Gluten free backpacking meal plan for energy, endurance & a lighter pack
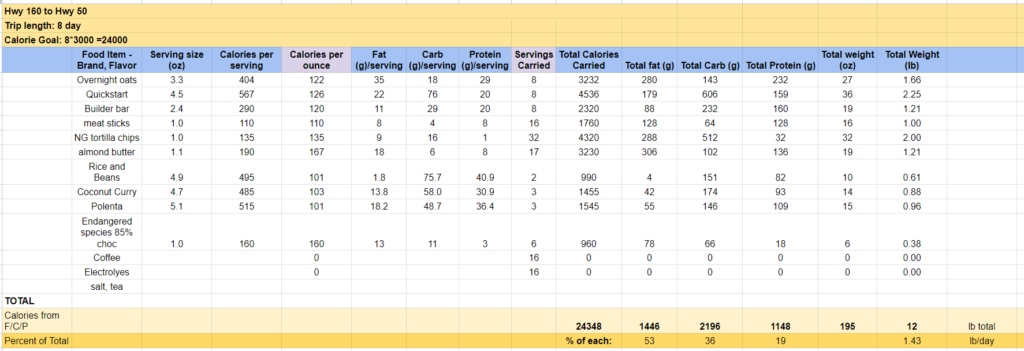
Here’s a snapshot of my backpacking meal plan:
A few notes about this backpacking meal plan:
> 1.43 lbs / 3000 calories per day (appropriate for me for this trip)
> macro ratio that supports muscle repair, recovery, steady energy, pack weight efficiency, and higher output (class 3/4/5 scrambling sections)
> gluten free, dairy free, anti inflammatory
> prioritizes blood sugar balance for optimal energy
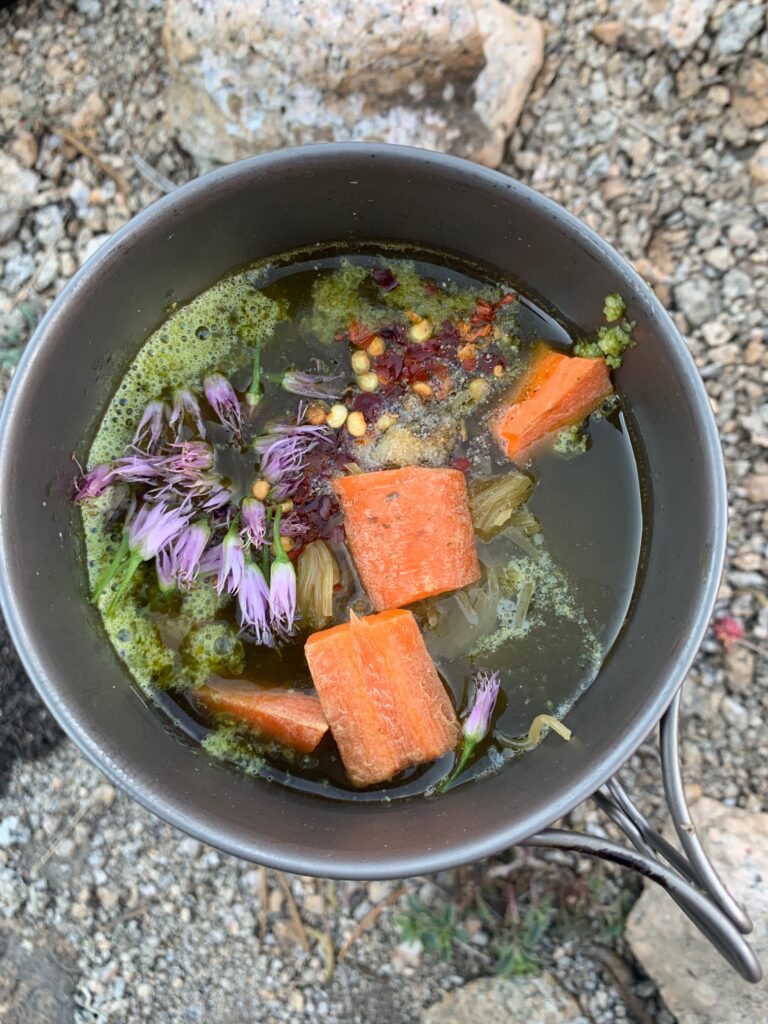
> includes a few “secret weapons” including cordyceps mushroom powder (improved endurance), cinnamon (anti-inflammatory, blood sugar regulation), rhodiola (reduces fatigue), collagen (muscle repair, joint support), and electrolytes and extra sea salt (optimal muscle and neuron function)
> less variety rather than more keeps planning and prep simple and quick
My backpacking meal plan process:
1. Determine how many calories to pack. I know from past experience what I need per day, which varies based on terrain (off trail vs on trail, daily elevation gain, etc.), climate, how far into a thru hike I am, and so on. For this trip, which averages 500’ of elevation gain per mile and is all off trail and will likely include getting caught in monsoons on a 13,000’ blustery ridgeline, I’m packing more calories than I would on a well-graded trail at 4,000’ in June.
2. Add breakfasts and dinners first (one of each for each day). I enter basic nutrition info for each item. Seems tedious perhaps, but it makes it easy to swap items in and out to meet my calorie and macro goals (see step 3).
3. Fill in enough snacks and the right kind of snacks to hit my macro goals. On this trip, I’m aiming for ~20% protein, 40-50% fat, 30-40% carbohydrate. I won’t go into the reasons for this here as I’ve written extensively in other places about macros for backpackers and how to choose the right ratios for your endeavor.
I use this process to quickly and easily plan food for all my trips, personal or guided, so that I never have to guess at whether I’m carrying too little (or, more commonly for most, too much) food, and so I know I have the right foods to support recovery, energy, and endurance.
If you find meal planning for trips to be confusing, or if you’ve wondered how you can eat healthier on trail, hopefully this was a helpful snapshot. I love feeding myself well on trail and feel like it’s been one of the keys to my longevity and relative lack of illness or injury on some of my more demanding adventures.
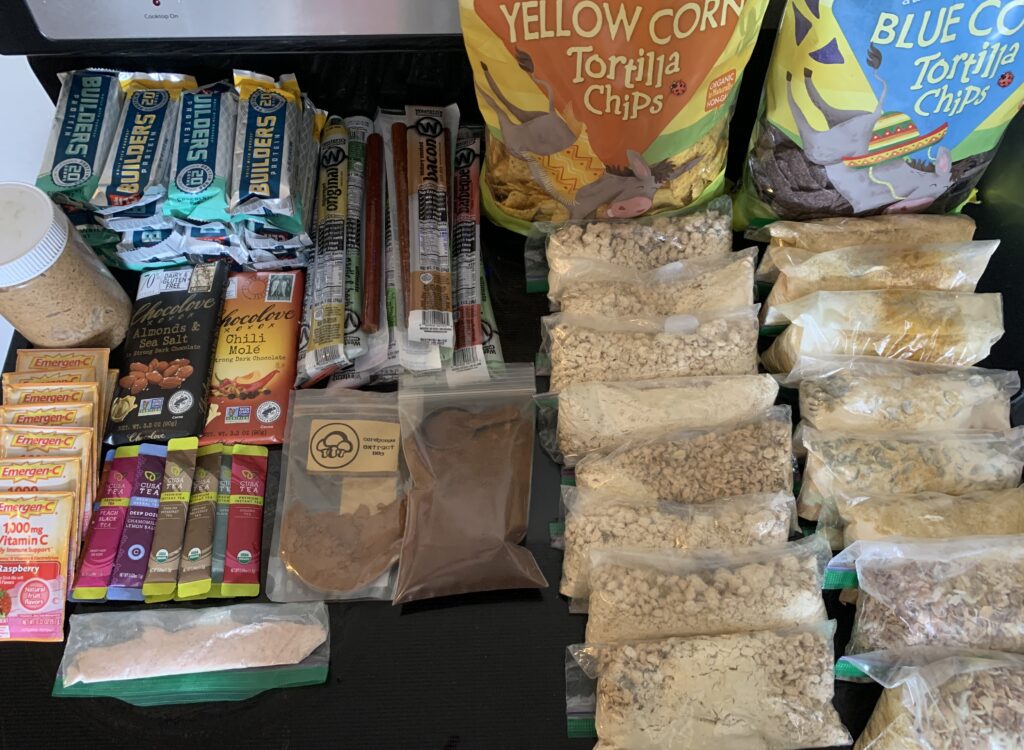
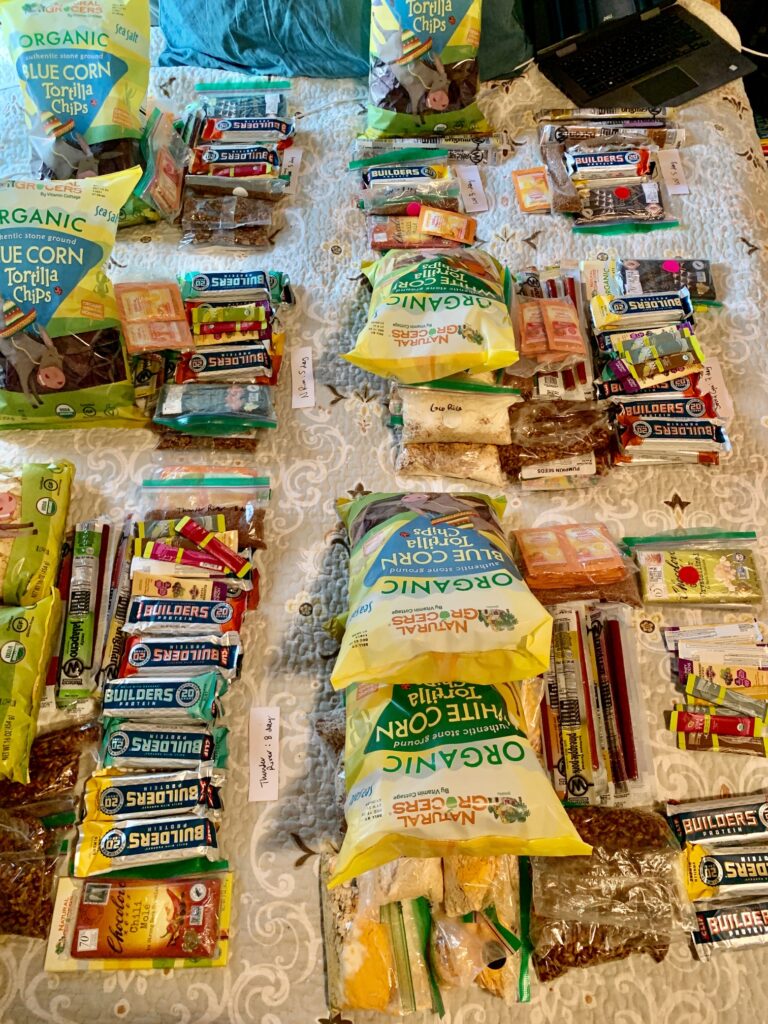
Here’s all the food I’m taking. It fits into one 12×20″ LOKSAK OPSAK (the chips will be opened, crushed, and eaten with a spoon).
It’s a complete framework to quickly master backcountry meal planning so you can enjoy improved energy, faster recovery, and a lighter pack on your next hike. It includes spreadsheets and templates to make planning fast and simple
I created the course based on the process I used to plan a gluten free, dairy free, healthy meal plan that would keep my autoimmune symptoms at bay on a 4-month CDT thru hike.
Here’s How It Works: 1. Calculate Caloric Expenditure (i.e. How much food to pack) 2. Dial in Your Macros (i.e. What type of food to take) 3. Choose a Resupply Strategy 4. Create Your Meal Plan 5. Complete Your Goal Hike with Abundant Energy & a Lighter Pack
Students have used this course to meal plan for all range of trips from a weeklong trip in the Cascades to a multi-month hike of the PCT. Find the details here.
The most commonly overlooked aspect of planning is researching the conditions you’re likely to encounter on your chosen route. The expected conditions impact so many downstream trip planning decisions including your itinerary, gear choices, resupply plan, risk mitigation plan, and physical and mental preparation, so it’s critical to include this step!
The following excerpt provides a framework for planning your trips as well as instructions on exactly how to research likely conditions for your trip.
Planning your backpacking trip: an overview
My first backpacking trip was in college as part of a backpacking course, and the instructor had done all of the planning. When I attempted to do some pre-trip planning for my second-ever multi-night backpacking trip in 2009, on the Appalachian National Scenic Trail (AT), I used the knowledge I had gained from that college backpacking course—a very outdated approach as I came to learn—combined with what my hiking partner shared with me based on his research, and I hoped for the best.
There were far fewer online resources back then, and I had zero connections to the long-distance hiking world—a world I didn’t even know existed. In fact, I had never even heard of the AT when my friend had posed the idea to me five months earlier. I knew only that I needed an escape from my life at the time, I loved the outdoors, and it sounded like a grand adventure. And though the adventure was grand, my oversights ended up costing me money, time, and enjoyment.
Since those early days, I’ve learned a lot about the importance of trip planning and how to do it effectively and efficiently. Now, not only do I love the planning phase because it vastly increases my safety, happiness, and odds of success, but it also builds anticipation for the adventure to come!
This chapter covers a straightforward process for planning a multi-week backpacking trip from start to finish—a resource we wish we had had when we got started. We focus primarily on planning a longer excursion, such as a thru-hike, but there are also tips sprinkled throughout for shorter trips. Following a framework can keep you from feeling overwhelmed and makes the trip-planning process easier each time. This method involves defining your trip parameters, evaluating likely conditions, creating an itinerary, selecting gear, planning your resupply, understanding backcountry safety, and preparing yourself physically and mentally.
For multi-week to multi-month excursions, your trip planning might begin more than a year out from your projected start date. The amount of time needed to plan will be different for everyone and depends on factors such as your experience, trip complexity, trip duration, destination, and your familiarity with the area. In general, the less experienced you are and the greater the complexity and duration of the trip, the more preparation time you will need. For example, a five-month thru-hike of the Pacific Crest National Scenic Trail (PCT) may require a year of planning for someone new to long-distance hiking, whereas a more experienced backpacker may need only two months to plan. The more experience you gain, the easier the planning becomes.
No matter how much experience you have, there is a lot to take care of before a long hike. Always give yourself plenty of time to properly plan. It saves you time overall, money, and hassle once you’re out on the trail!
Researching Likely Conditions
Once you’ve finalized when, where, and with whom you’re going, familiarize yourself with your chosen route and assess the conditions you’re likely to encounter. This sets the stage to create an itinerary, plan your gear, assemble a resupply plan, and evaluate and mitigate risk. It also provides you with a better understanding of how to prepare physically and mentally.
In this stage of planning, you’ll want to reevaluate the weather and climate for your destination as well as the topography and trail type. In addition, research route conditions, such as the necessary navigational tools, where the water sources will be, possible wildlife encounters, how remote the route is, and whether any restrictions or closures may be in effect during your trip.
What follows are questions, or prompts, to help guide your research into each set of conditions. Some of these trip conditions may not exist on every route and there may be others you wish to include that aren’t on this list. Consult chapters 3 and 4, on backcountry safety and navigation, to learn more about each of these risk factors and how to create a personalized preparation plan for your chosen route.
Seasons, Climate, and Weather
What season(s) will you be hiking in? How much daylight will there be? Based on your earlier research, what is the expected climate and weather? What are the averages for precipitation and temperature? What are the record highs and lows? As you get closer to your trip dates, remember to check the weather forecast.
Terrain
Terrain refers to the physical features of the land, such as mountains, forests, or floodplains. What types of terrain will you encounter? How much of your route is above tree line? How much of your route is forested? What is the degree of sun exposure, or the extent of elevation gain and loss?
Trail Type
Consider the type of trail on which you’ll be hiking. Will it be a well-marked and maintained trail or will you be hiking off trail? Will you be traveling across scree or boulder fields? Is there vegetation? If so, what type, and do you need special gear/clothing to avoid spiny or poisonous plants? Does your route require scrambling or climbing? Will you encounter year-round or glaciated snow, and if so, how much?
Navigation
What navigational tools do you need? Do you have an understanding of the broader area beyond just the trail you’re hiking? Are you familiar with alternate routes and potentially confusing junctions? If you were to go off route, where are the closest roads? What prominent landmarks, such as mountains or rivers, can you look for?
Water Sources and Obstacles
Where are the water sources along your route, and are they likely to be flowing at your chosen time of year? What is the source (spring, stream, river, lake, etc.)? Is the source directly on your route or will you need to hike off trail to find it? Are there river crossings? How wide and deep do you expect them to be?
Wildlife Interactions
What animals are you likely to encounter on this route? What are the risks? How will you deal with the situation if you encounter any of these animals?
Human Interactions and Remoteness
Are you likely to encounter other humans on this route? How remote is the route? How likely will it be for someone to find you if you’re injured? Where are the nearest roads? How will you be evacuated in case of an emergency?
Restrictions and Closures
Are there any fire restrictions? Will you encounter any sections of trail that may be closed due to events like a downed bridge, wildfire or natural disaster, or for species restoration?
As you evaluate each of these factors and plan your trip, order and print any maps, data books, and guidebooks you will need for your hike in both digital and paper formats. Other resources that can assist you in finding the most up-to-date conditions include trip reports, online forums, land managers, trail association websites, historical weather data, backcountry rangers, and experienced backcountry users. These are all excellent sources to draw upon in the creation of your beta packet which will be discussed in(see chapter 4). As you get further into your planning, refer to chapters 3 and 4 for a more thorough discussion of safety concerns, navigation, and route preparedness.
As you may or may not know, last fall when I was hiking the length of the Grand Canyon, a mountain lion came into my camp and we had an hour long standoff!
I mentioned the experience briefly on social media, but never shared the full story.
Until now.
Last week, I started reading Over the Edge, a book which chronicles all known accounts of death in the Grand Canyon. (Highly recommend!)
It got me thinking about the importance of debriefing our experiences so that we can learn from them. This is something I’ve always found value in, whether we’re talking about experiences in the backcountry, business, or life in general.
So, I (finally) recorded a video talking about my mountain lion encounter in the Grand Canyon last fall and shared a few of my take-aways.
Watch my grand canyon mountain lion debrief here:
I hope you find it helpful or, at the very least, entertaining.
If you have a chance to watch, let me know what you think.
If you want to dive deeper into animals encounters and safety in the backcountry, check out the Stay Safe in the Backcountry course I co-created with Heather Anderson.
And, more interestingly, why I developed this list and how a source of personal shame morphed into a source of strength.
Backpacking on a gluten free, dairy free diet isn’t nearly as hard as most people imagine. And it certainly need not be a reason that keeps you off trail!
I was reflecting my origins with creating healthier backpacking food alternatives and it’s a story that feels worth sharing. If you have something in your life that you’ve perceived as a weakness or flaw that holds you back, my hope is that this will help you see it through a new lens.
If you’re here for the gluten free, dairy free backpacking meal and snack ideas, you can find that whole juicy list + my tips for backpacking on a “restricted diet” here.
If you’re here for the story behind the list, read on.
After finishing the PCT in 2014, I discovered I had an autoimmune condition that destroyed my energy levels and threatened my backpacking dreams.
Before attempting the CDT a few years later, I needed to develop a gluten free, dairy free, grain free trail menu to minimize inflammation and keep my symptoms at bay if I were to have any chance at finishing the trail.
And it worked. I finished the trail in less than 100 days and mostly felt great the entire time.
So I shared my approach to healthy eating on trail because I knew there must be others looking for an alternative to the typical hiker fare.
And I received a lot of appreciation but also a lot of people projecting their judgment of their own food choices onto me (“Don’t tell Salty, I’m eating this Snickers”… why would I care?).
At the time, I unconsciously internalized some of that shame and felt embarrassed for having to eat “differently” to feel well enough to hike.
Fast forward years later, I see that my autoimmune condition was an invitation to take exquisite care of myself.
And you know what?
I love that about myself.
Yes, I eat differently and go to bed early and measure my resting heart rate, heart rate variability, and blood sugar each morning and…
I LOVE IT.
Because those practices ensure I have the energy to do so many amazing things in my life like hike long distances and build a business and have thriving relationships.
Now if folks have issues with how I eat, live etc., or want to project their self judgment onto me, they’re just not my people, and that’s perfectly okay. I don’t need anyone else to approve of how I eat because I approve of how I eat. And I know it allows me to live the type of life I want to live.
Perhaps you too have a perceived shortcoming that contains a hidden gift?
PS: this is not bypassing feeling the suck of a painful circumstance. It’s feeling the feelings and intentionally choosing how I want to feel about the circumstance instead.
If you feel called to share, I’d love to hear if you can relate.
A common mistake I see (and which I’ve made) when implementing healthier eating habits is too much restriction, whether that looks like under-eating calories or removing entire food groups.
In most cases, that only lasts so long before it results in a binge, which results in feeling awful and is counterproductive to your goal.
Here’s what I’ve seen as an effective way to escape the restrict/binge cycle:
1. Focus on real, whole foods which are naturally satiating (vs hyper palatable foods that invite you to overeat). But avoid being dogmatic. 80/20
2. Stop extreme restriction. This step takes time and involves learning to trust yourself. You’re training your brain that nothing is off limits so you don’t need to binge on it when you have the chance. It’ll be there again later when you want more.
3. Practice self compassion and self forgiveness if you “mess up” and don’t make it mean anything about you. Move on. Eat a normally at the next meal. This step is at the heart of it all. It’s how you learn self trust.
4. Send signals of physiological safety to the body that reduce the likelihood of overeating. This includes eating enough protein, carbs, and calories to be satiated, staying hydrated, managing stress, and getting enough sleep.
This issue has been coming up a lot recently in client sessions. Many people are seeking healthier eating habits this time of year, so if that’s you, hopefully this is helpful!
If this resonates, reach out to see if private coaching would be a good fit for you!
I’ve been thinking about the upcoming backpacking season, my clients who are preparing for big hikes, and how I can best support them with their goals.
That got me thinking about some of the things I wish I’d known when I got started.
This primarily included investing too much time on things that weren’t actually that important and not enough time into other things which really do make a difference.
Here are those mistakes:
Focusing too much on getting the “perfect” gear
Having good, functional, relatively lightweight gear is important, but this topic can be SUCH a rabbit hole. You can easily spend hours (days! months!) researching, comparing, and getting yourself all twisted into a knot over finding the “perfect” item when, in reality, getting something good enough will do.
I don’t advocate purchasing without doing some research, but go into it knowing your priorities (weight, cost, durability), compare a few items, purchase, and move on with your life.
The best way to know if something works for YOU is to try it out. You can always replace and upgrade as you continue on your backpacking journey.
Neglecting strength and mobility
On my first few thru hikes, I mostly focused on running and hiking to prepare myself physically. And those things are obviously helpful for cardio endurance.
Then before my CDT hike, I spent a winter doing body weight training and power yoga 2-4 mornings a week.
The result: I was honestly shocked at how much stronger and slower to fatigue I was on trail. In part, I think it’s what allowed me to hit the trail doing 20+ mile days without injury.
Waiting too long to start planning and preparing
The body, mind, gear, food, maps all take time to prepare. If you have plans to get out on a trip this year, don’t miss out because you procrastinate planning and preparing. Plus, there’s no better way to pass the winter than to start your planning and training now.
Not knowing my “why”
To stay motivated over the long haul, I find it’s valuable to have a clear sense of why I’m out there. If you know your why, when the going gets tough (and it will), you’ll find reserves of energy and perseverance you didn’t even know you had.
Failing to anticipate challenges
It’s easy to get caught up in how dreamy it’ll be when you’re out in the backcountry, free from obligations, drinking from streams, and taking cat naps in warm, sunny meadows.
But it’s important to keep in mind that you’ll likely encounter challenges as well. (That’s part of the appeal, right?!). Visualizing the physical and mental challenges you’ll encounter and how you’ll navigate them makes you more prepared to get through them if/when they occur.
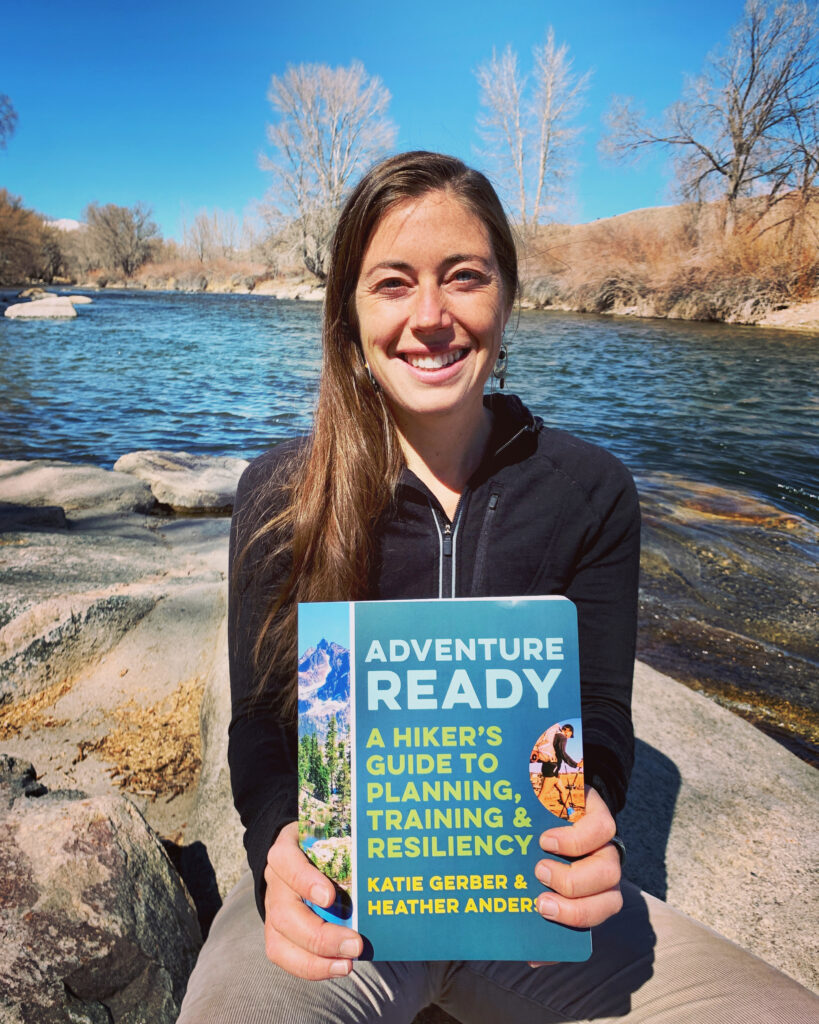
If you feel like this is your year to go all in on your health and adventure goals, and you want a step by step plan to mentally and physically prepare for a big backpacking trip, check out our Adventure Ready course.
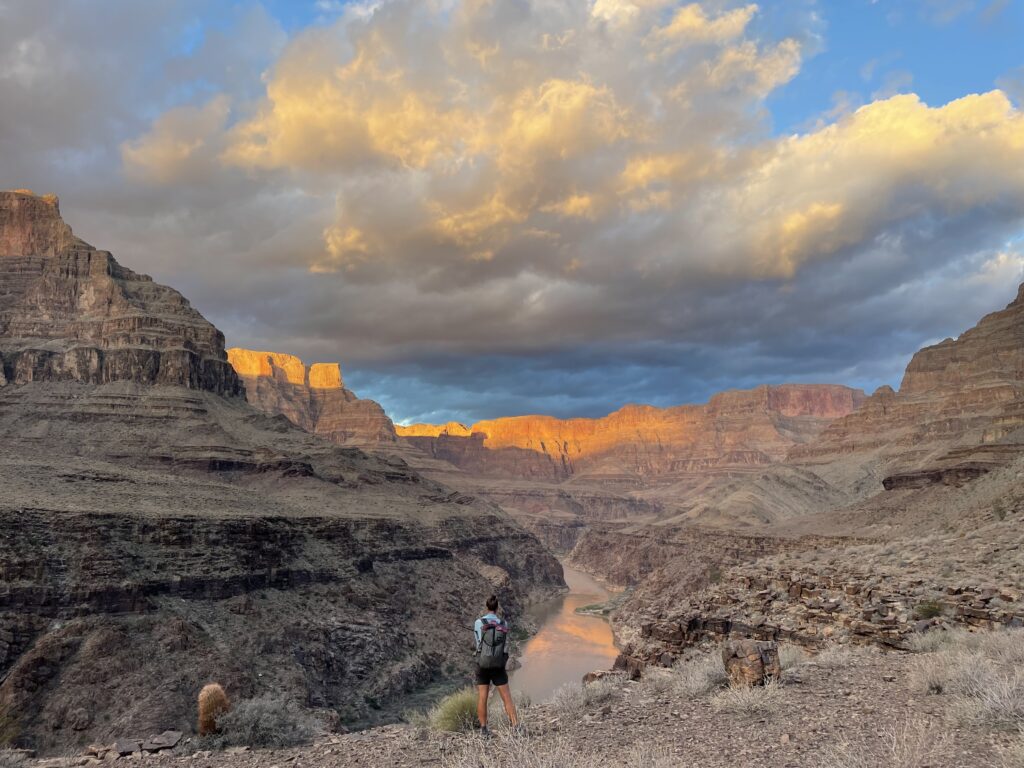
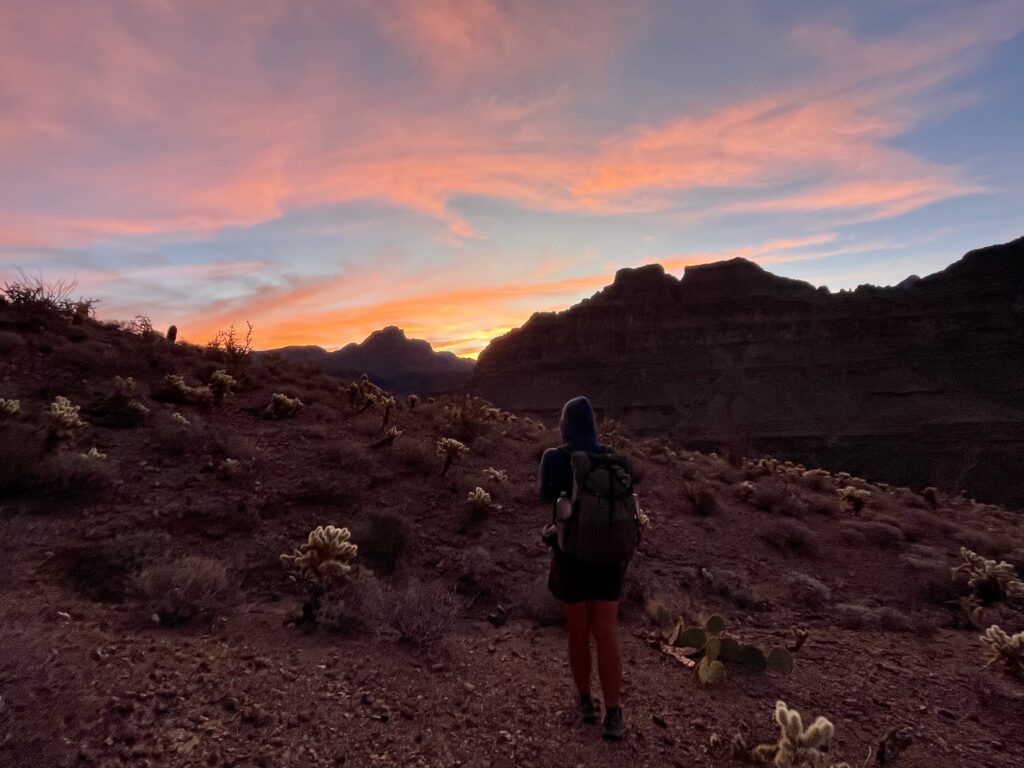
In the autumn of 2022, Ryan Sylva and I hiked the length of the Grand Canyon.
This is post 2 of 2, which details trip highlights and lessons. Part 1 is an overview of the trip in terms of length, duration, location, terrain, natural history, climate, water, and resupply.
Highlights
It’s hard to whittle this experience down to a handful of highlights because the entire experience was a highlight. However, I enjoyed reflecting upon and distilling the aspects of this adventure that I treasured the most.
Developing a relationship with the Canyon. Deepening my knowledge of the Grand Canyon and gaining a more intimate understanding of the history, the geology and characteristics of different rock types, the rules of travel, and the nonhuman inhabitants felt like being let in on an incredible secret. Each day was filled with seeing diverse types of rocks and getting the chance to crawl over and around them and learn their properties. Each time we caught sight of a bird or animal felt special and I was constantly seeing new plants, observing where they liked to grow, in what conditions, and around whom.
It was similar to the excitement of falling in love and wanting to learn everything you can about your new partner. Day after day, it felt like I sunk more deeply into the timelessness of the place, becoming more connected to its rhythms and inhabitants. We drank from the same pools as the coyotes and followed the sheep tracks, trusting their ancient knowledge of the land. The plants and animals of the Canyon became our teachers; demonstrating how to move through and inhabit the harsh environment.
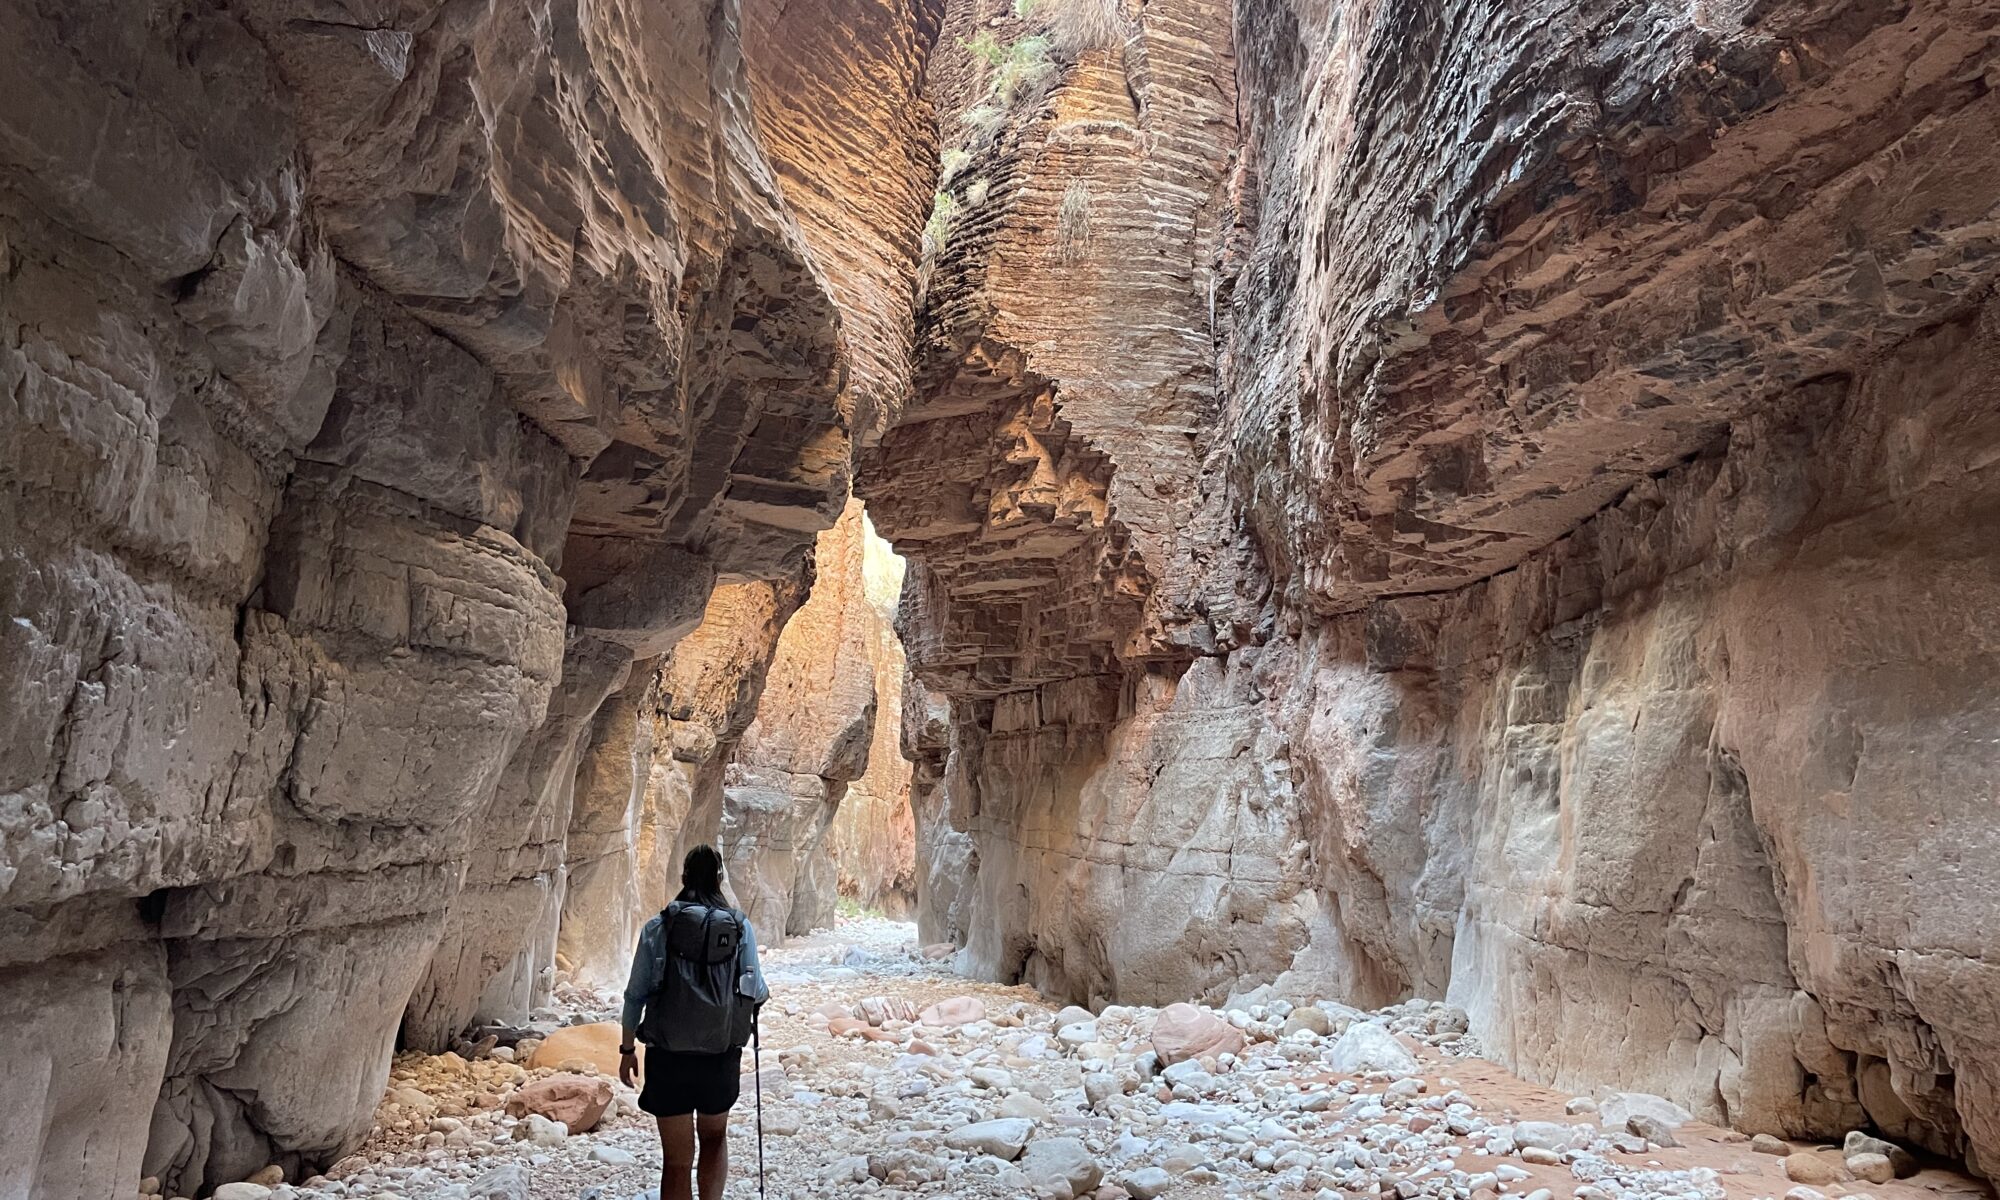
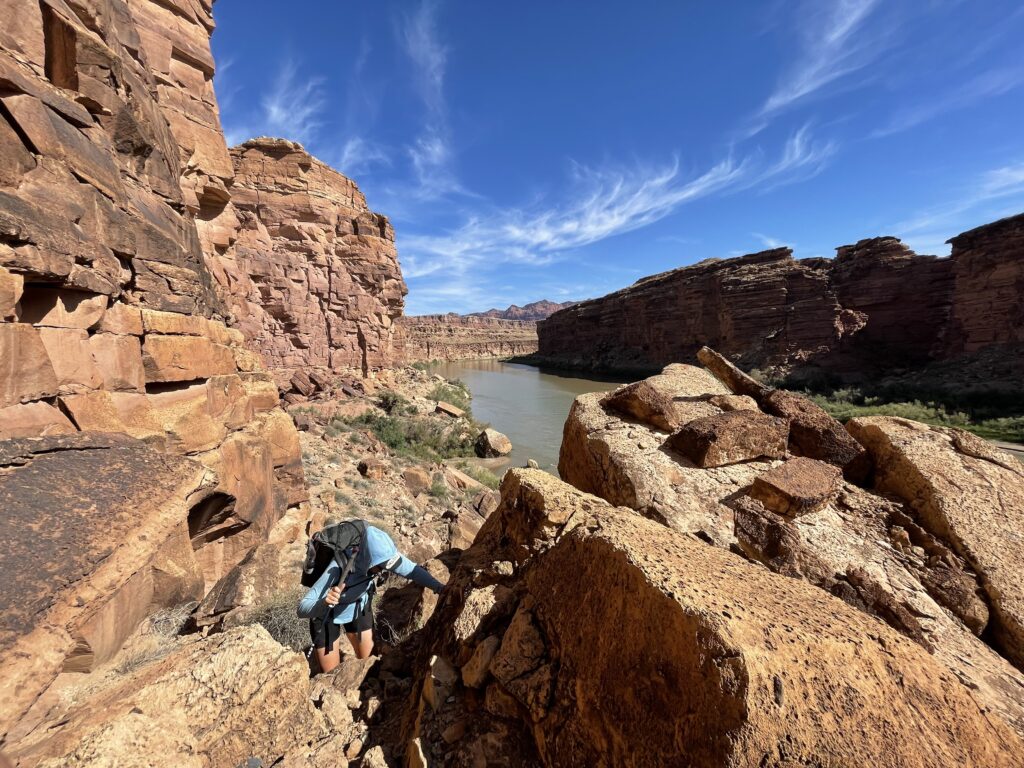
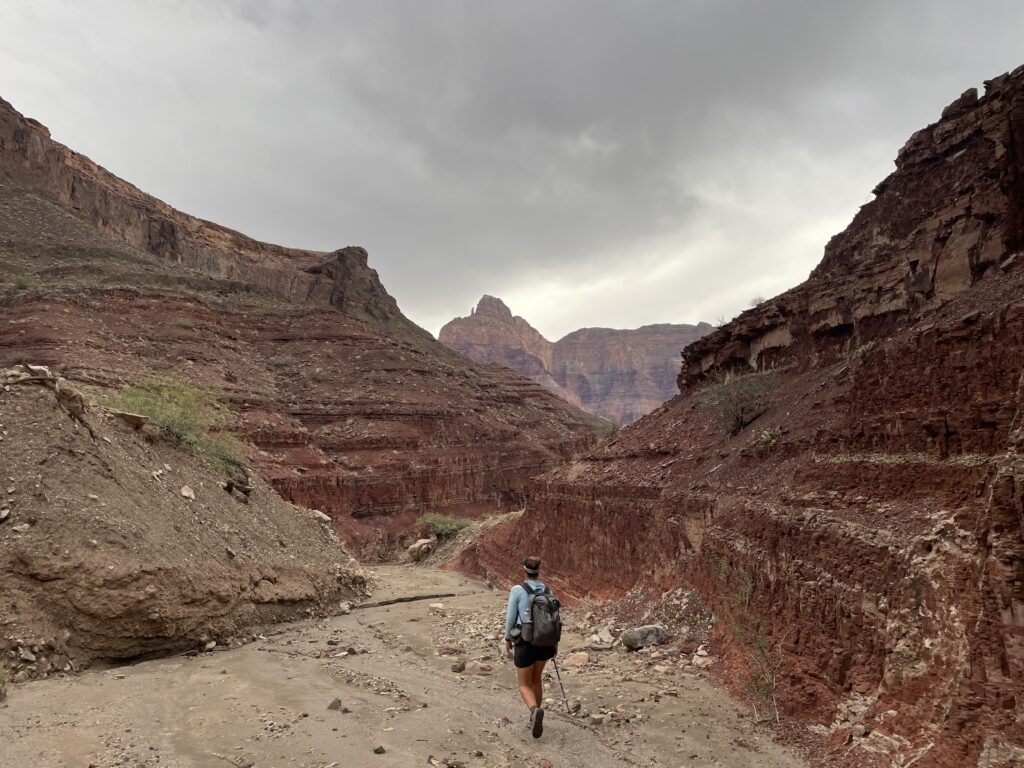
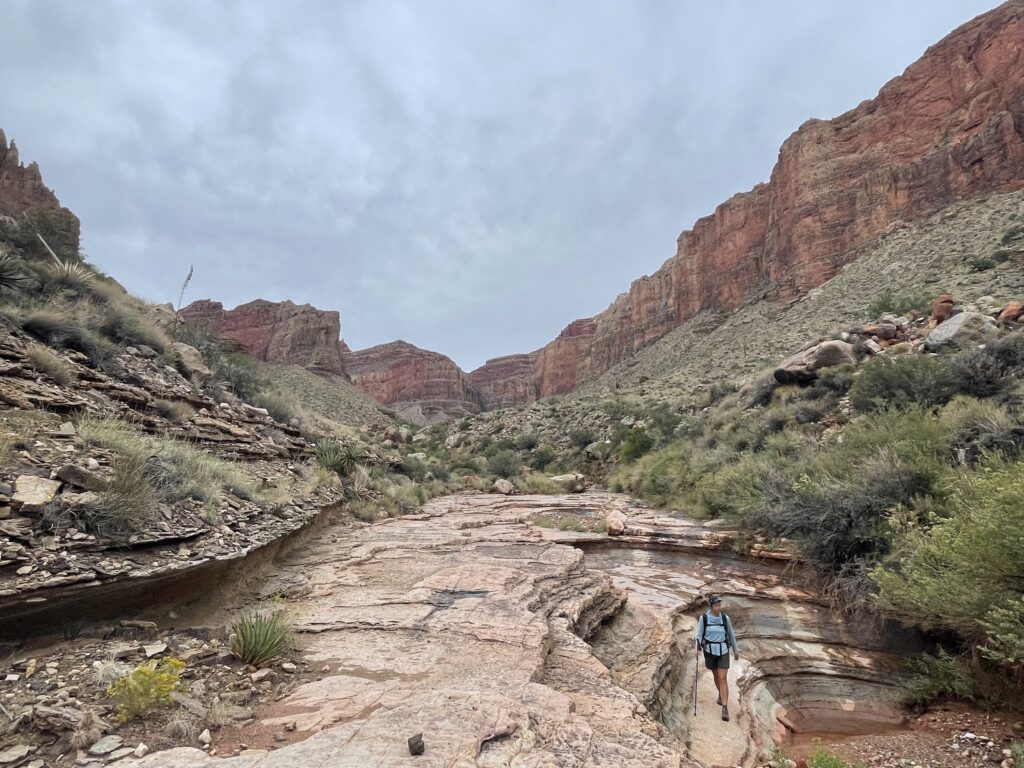
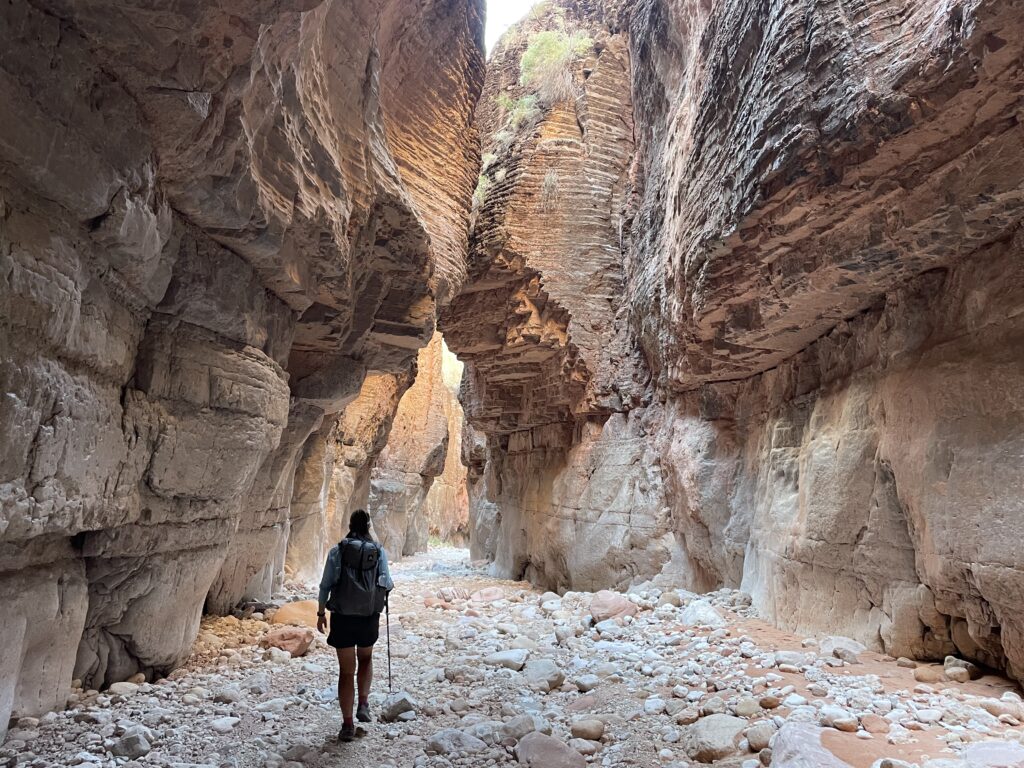
The navigation, route-finding, and problem-solving. This was the most mentally engaging hike I’ve ever done. Nearly every moment of every day required my full presence as I was not only paying attention to macro navigation but to the route finding required with each step, which included avoiding any number of obstacles at once. For instance, it was not uncommon to be gingerly stepping along the edge of a very steep, loose, slope of hermit shale with a 500’ sheer drop off less than 12 inches to your left while also stepping over a beavertail cactus, swerving around a teddy bear cholla, and ducking under a catclaw branch. And doing that for 10 hours of the day.
From one end of the Canyon to the other, we passed through different ecosystems which felt like different worlds in a video game, each with it’s own unique challenge. Here’s the section of endless prickly pear, then the section of steep talus cliff walking, then the teddy bear cholla minefield, then the dead-tamarisk-hopping through the silt flat, and on and on. I was constantly learning about how to travel more efficiently off-trail through the different types of terrain and just as I’d gain proficiency, a new challenge would be presented. This made the experience ever-engaging.
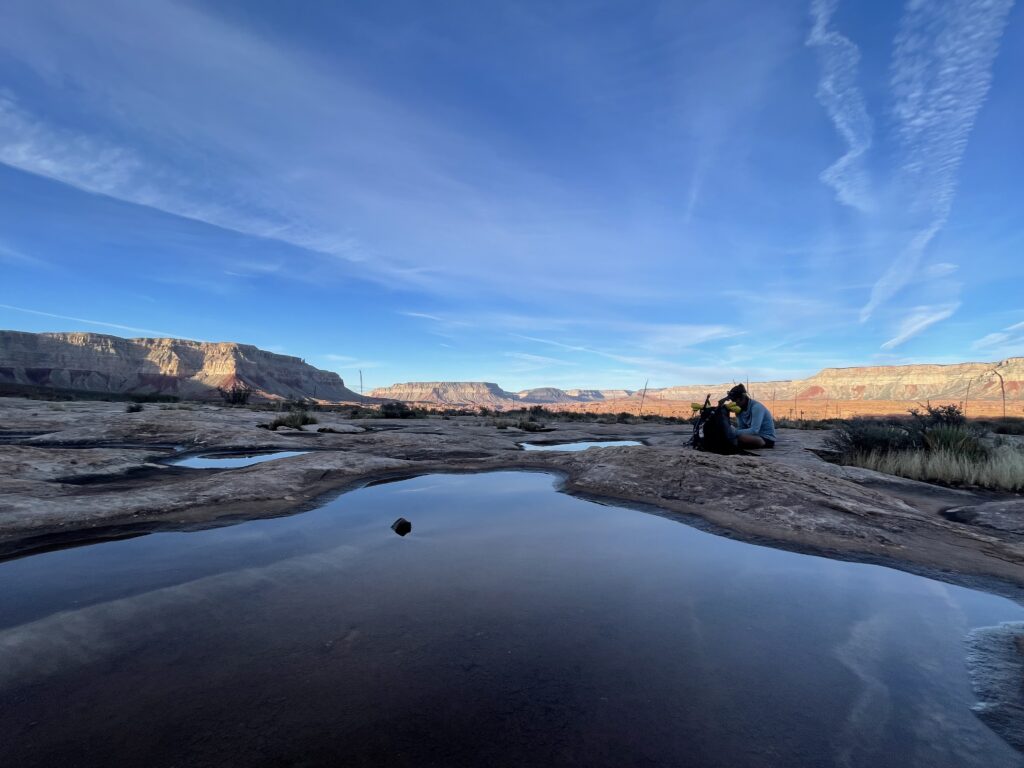
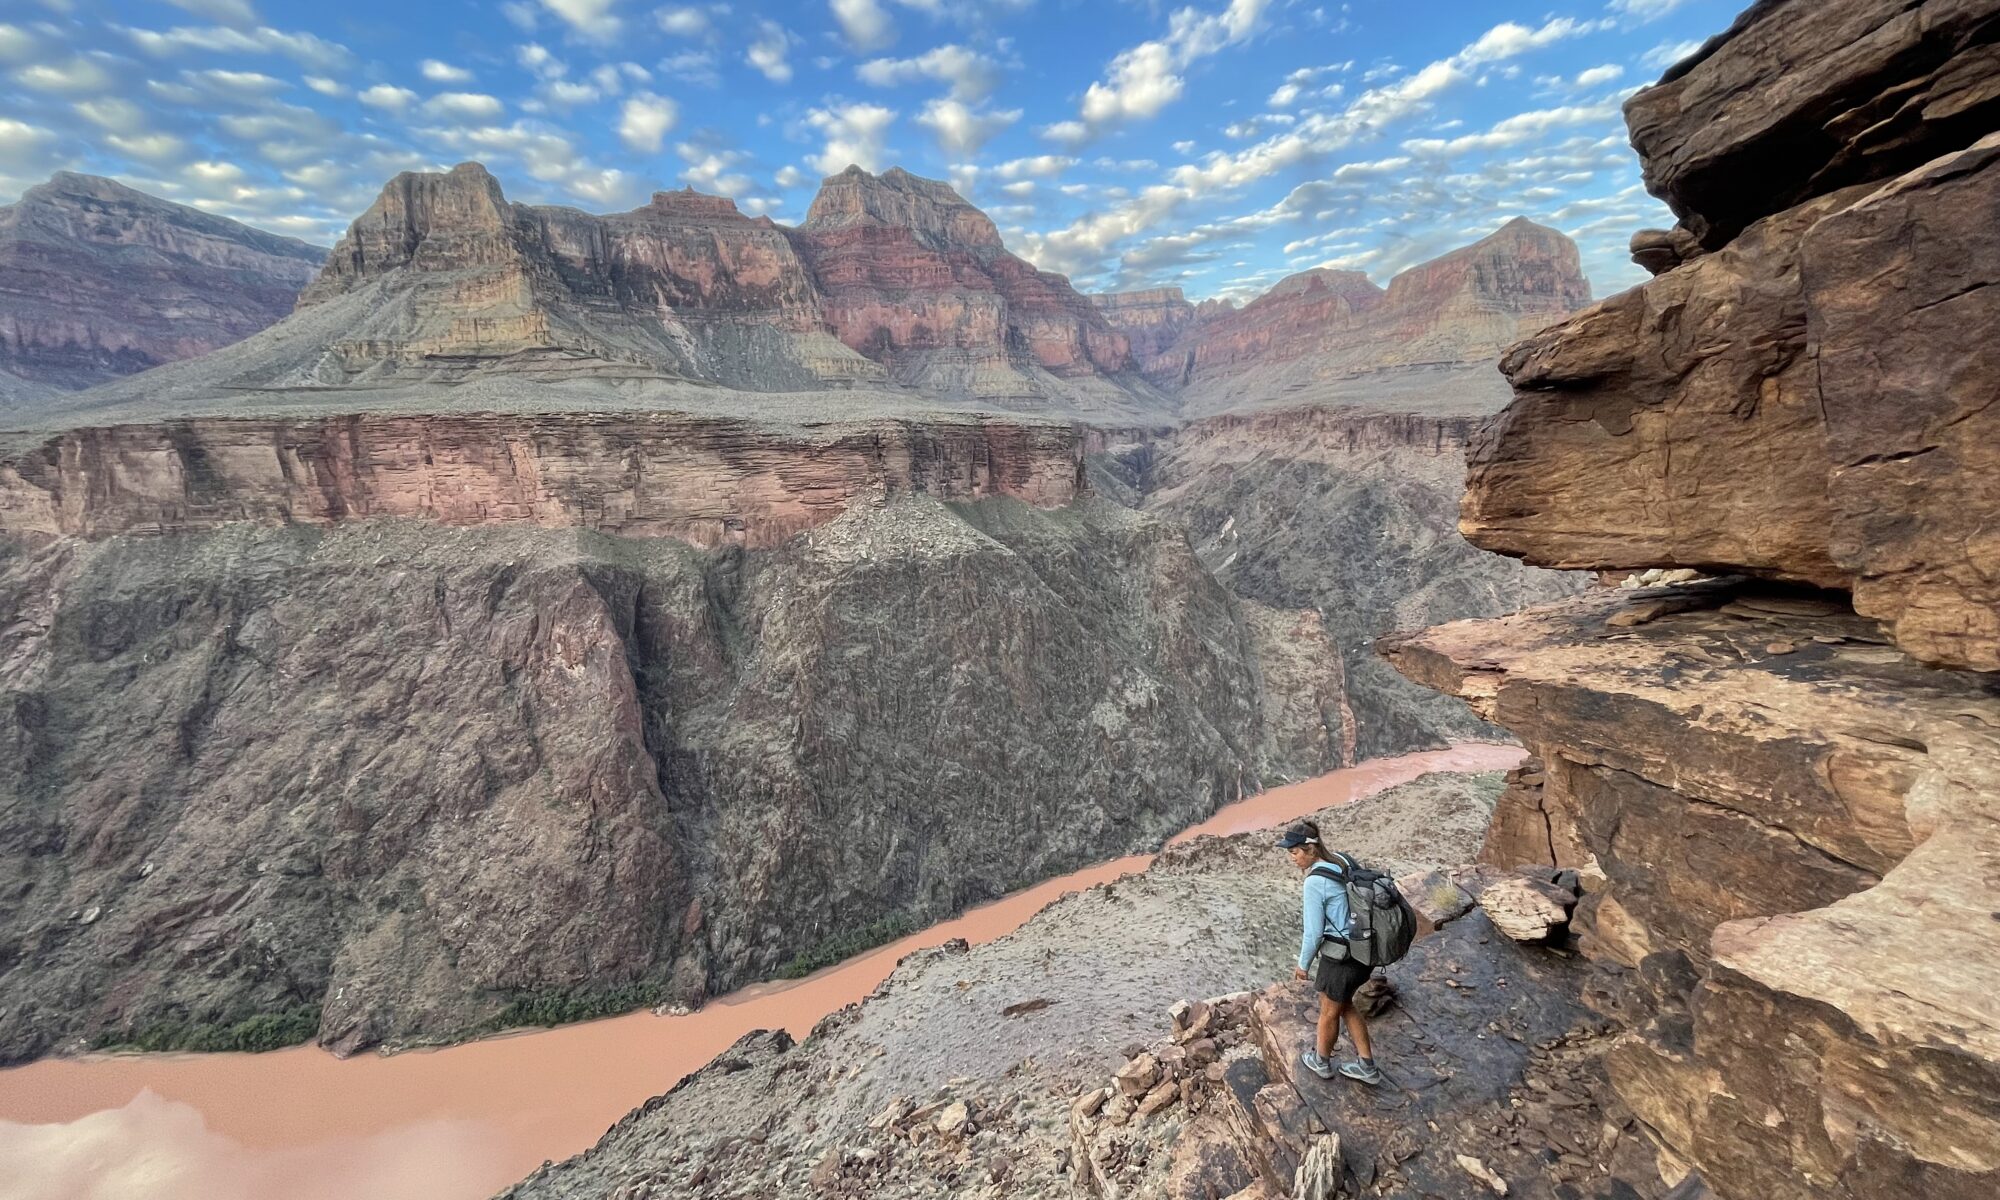
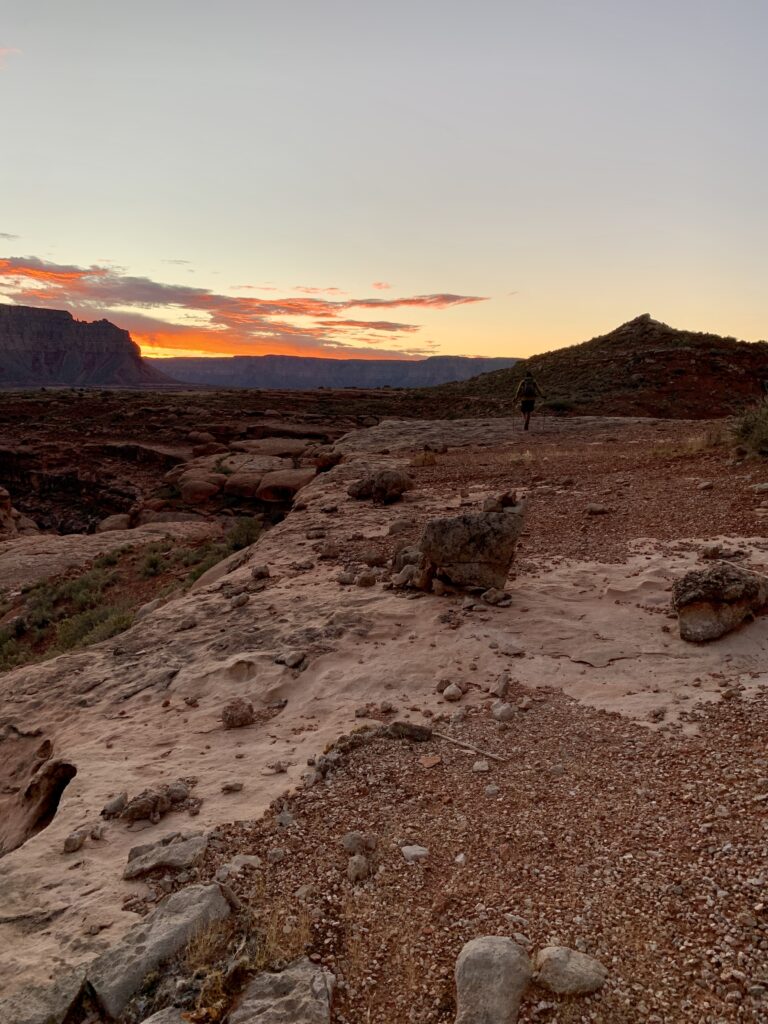
The remoteness. Similar to my hike in the Great Basin in 2021, I was attracted to the harshness and remoteness of this route. Once beneath the rim and off the main corridor trails, we didn’t see another backpacker the entire time. The western Grand Canyon felt particularly remote as we didn’t even see any rafters west of Diamond Creek. It’s rare that one can travel for so long in the backcountry without encountering other people and very little human infrastructure. It felt like a true wilderness experience.
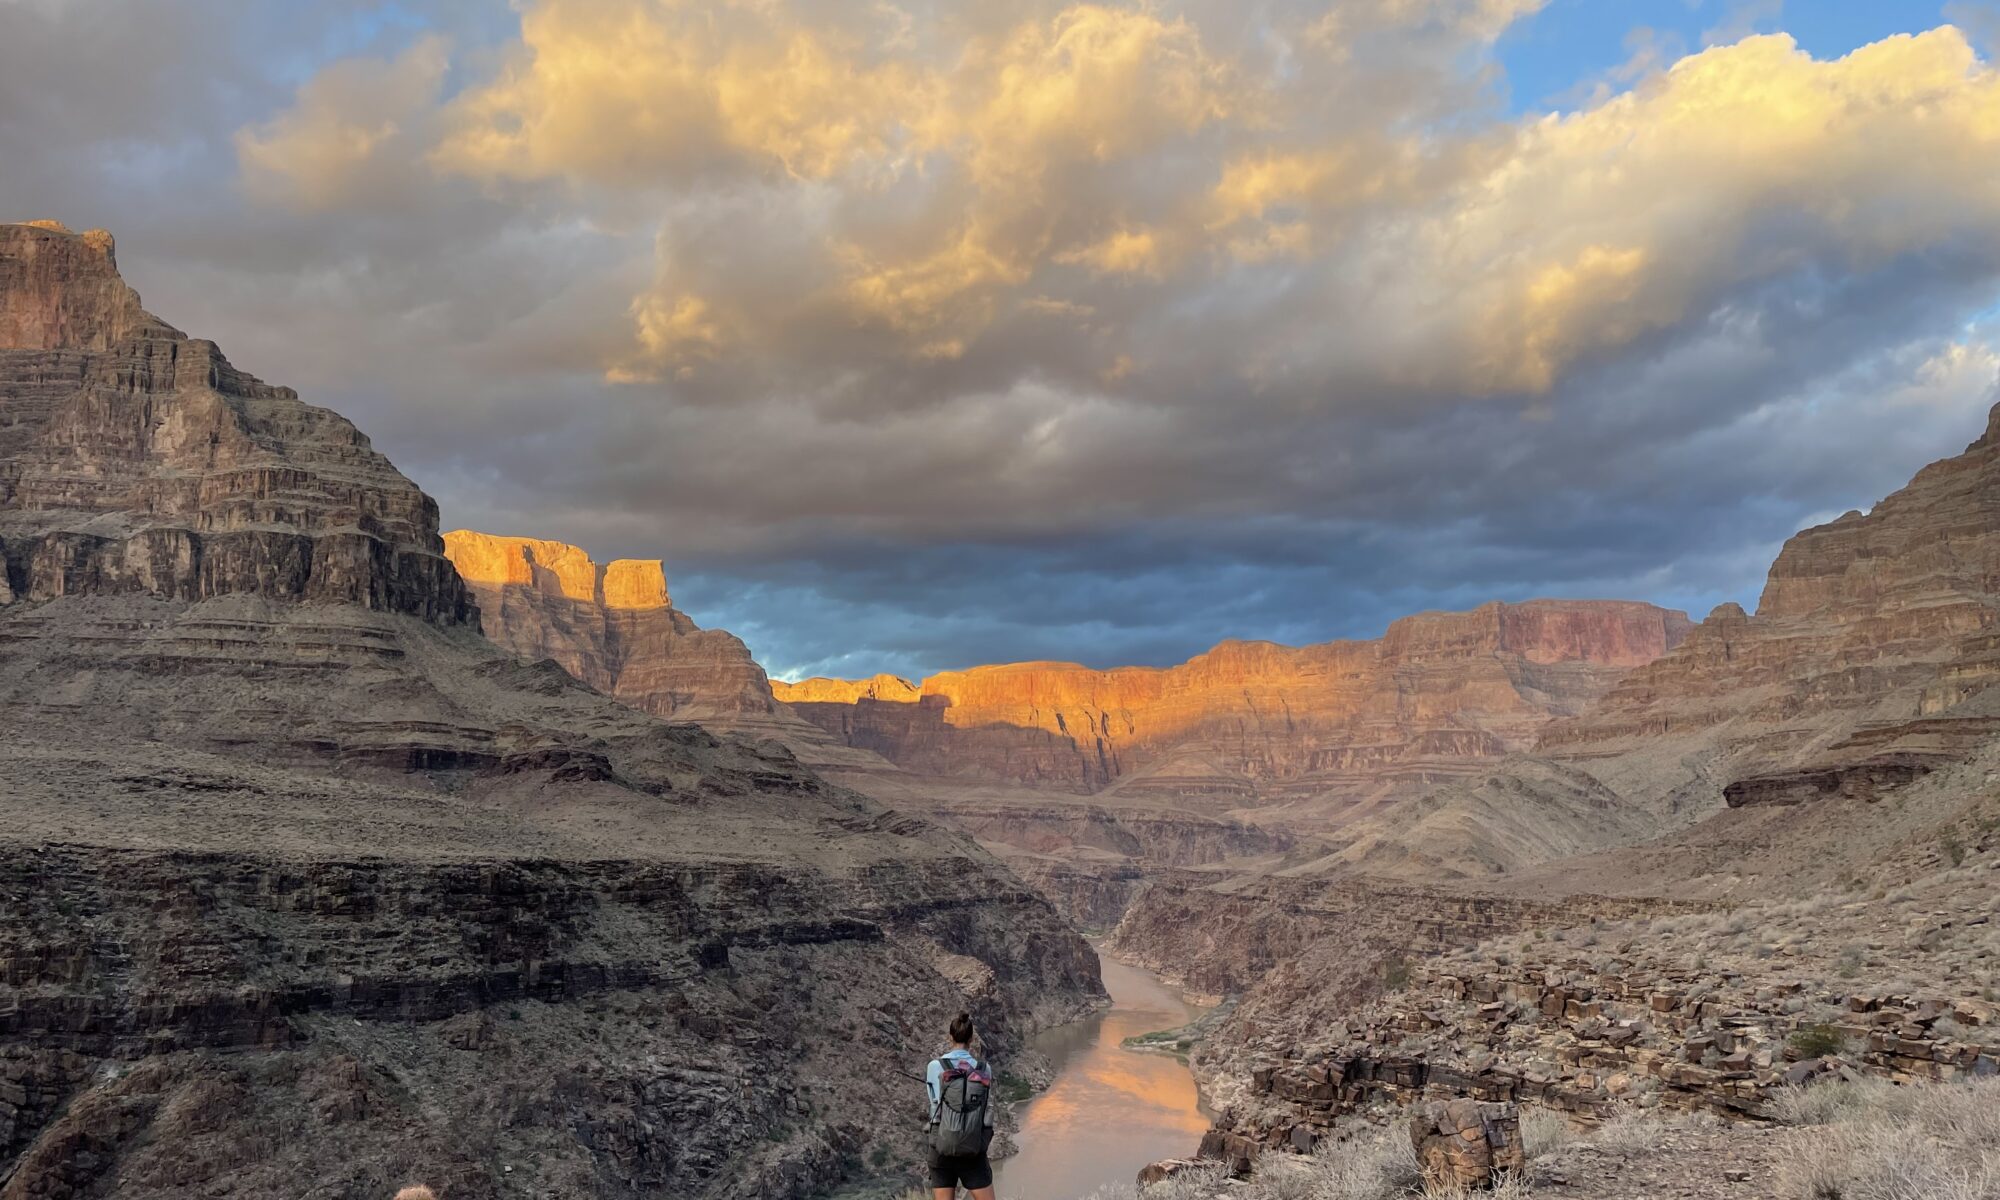
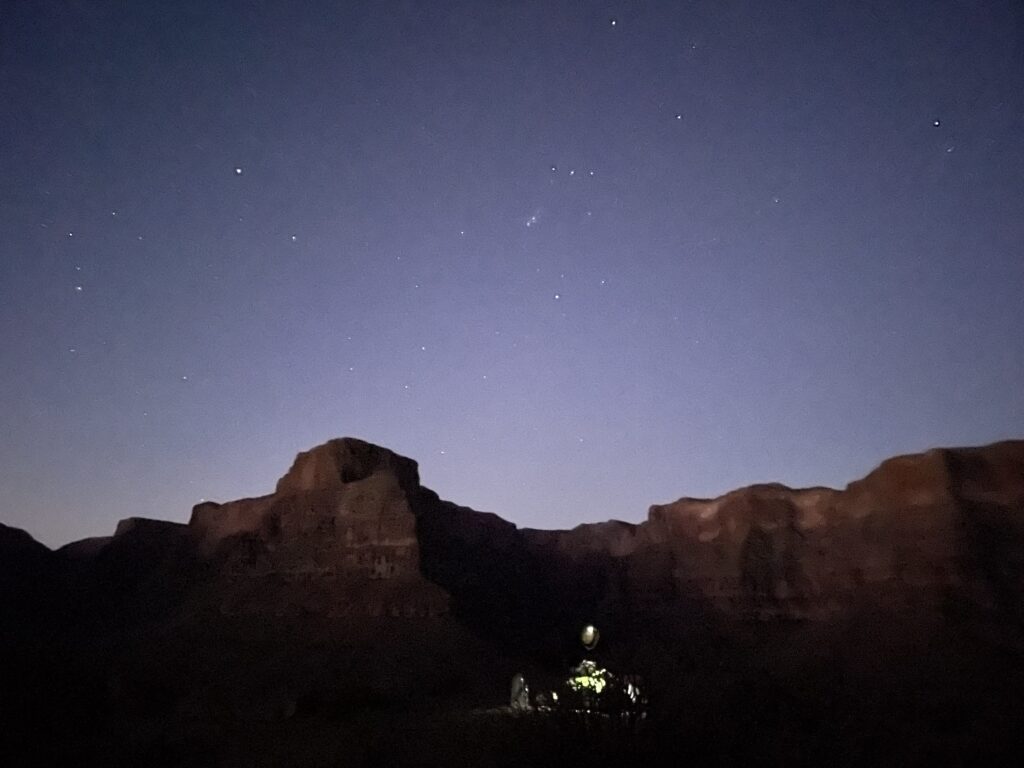
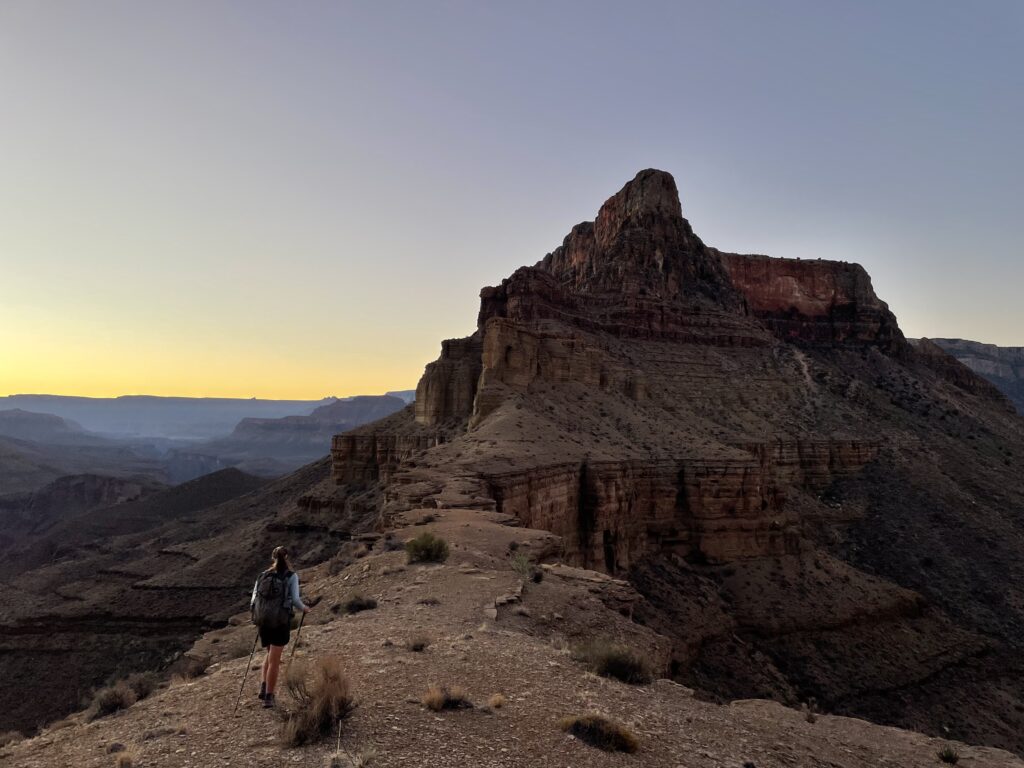
The 12-hour nights and dark sky. The Grand Canyon has some of the darkest skies to be seen anywhere in the continental US and each night countless stars blanketed the sky in our narrow ribbon of view between the Canyon’s walls. Hiking in autumn meant we had no less than 11 hours of darkness each night, and closer to 13 hours by the time we finished. Each day I looked forward to arriving in camp, not just to rest my weary muscles, but to lay there for hours and watch the constellations shift.
The extra rest was a treat as well. I’m accustomed to hiking from dawn to dusk during long summer days, only being in camp long enough to lay out my bedroll, sleep, and pack up again. These long nights allowed time for my body to recover from the demands of the day. There was also ample time to savor a slow-cooked dinner, breakfast, and hot coffee in the crepuscular hours while winding down after a long day or mentally preparing for another.
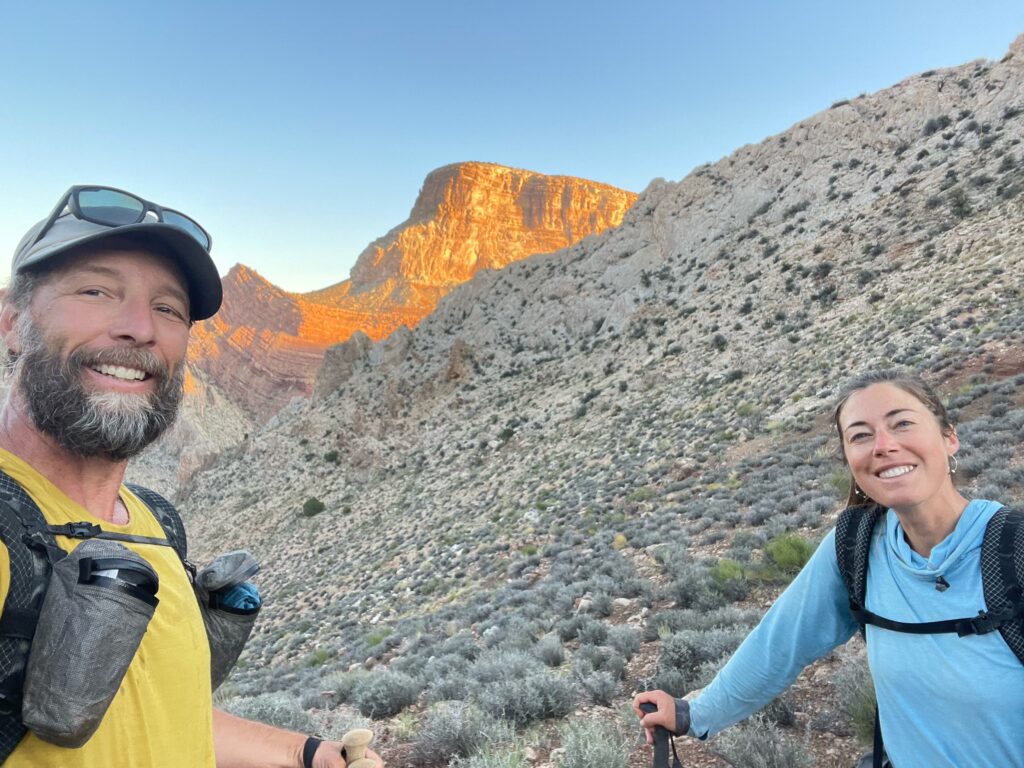
Hiking with Ryan. Like many things in life, much of what I saw and experienced on this hike was richer because it was shared. Moments of oohing and awing over a multi-colored, 360-degree sunrise, hearing the roar of the rushing river greet us at the mouth of a canyon, witnessing a group of rams scampering up a ravine, and successfully solving complex route-finding puzzles were all better because we could enjoy them together.
After years of friendship and partnering up to hike the Great Basin Trail last year, Ryan and I knew that we shared the same hiking style and preferences, which is essential on a trip like this. We like to hike from sun up to sun down while taking minimal breaks and pushing hard. Our risk tolerance is similar, we work well as a team, and we trust each other. We often went hours without speaking, communicating instead with glances, gestures, and only an occasional sentence or two that would probably sound cryptic to an outsider.
The mountain lion encounter. Having a mountain lion walk within 10 feet of me and then engage in an hour-long standoff with us in camp was the most frightening and exhilarating animal encounter I’ve had in the backcountry. To be so close to an animal that is known to be elusive and secretive, and to have left the encounter unscathed feels extremely lucky, and even sacred.
Spaciousness for my mind to wander and emotions to be processed. Even though this hike was full on both physically and mentally, it was nice, as it always is, to take a break from the firehose of information, emails, and tasks that fill my off-trail life. I had a lot that I needed to sit with, from my father’s death 18 months ago to the loss of my beloved feline companion of 17 years and the end of a 3-year romantic relationship this summer. I needed space to be and feel and grieve. And I got it.
Take-aways & Lessons
The following are lessons I took away from this experience and which I hope, in some way, will serve you as well. They range from the pragmatic to the abstract, some applicable only to Canyon travel while others apply well beyond the outdoors.
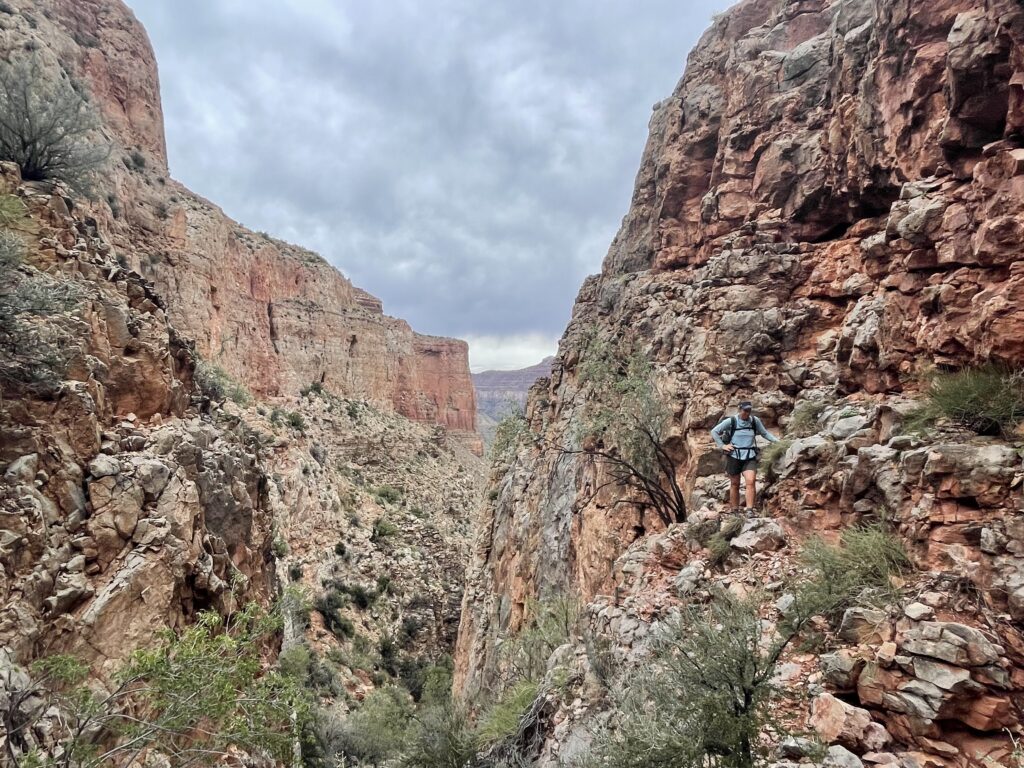
Hold expectations loosely. Early on in our hike, it became apparent to me that if I was going to enjoy the experience, I’d need to learn how to hold my goals for each day loosely. Travel was difficult and slow. For any sketched route mile on our GPS, we would need to add at least 20% for a realistic expectation of mileage required to cover that distance in the field, due to route-finding obstacles. With no trail, it’s rarely possible to travel in a straight line. Rather than our normal trail pace of 3+ mph, 1 mph became the standard. If we averaged 2 mph, we were really cruising.
Though we would study our maps, nothing could tell us the exact nature of the obstacles we’d encounter and how long it’d take us to problem solve our way through. I learned to hold expectations for the day loosely, not to get too far ahead of the present. It would only result in frustration and feeling deflated if we fell short of a goal, rather than staying present and feeling proud of what we did accomplish. Instead, I learned to keep a general idea of where I’m headed, and then take it step by step and hour by hour, leaving space in the day for adventure to unfold.
Most mistakes happen when I rush. From sliding down a loose ravine to brushing up against a cactus to fighting through mesquite when an easier way could be found above, many mishaps and minor injuries could be attributed to moving too fast and forcing a way through. I learned not to hurry.Walk with intention and slow down to find the best way through. And if it’s feeling too hard or dangerous, there’s probably a better way around. Go slow to go fast.
There’s no such thing as enough planning. We researched, planned, and prepared for this trip for months and it still wasn’t enough. Even though we’re seasoned backpackers, on this route, nothing can substitute for experience in the Grand Canyon. The more, the better to allow for learning different parts of the canyon and getting to know the area through various modalities (e.g. on foot and on raft). I have an incredible amount of respect for the folks who have spent a lifetime exploring and developing an intimate knowledge of the Canyon.
I am resilient. And, all that said, you can plan and prepare all you want –and you should– and still there will be things that catch you off guard, take you down, and humble you deeply. This was a tough route, so much so that I had days that I questioned what I was doing out there. It’s getting through those moments that remind me that I am capable and resilient. I can trust myself in the face of uncertainty, tolerate discomfort, and learn and grow from the experience.
Everything is only ever happening right here, right now. Being immersed in a society of busy-ness where our worth is linked to what we produce has conditioned my mind into unconsciously viewing things as a checklist. While I love to get stuff done, there’s a time and a place for that. That lens is beneficial for accomplishing goals, but it’s not conducive to staying present and soaking in the surroundings.
There were moments each day when I would become aware of the background instructions running in my mind: get through the ravine, around the side canyon, to the next water source, to camp, to the end. And then I’d arrive and realize I hadn’t truly taken in my surroundings along the way because my attention was focused on getting there rather than just being here.
As cliché as it is, it’s the journey, not the destination that’s the whole point. I can slip into this checklist mindset not just on trail, but in daily life as well. When I caught my thoughts wandering to the past or to the future, I’d remind myself “Here. Now. This is it.” It’s a gift and a privilege to be in this landscape and I can reciprocate that gift with my attention.
Final Thoughts
Finally, if you’ve read this far and you’re thinking about hiking this route, let me reiterate how challenging it is and how much preparation, research, and experience is necessary. Especially experience in the Grand Canyon. Ryan and I have a lot of off-trail backpacking experience and tens of thousands of miles on our feet, many of them in desert environments. We did months of planning, research, and preparation for this hike and still, we got walloped. Ryan’s words sum this up well:
“After hiking the route and getting to know the intricacies, I realized I didn’t know shit about the canyon no matter how much research I had done. I have so much respect and admiration for the folks who have spent a lifetime out there in the Grand Canyon. This route is simply not one to ‘plug and place.’ I will reiterate that the route is very, very dangerous. I will reiterate you will need to do more research for this than anything you have undertaken before. And, when you feel ready, you still need to do double the research.”
For step by step guidance on preparing for your next backcountry trip, our online courses are the best place to start:
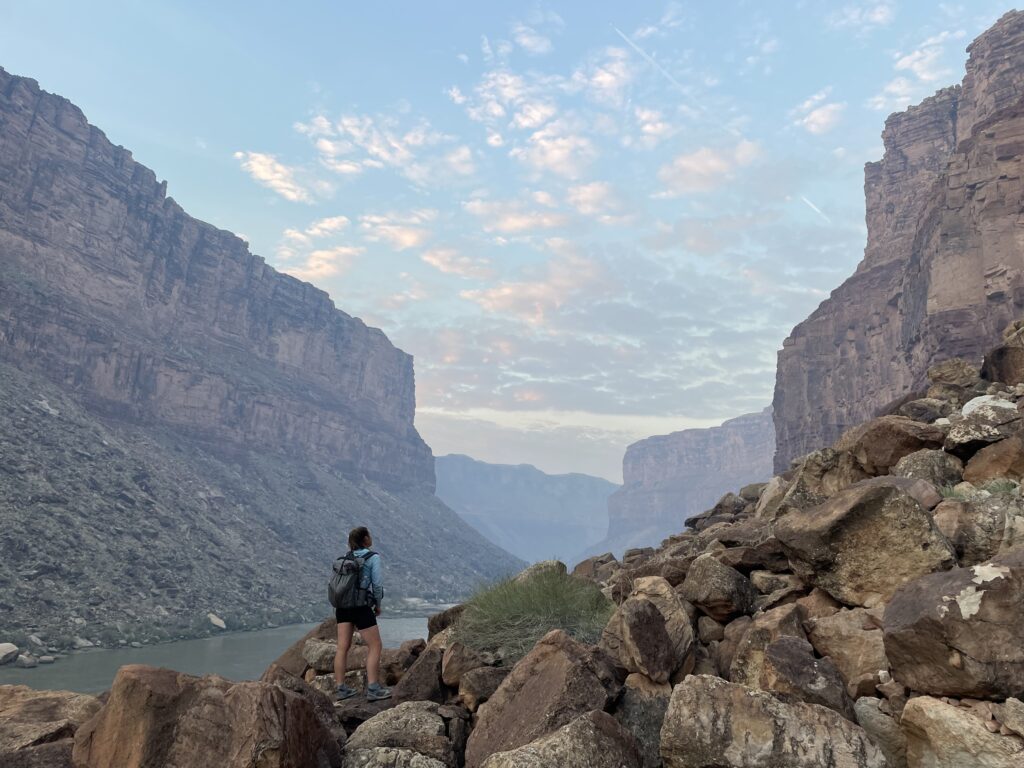
In the autumn of 2022, Ryan Sylva and I hiked the length of the Grand Canyon.
This is post 1 of 2, which provides an overview of the trip in terms of length, duration, location, terrain, natural history, climate, water, and resupply. Part 2 details trip highlights and lessons.
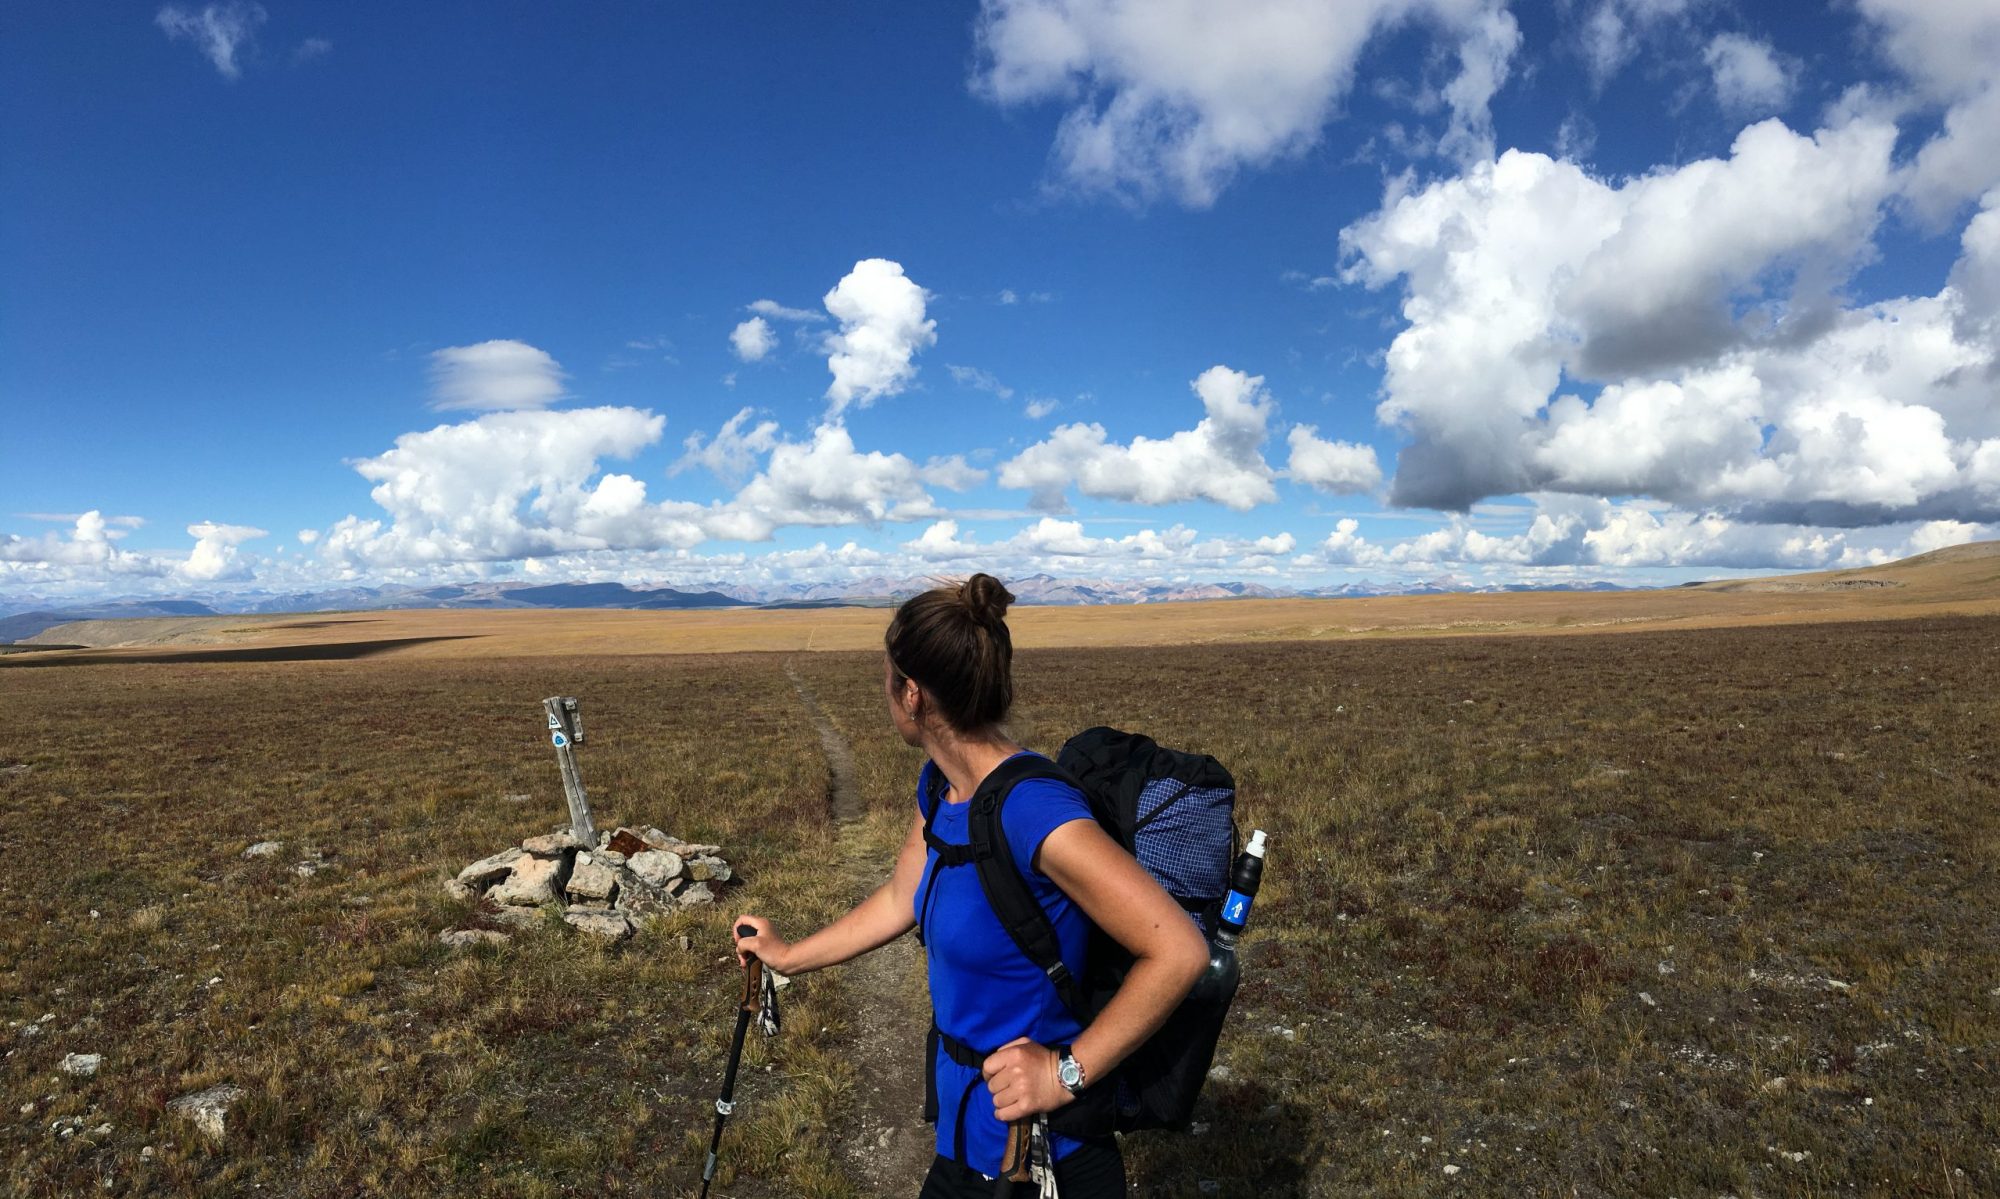
My intention in sharing this overview, the instagram stories, and my gear list is because I believe that when we get glimpses of these wild, remote places, they go from the abstract to the relatable and we become more inclined to care about and protect them. My hope is not for you to emulate this trip, but to be inspired to get outside and experience the outdoors in whatever way feels compelling to you.
To see the journey in photos, check out my instagram highlights Grand Canyon and Grand Canyon II. You can also read a detailed account of the trip on Ryan’s website.
To sum it up, this experience was an adventure in the truest sense of the word: unusual, exciting, and often hazardous. Much gratitude is owed to Grand Canyon explorers before us, including Harvey Butchart, George Steck, Tom Martin and Rich Rudow among others, from whom we obtained inspiration and/or route beta.
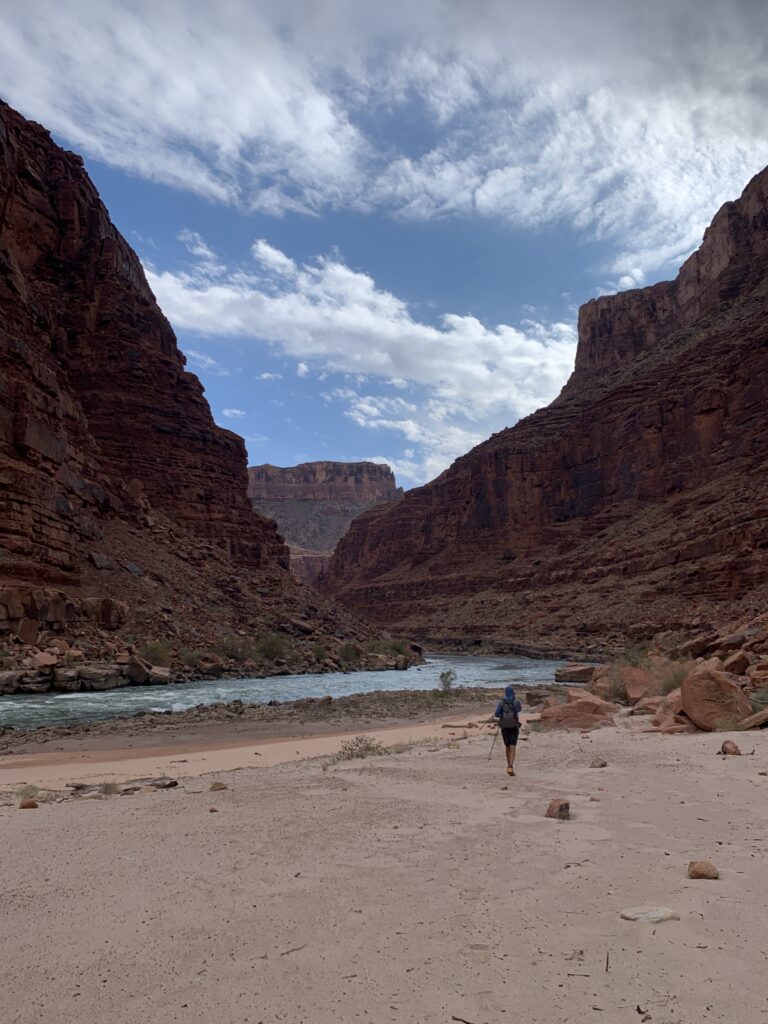
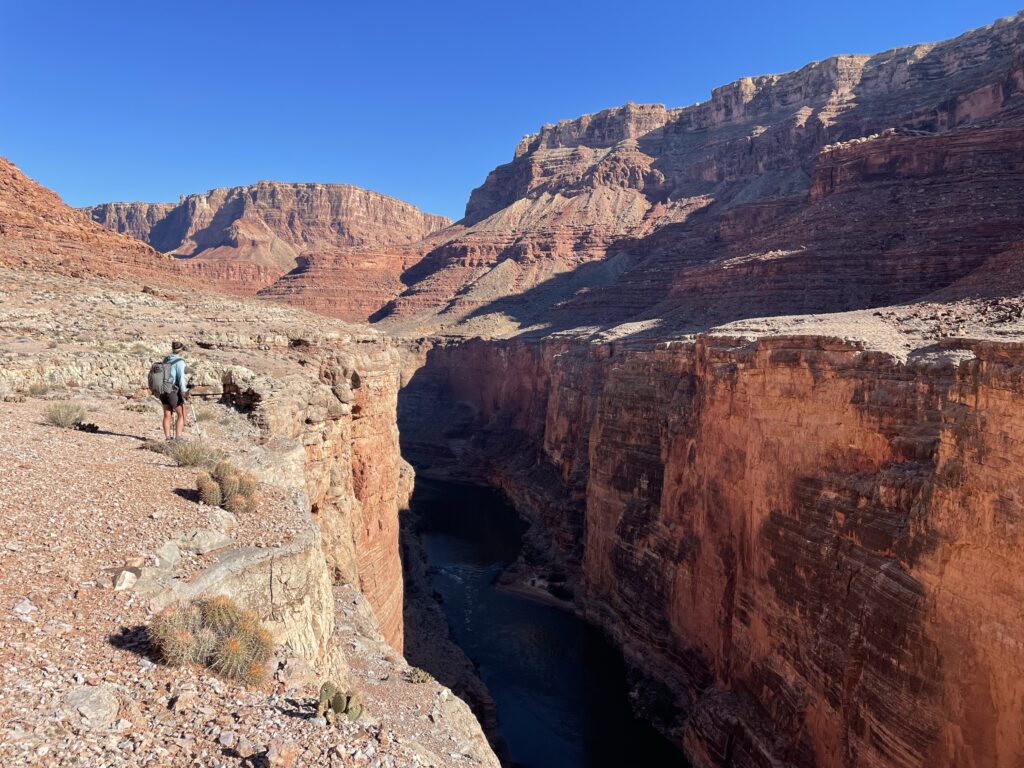
We estimate that we hiked ~575-600 miles based on our mapped route, though neither my partner nor I recorded a GPX track. We hiked entirely on the north side of the Colorado River, connecting our footsteps from Lee’s Ferry to the historic Tassi Ranch, an arbitrary pick up point west of Pearce Ferry on the north side of the river.
We completed the hike in a total of 35 days between late September and mid-November. Hiking dates were 9/27-28 (Lee’s Ferry to Rider Canyon), 10/1-5 (Nankoweap Canyon to Phantom Ranch), 10/19-11/10 (Phantom Ranch to Tassi Ranch), and 11/12-17 (Rider Canyon to Nankoweap Canyon).
There are many ways to complete a traverse of the Grand Canyon. We wanted our route to utilize different layers of the canyon, stay beneath the rim, and not require any technical climbing. Class 3, 4, and low 5th class climbing was fine, but anything more was beyond our skillset. We didn’t carry a harness or rope, but we did use a 30’ piece of tubular webbing to haul packs when wearing them while climbing compromised our balance.
Terrain
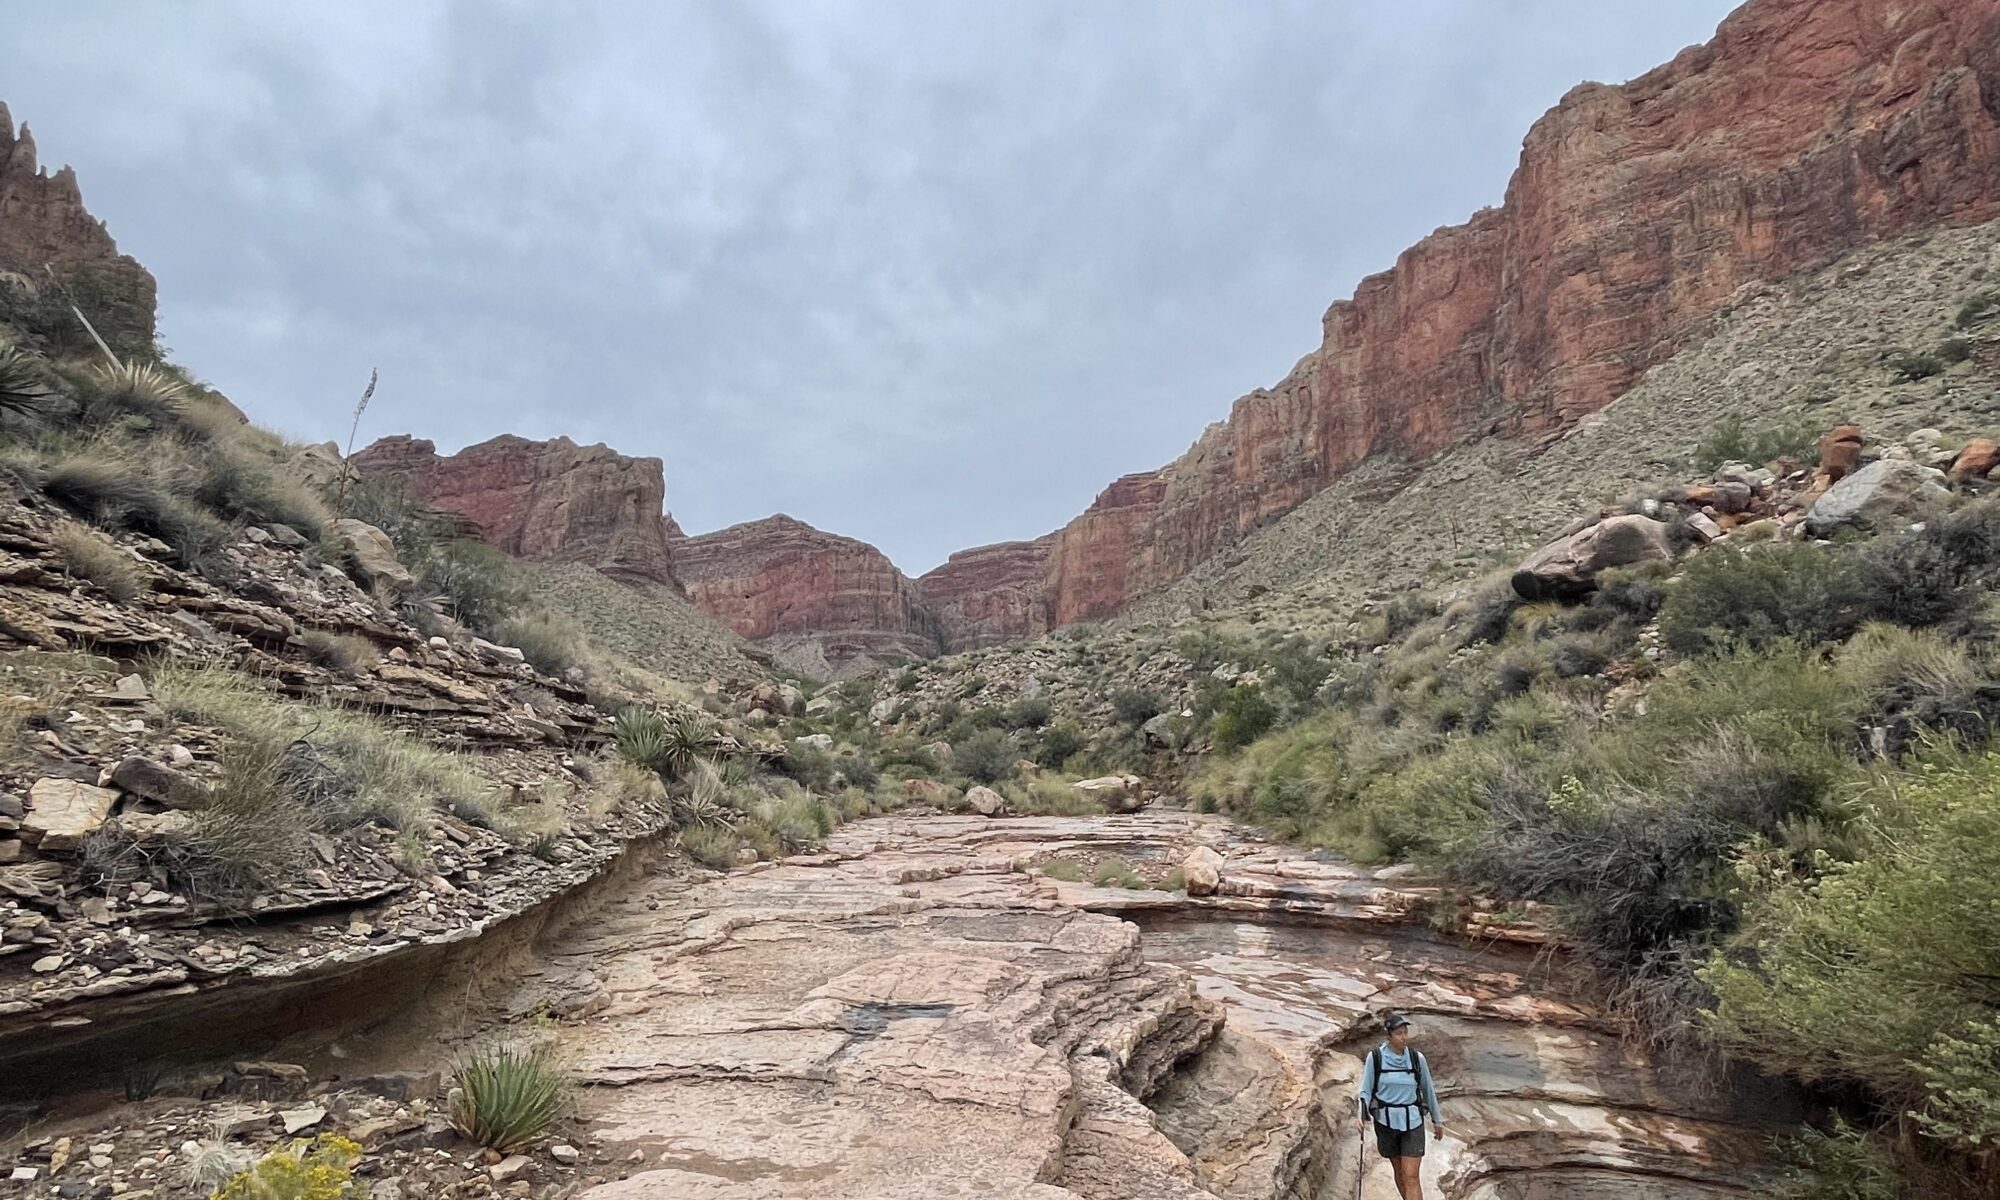
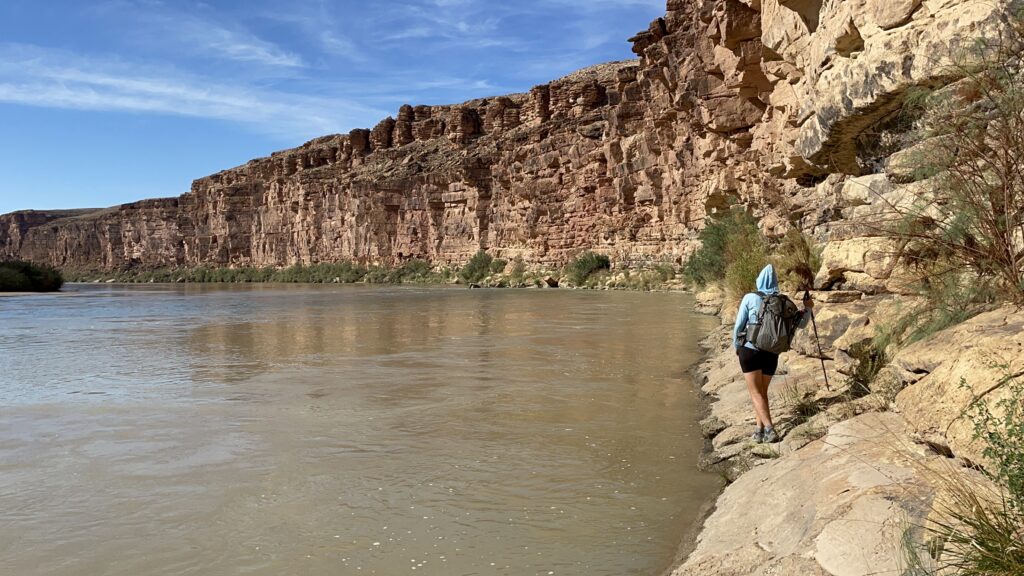
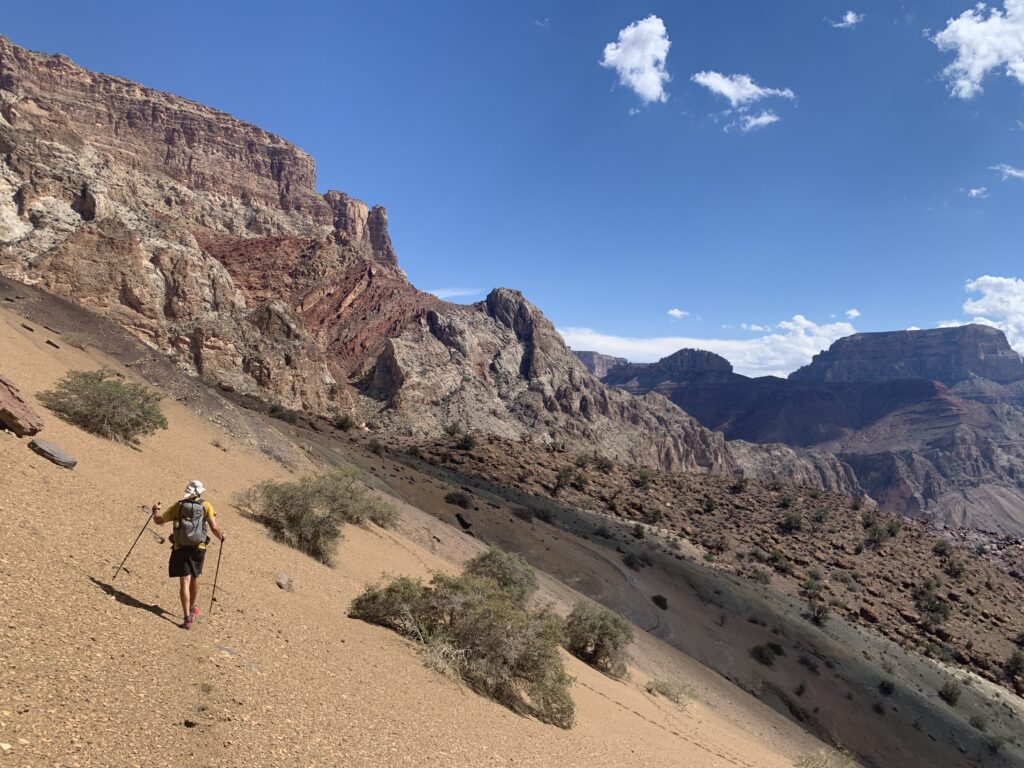
The entire route was off-trail with the exception of roughly 9 miles of maintained trail near Clear Creek. There were also portions of the Tuckup Trail that are well defined and a handful of miles on old ranching roads that were in good condition. Otherwise, we kept our eyes out for sheep trail and read the terrain to find the best path through. Travel included beach walking, boulder hopping, creek wading, scrambling up and down layers and along ledges, traversing steep talus slopes and loose ravines, and stepping over, through, and under cacti, mesquite, sagebrush, catclaw acacia, saltcedar and all sorts of other pokey vegetation.
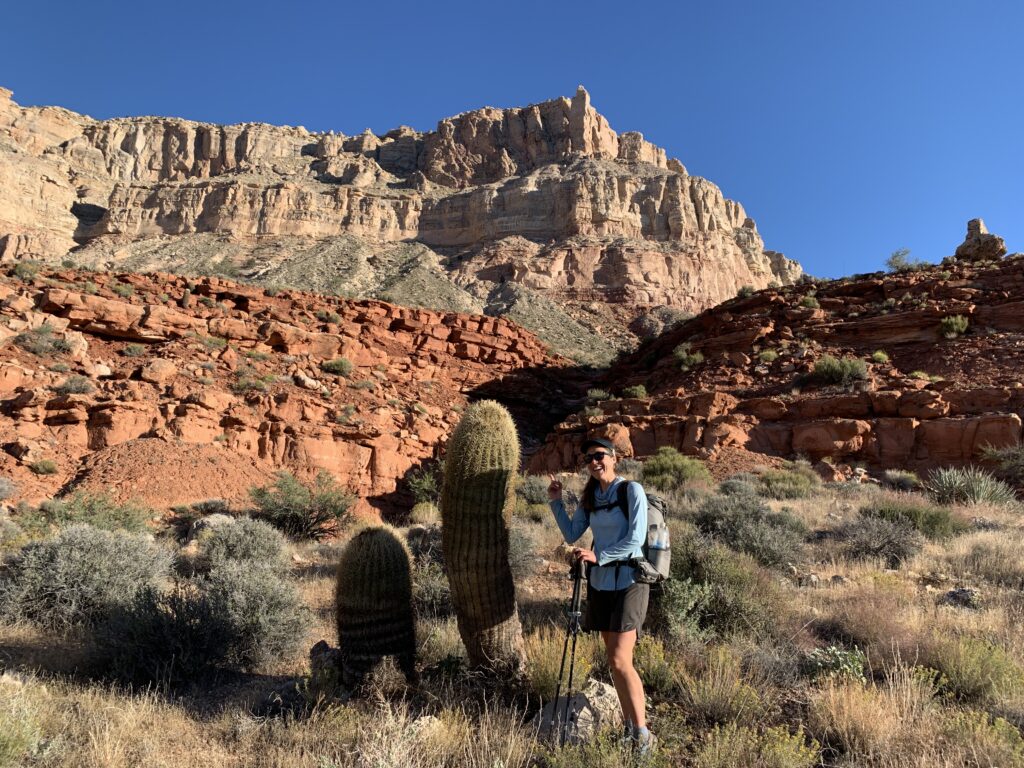
Our route traversed through three ecoregions, including the Mojave Desert, the Great Basin, and the Colorado Plateau. These different habitats are the result of geologic variations and elevations that range from 2000’ to 8000’. We walked through desert washes at the lowest elevations to Mojave desert scrub, sagebrush steppe, pinyon-juniper woodland, and ponderosa pine forest as one ascends in elevation.
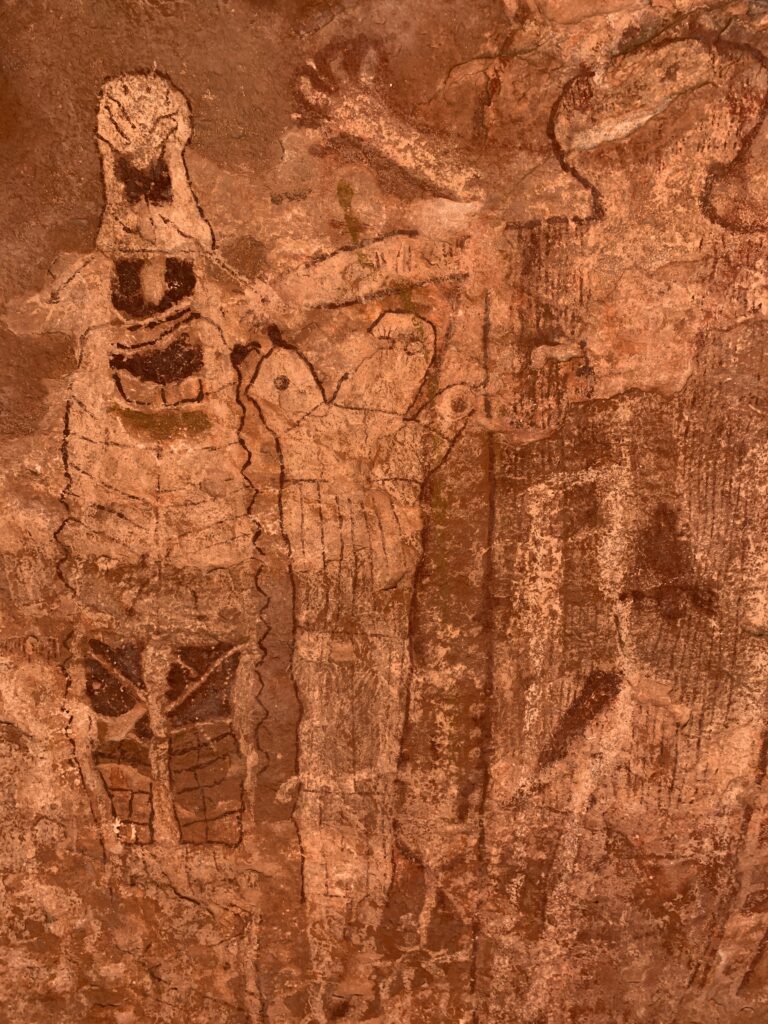
Natural & Human History
Humans have inhabited the Grand Canyon for thousands of years. The Havasupai, Navajo, Southern Paiute, and Hualapai communities live inside the Canyon or along the rim. Hopi, Zuni, and Apache live nearby. Later, Mormon ranchers, miners, and early explorers lived in and around the Canyon. We relished seeing remnants of early inhabitants, particularly the indigenous communities. This included granaries, pictographs, and agave roasting pits.
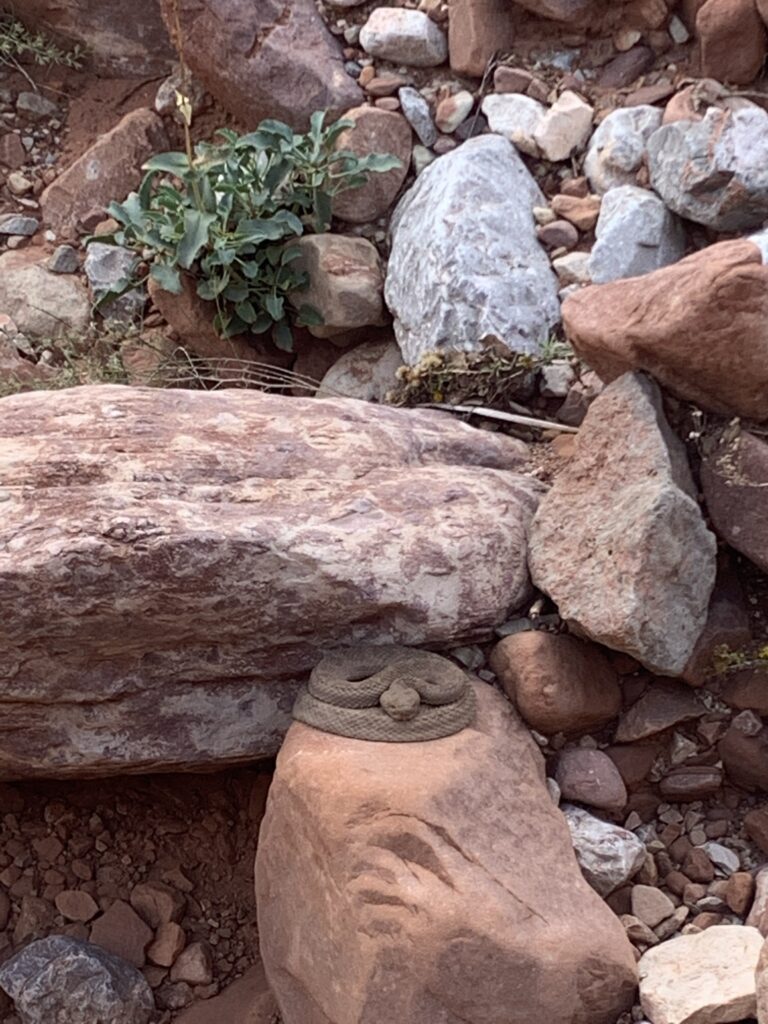
A wide variety of animals, insects, birds, and plants also inhabit the Grand Canyon. I won’t name them all, but our wildlife sightings included bighorn sheep, squirrels, chipmunks, rattlesnakes, mice, mule deer, bats, tarantulas, black widows, lizards, scorpions, coyotes, burros, toads, and a mountain lion, to name a few.
Plant observations were extensive as well. There are nearly 2,000 species of plants, mosses, and lichen in the Grand Canyon. Different vegetation communities are seen at different elevations and in different parts of the Canyon. Some of the species we saw the most include sagebrush, Juniper, Pinyon pine, aspen, ash, lupine, catclaw acacia, Mormon tea, western honey mesquite, willow, broadleaf milkweed, indian paintbrush, snakeweed, Utah agave, banana and narrowleaf yucca, snakeweed, creosote, white bursage, brittlebush, ocotillo, four-wing saltbush, big sagebrush, blackbrush, rabbitbrush, and various cacti, such as California barrel, fishhook, beavertail, desert prickly pear, hedgehog, and cholla.
Climate
Heat, water, and remoteness are the biggest challenges of backpacking in the Grand Canyon. Temperatures ranged from over 100-degree highs during our first week of hiking in late September to lows around 20-degrees on a few chilly mornings in early November. Obviously temperature ranges are vast when you’re traveling at elevations ranging from 1,500’ to nearly 8,000’. We would have benefited by delaying our start date until mid-October, when summer’s sweltering heat had begun to wane. Generally speaking however, the temperature range was quite comfortable. Daytime temperatures were in the mid-50s to mid-70s, and nighttime temperatures were in the high 40s to low 30s. Other than adding a down jacket for the last half of the trip, which I probably could’ve gone without, I carried the same kit for the entire trip.
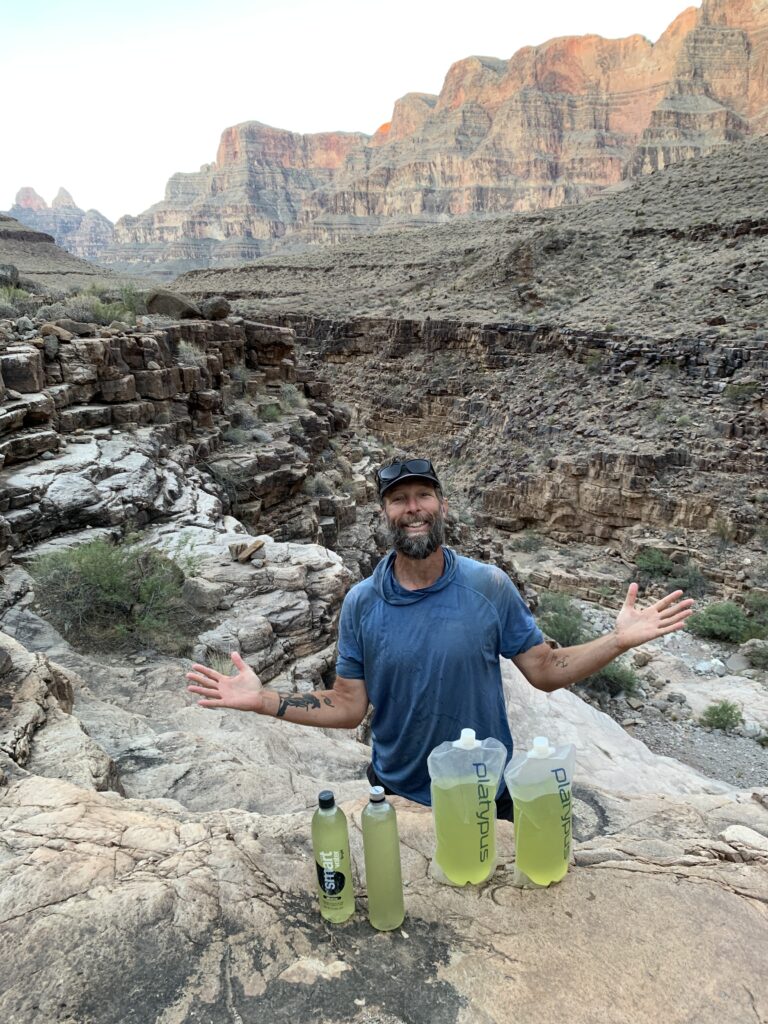
Water
Water is constantly on one’s mind while traveling in the Grand Canyon. Our schedule coinciding with the occurance of several decent storms was quite fortuitous. Not only did we begin our hike at the tail end of a strong monsoon season, we also received a few well-timed storms that filled the potholes. As a daily practice, we were always looking ahead and making educated predictions about where we might find water again, how likely it was to be there, and how long it’d take us to get there. This wasn’t always easy, as we were traveling off trail through difficult terrain that we hadn’t seen yet. Additionally, we found that it was not uncommon to encounter an obstacle that ate up precious daylight, such as getting pinched off at a cliff and needing to backtrack to find a different way or encountering an area covered in prickly pear cactus that required us to tiptoe through for miles.
As part of the research and planning phase, I created a spreadsheet of all of our potential water sources and their reliability. This was used in conjunction with maps and beta from other Canyon travelers, alongside our observations of the weather and the terrain we were traveling through to ensure we had enough water. For example, in addition to knowing where our next reliable water source was, we knew that we commonly found water in side canyons with steep walls that shaded the pools below pour offs. After a heavy storm, it was likely those pools and others would have good water. It was not uncommon for us to carry 6-8 liters, drink green water from potholes, and ration when we didn’t make it to our anticipated source in time.
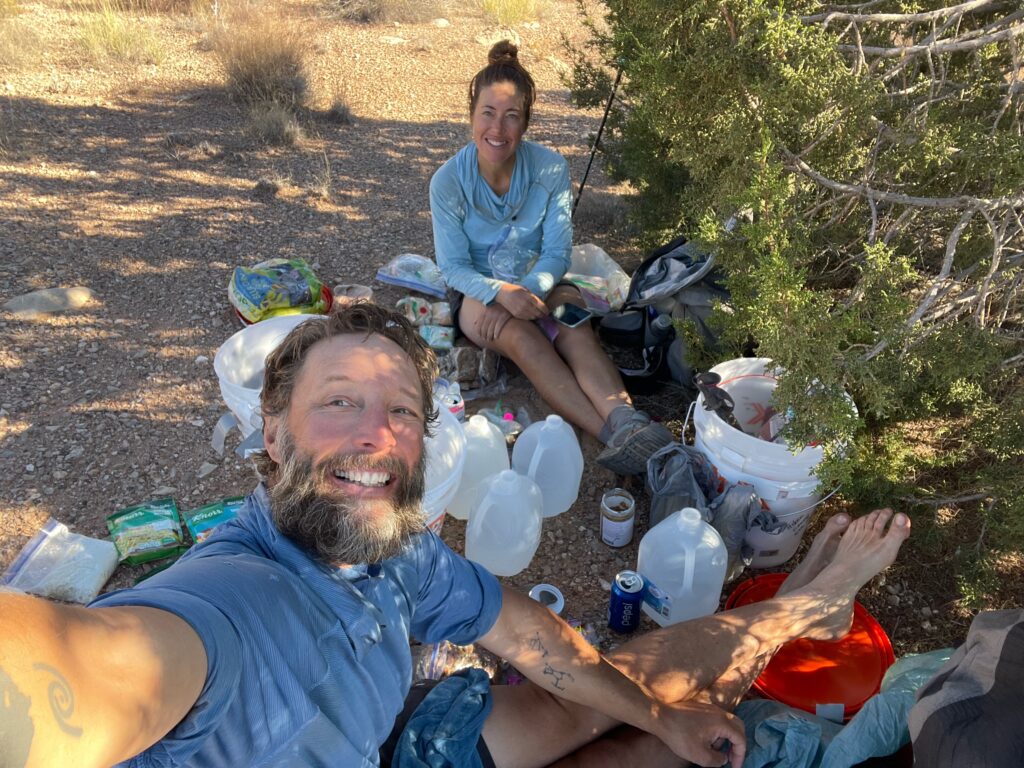
Resupply
Options to resupply food and replace or repair gear were limited. There are no town stops inside the Canyon and getting into and out of it is time-consuming and strenuous. More thought went into self-sufficiency on this trip than on any of my previous outings, particularly hikes on well-traveled trails like the PCT. I was conservative with gear decisions and beefed up my first aid and repair kits. We planned for contingencies upon contingencies.
Caching food, water, and gear replacements was critical to our success. The distance between caches and our speed of travel determined how much food we carried at any given time, with food carries raging from 5-11 days. Caching required a lot of driving and time. We opted to set 3 caches: South Canyon (which we didn’t utilize due to Ryan’s heat illness on day 2), Thunder River Trailhead, and Tuweep Campground.
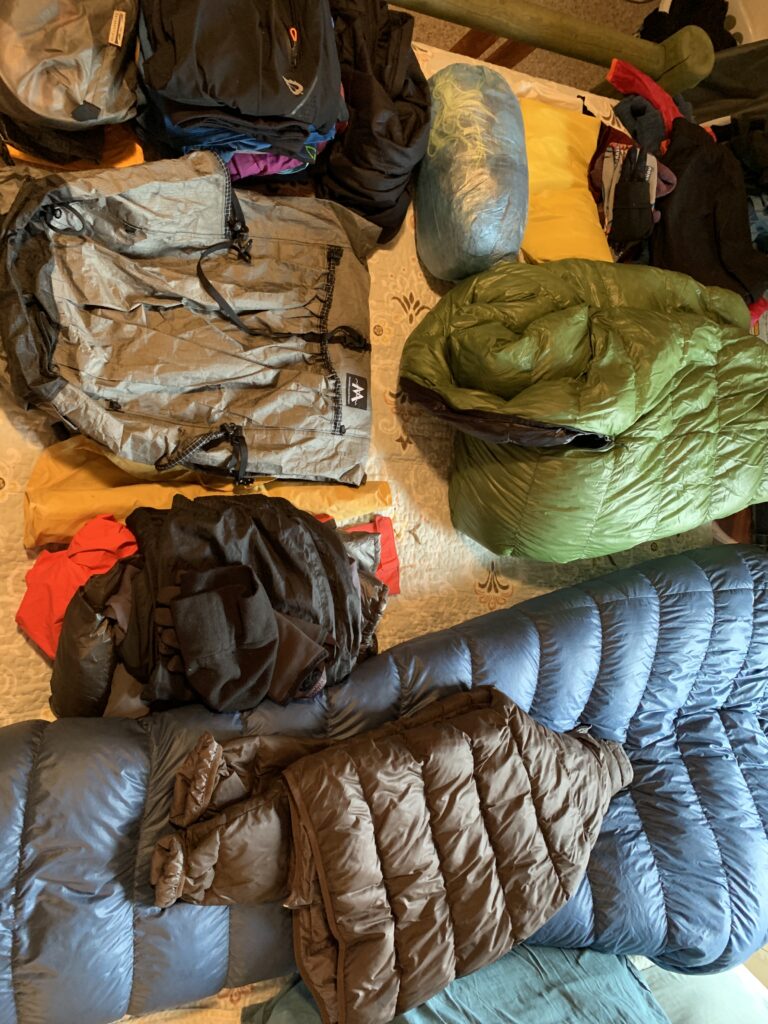
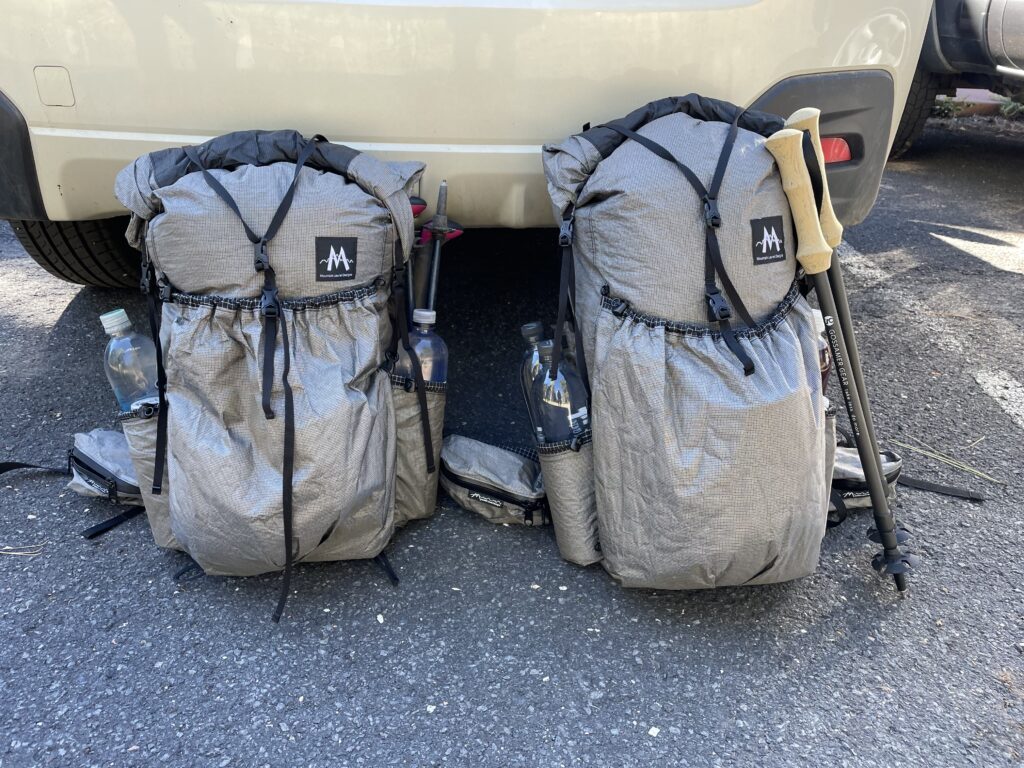
In the fall of 2022, I hiked the length of the Grand Canyon from Lee’s Ferry to Tassi Ranch. This post shares my Grand Canyon Traverse gear list. It’s all the items I carried for the route and the rationale behind my choices. This is provided as a guide for how I think about creating gear lists and for those who are just curious about what I carried. The gear taken on any trip should be unique to the location, goals, conditions, season, and experience of the hiker.
Conditions & Intentions
This hike was completed in late September through early November. Temperatures ranged from 20-100 degrees Fahrenheit. We experienced a few thunderstorms as we were at the end of monsoon season, but overall conditions were very dry. Finding water was always a challenge and when we found it, we needed the ability to transport large quantities. Sun was intense and shade was minimal. There are no resupply points inside the canyon to purchase food, gear, or other supplies. Our goal was to hike in a lightweight style, hiking from sunrise to sunset to maximize mileage.
Location-specific selections and rationale
These are the items that were selected specifically for the conditions expected on this trip:
Sun hoodie & sun glasses: protection from the incessant and intense sun
Lightweight rain jacket: minimal rain expected
App Co Gear alpaca hoodie: my sole insulating layer for the first half of the hike while summer’s heat still lingered
55L pack: larger capacity pack for the extra gear, food storage, and water capacity needed to be more self sufficient on this trip
Bulked up first aid and gear repair kit: the canyon is remote, help is far away, and there are no towns to replace broken gear
Increased water capacity: long water carries
Webbing: ability to create handlines or pass packs through breaks in the layers
20K external battery: no towns to charge electronics
Special thanks to gear companies who have supported me:
Astral Footwear for providing shoes for me for this trip. I’ve been wearing and testing Astral shoes since 2018 and they’re my top choice due to their breathability, grip, and durability.
TOAKS for providing my awesome alcohol siphon stove, 750-ml titanium cookpot, and my long-handled spoon. If I’m carrying a stove, this is always the one I take.
If you’d like a downloadable copy of this template, it’s available for free from Andrew Skurka. It’s the template I use for all my hikes, updating it for each new location/season. It also serves as my pre-trip packing check list.
Why spend $500 on a 14oz tent and then carry 2 pounds too much food?
This year, I’ve helped over 400 clients prepare for and execute backcountry trips. As a guide, online instructor, and operations coordinator for Andrew Skurka’s education-focused backcountry trips and online planning course, I’ve had the privilege to support clients through the most common stumbling blocks. One that comes up repeatedly both in the planning stage and in the field is uncertainty about how much backpacking food to pack. In most cases, people end up packing way too much food and therefore carrying unnecessary weight.
For how much time, money, and effort goes into lightening one’s pack, it’s unfortunate to see people negating the payoff by carrying excess food weight. To be clear, a little bit of buffer, such as an extra meal or bar, is a great idea. Carrying a few pounds excess is not.
6-weeks of gluten free backpacking food (Grand Canyon + guiding in WV) at 0.93-1.29 lbs/day
Case Study: 5-weeks of Backpacking Food for the Grand Canyon
As I prepare food for an upcoming 5-week hike in the Grand Canyon, I wanted to share my process and techniques for keeping food weight appropriate for the length of trip I’m on. With longer distances between food caches (e.g. 5-11 day carries) and extra safety gear for this trip, packing efficiently in terms of food weight is critical.
To keep food weight low, there are two key factors I focus on: packing the right amount of calories and packing the most calorie dense foods.
Determining Backpacking Food Calorie Needs
To determine how much food to take, I take past experience into consideration and calculate calories. You can use a free BMR calculator online, and adjust for activity (see this video). Then test it out and take note of how much food you returned with or whether you ran out. Like most hikers, I get hungrier the longer a trip lasts. For that reason, I generally plan for a higher calorie intake later in the trip.
For this trip, for example, I’m planning about 2300-2500 calories for the first two weeks, then 2700 for the last 2.5 weeks. Cold temperatures, a high amount of elevation gain, and cross country hiking over uneven surfaces make me hungrier, so I also try to plan for that. As far as macronutrient ratios, I feel best eating about 50-60% fat, 20% protein, and 20-30% carbohydrates. See this video on macronutrients for backpacking.
Choosing Calorie Dense Backpacking Food
As I discussed in my food planning for the Great Basin Trail, I prioritize trail food that is energy-dense, meaning high calorie per ounce. I aim for >125 calories per ounce, but some foods fall short of that which I’m okay with if it’s a high protein food. At nine calories per gram for fat compared to four calories per gram for protein or carbohydrate, this makes fat a good option for weight efficiency for long distance hiking. For a complete breakdown of the benefits of a higher fat diet for backpacking, see this post.
By focusing on packing the right amount of food and packing about 50% of my calories as fat, my food weight per day ranges from 0.93 pounds at the beginning of the trip to 1.29 pounds toward the end of the trip when I plan to eat more calories. For those interested, my food for this trip is all gluten free, with a high priority on nutrient density and antioxidants, and simplicity.
Hopefully this helps you with your own meal planning for your next backpacking trip.
If you’re interested in the blueprint I use to plan my recipes and meals for every single backpacking trip I take whether it’s a few days or a few months, I invite you to check out the backcountry meal planning course.
I dumped all my knowledge from training as a nutrition coach and my experience from 10,000+ miles of backpacking into this course to help streamline the process for others. We cover how to determine your calorie and macronutrient needs, how to create a meal plan (including templates), creating a resupply plan, creating your own balanced recipes, and much more.