Preparation for a 3000-mile Walk

adaptogen endurance

This post was originally written for Wishgarden Herbs.

How do you prepare for a 3000-mile hike? It’s a monstrous endeavor, indeed, and after nearly 5000 miles of backpacking, I’ve learned that as much goes into the preparation as the execution.

The scope of my upcoming adventure is to hike the length of the continental divide from Canada to Mexico. Depending on the route I take, this will entail walking 2800-3000 miles of continuous foot steps, along the Continental Divide Trail. Commonly referred to as a ‘thru-hike’, I’ll be averaging 30-35 miles per day in order to complete the trail in one season.

Many hikers spend far too much time obsessing over gear, food, weather and other minutiae. While those things have their importance, it’s physical preparation and mindset that result in a successful journey.

Physical Preparation

To avoid injury and illness, it’s wise to optimize your health before hitting the trail. Before a long hike, I put additional effort into eating a nutrient-dense, anti-inflammatory diet and getting plenty of sleep. This is always important, of course, but the goal is to optimize immune health and resiliency before enduring the physical stress of a long hike.

Building miles slowly is essential to a smooth transition to hiking for 10-12 hours per day. There’s no preparation that compares to putting on a pack and walking all day, but it’s hard to find time for that. Activities like strength training and trail running help build muscle and condition the cardiovascular system in less time.

I’ve seen so many people leave the trail from illness and injury that I created the Adventure Ready online course to help hikers hit the trail feeling healthy and prepared for what’s to come. We cover mindset, diet, gut health, sleep, training, sleep, and stress management.

Mental Preparation

As critical as the physical preparation is, it’s often said that a thru-hike is 90% mental. Mastering mindset starts with committing to myself to do everything in my power to complete my hike. To stay motivated over the long haul, I like to have a clear sense of why I’m out there. If I know my why, then when the going gets tough (and it will), I find reserves of energy and perseverance I didn’t even know I had.

I find it’s also helpful to anticipate challenges and how I’ll work through them. I know that I’ll miss my loved ones, be physically & emotionally uncomfortable (frequently), things won’t work out as planned, and I’ll be alone a lot. It’s easier to navigate these challenges when I’ve prepared myself mentally. Additionally, I know I’m bound to have a transformative experience.

Connecting with Nature

Hiking a long trail allows me to reach more remote areas which few others take the time to get to. This allows for more intimate connections with the wildlife, which can be both magical and frightening.

The most common question I get, besides “Do you carry a gun” (the answer is no), is “Why?”. Why put your life on hold for 4 months? Why walk across the country, putting your mind and body through so much?  

I have many reasons, but perhaps the most compelling is the depth of connection I feel with nature during an experience of total immersion. For me, it takes a week or so of being out, but I can physically feel my body unwinding. The compulsive thought loops of ‘what do I need to be doing right now?’ fall away. I exhale deeply, knowing the only thing I need to do is walk.  

The reduction in external input when I’m deep in the wilderness helps me to notice more of what’s around me. Instead of the constant distraction of my own thoughts, I pay more attention to the surroundings. I notice the changing landscape and the weather patterns because they directly impact my experience. I feel the pressure changes of a storm coming before I even see it.

There is space to just be. My mind needs that openness, that white space. I am never more creative than I am while on a long distance hike. I become the truest version of myself. I see this in others as well. They tap into their deepest desires and potential. Creative projects and business ideas are born.

On a 3000 mile walk, I find a different level of presence than I experience in my ‘everyday life’ and that’s what keeps me coming back for more every summer.

If you’re interested in following the adventure or preparing for your own long adventure, I’ll be logging my progress on Instagram (@katiegerber) and on my website.

How to Hike the Oregon Desert Trail: 750 Miles Across Eastern Oregon

oregon desert trail

This post originally appeared on the Trek.

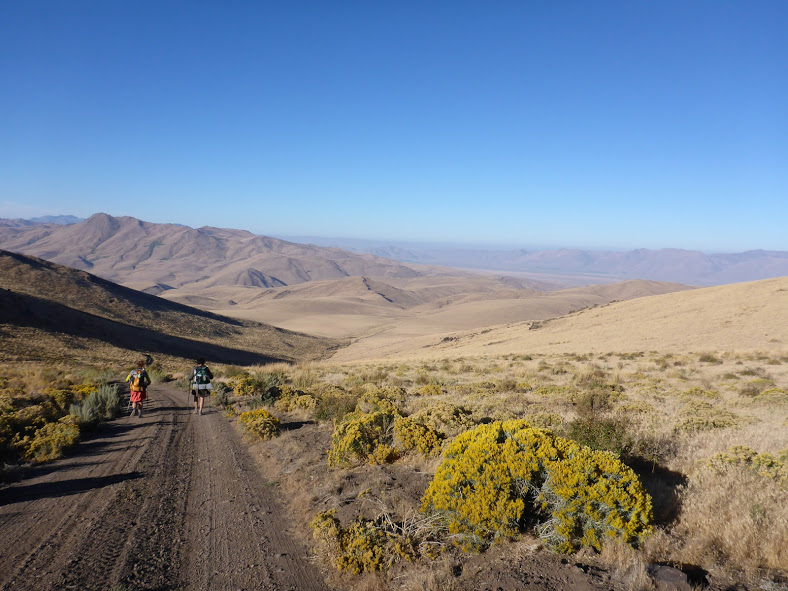
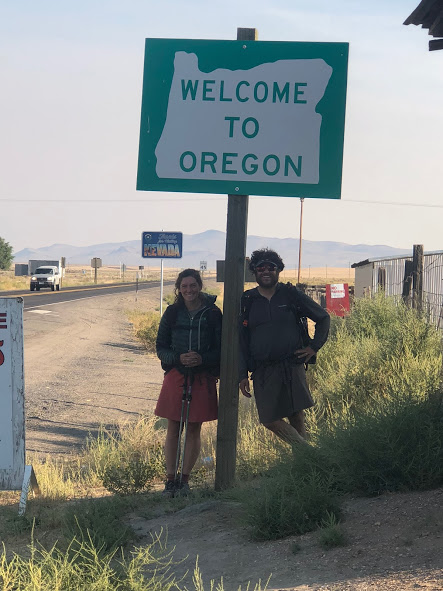
The Oregon Desert Trail (ODT) is a 750-mile route through the high desert country of Eastern Oregon. In the shape of a lopsided W, the Oregon Desert Trail made is up of a network of trails, cross-country travel, and two-track dirt roads. Oregon Desert “Trail” is a bit of a misnomer as the route is actually only 9% trail. The remainder of the miles are comprised of 35% cross-country travel, 51% unpaved/dirt roads, and 5% paved roads. The route was established in 2011 and has been thru-hiked by fewer than 30 hikers, who generally take four to six weeks to complete it. The ODT traverses some of the most spectacular natural areas of Oregon’s dry side, including Hart Mountain National Antelope Refuge, Steens Mountain, and the Owyhee Canyonlands.

Oregon Desert Trail At-a-Glance

ODT
  • Distance: 753.5 miles (variable depending on the specific route you choose).
  • Location: Southeast Oregon.
  • Trail type: Point-to-point.
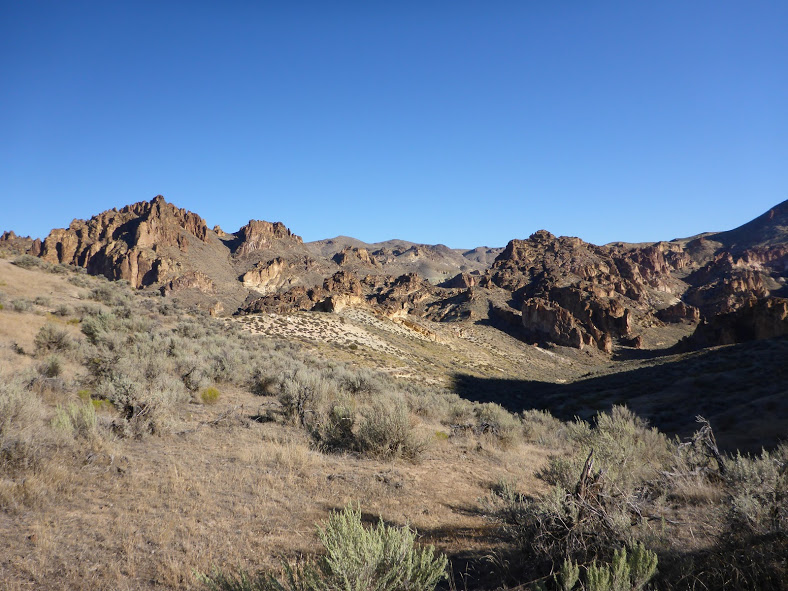
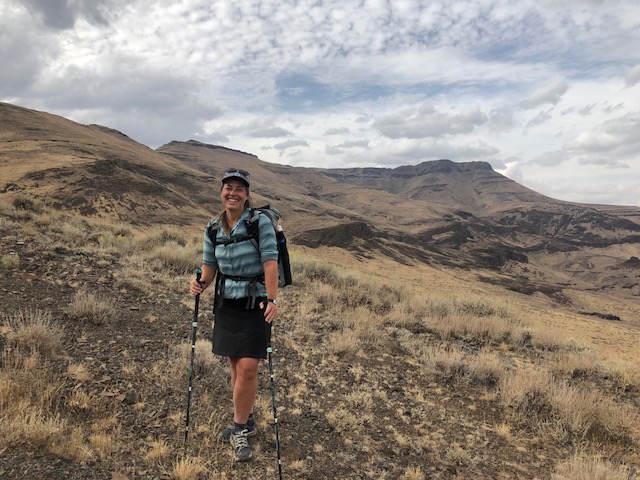
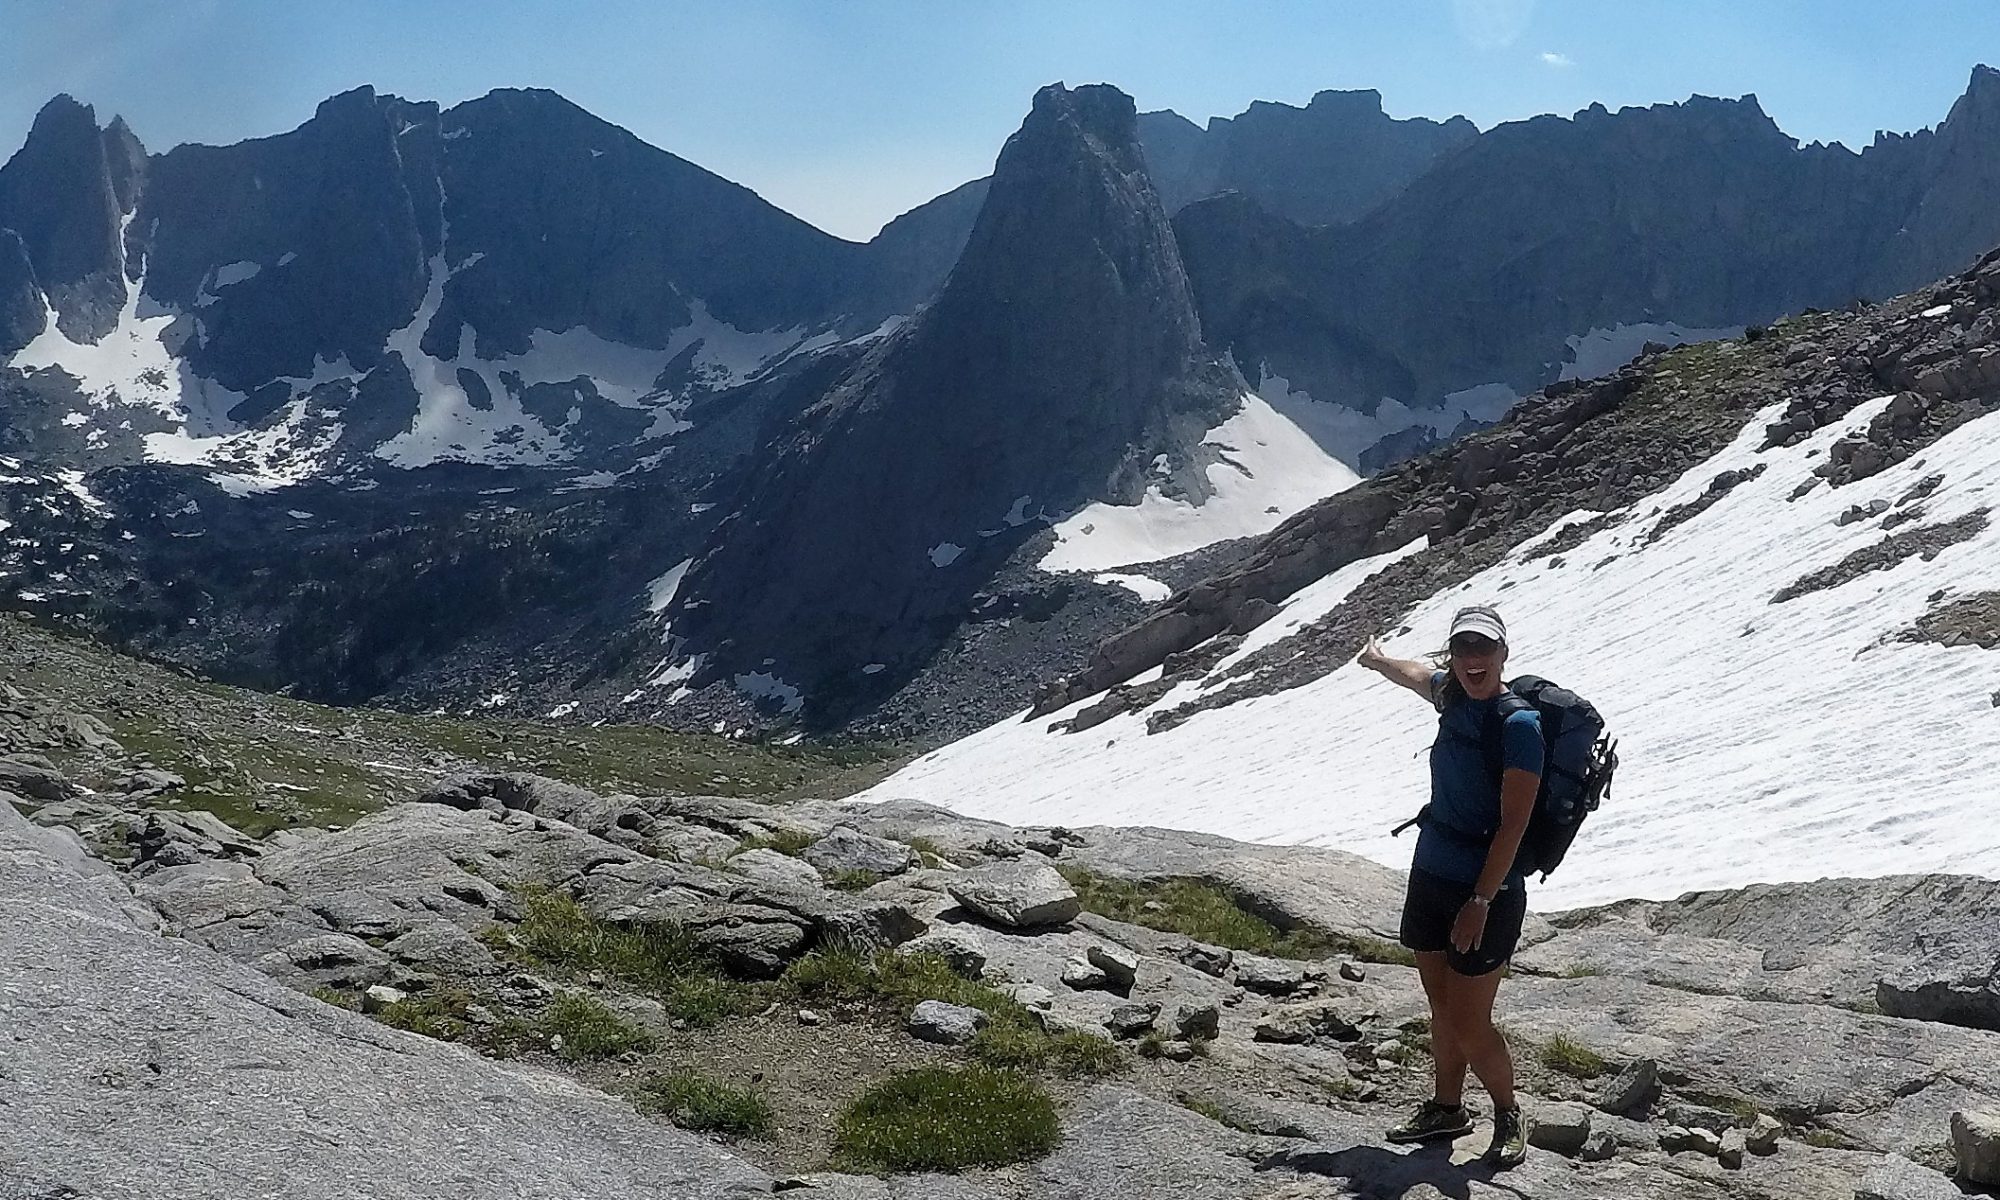
  • Scenery: Sagebrush seas, fault-block mountains, lava beds, canyonlands, pinyon-juniper forests, deserts, and hot springs.
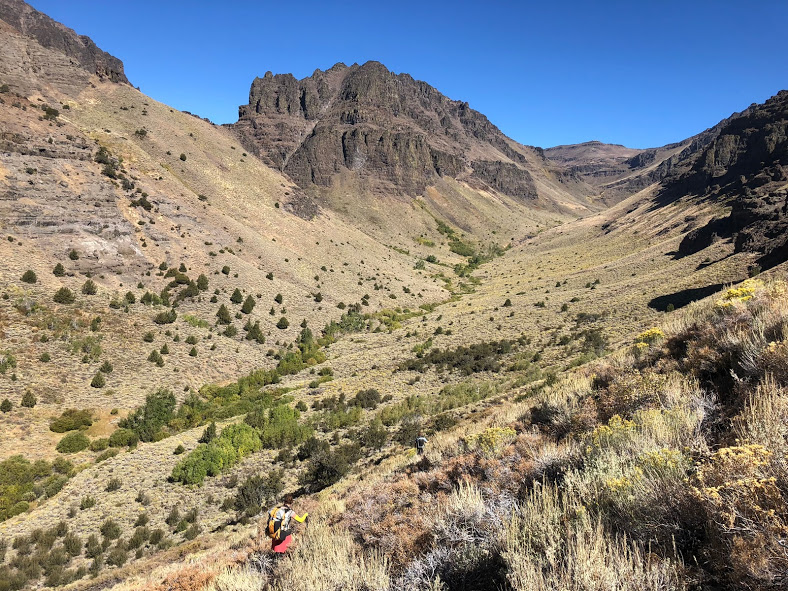
  • Terrain: Moderate to difficult, with rolling hills to river crossings and steep off-trail navigation through dense vegetation.
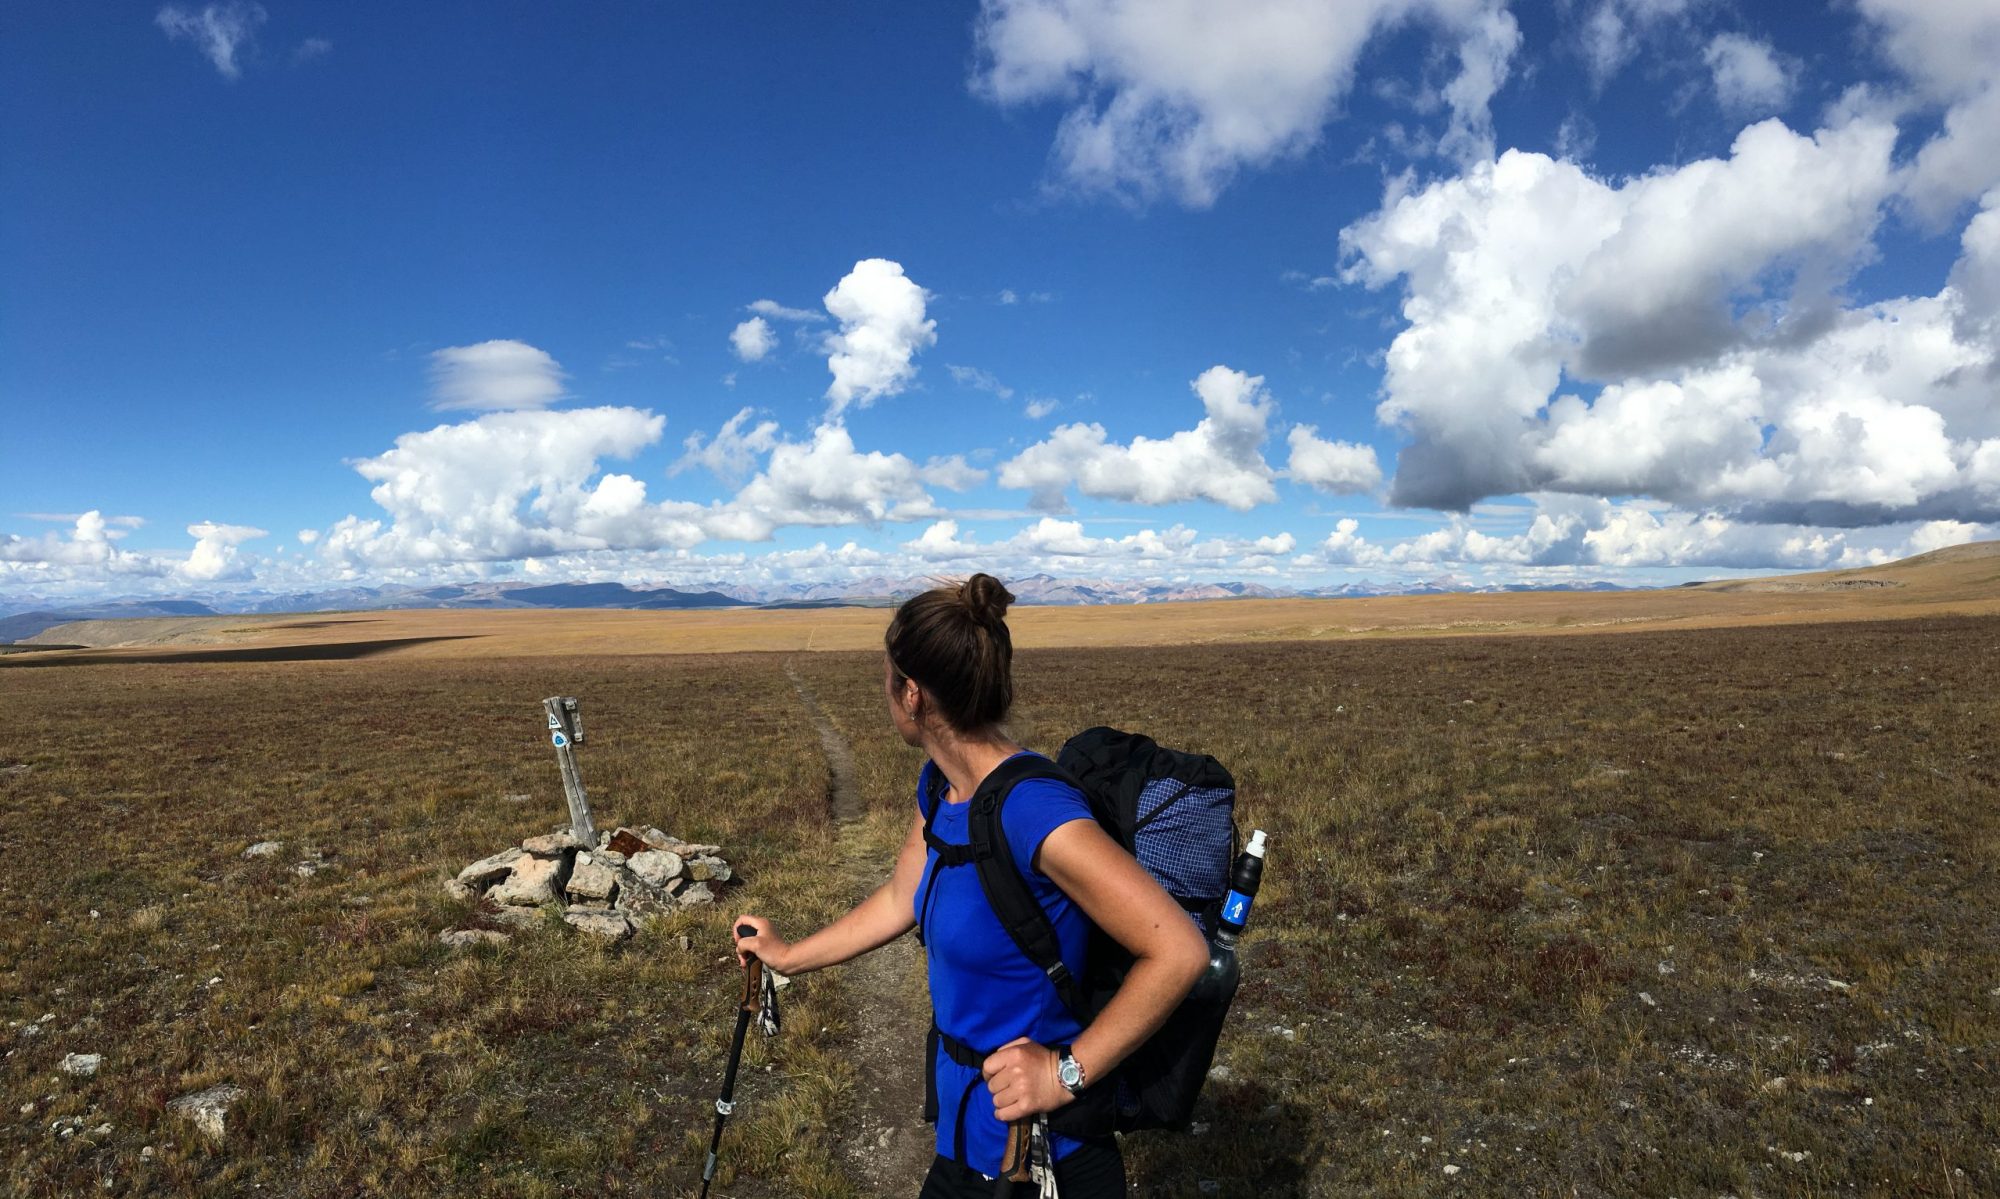
  • Navigation: The route is unmarked and requires map and compass skills and/or use of a GPS. The best resource for maps and way points is the Oregon Natural Desert Association (ONDA) website. There are occasional cairns or sections where the route follows other signed trails, but this is rare.

Getting There

oregon desert trail

The termini are located in the Oregon Badlands Wilderness near Bend, OR, and in Lake Owyhee State Park, near the southwest border of Idaho. The trail can be hiked east to west or west to east. For most people, accessing the Western Terminus near Bend is easier. You could fly into Redmond Municipal Airport, 17 miles from downtown Bend, and taxi or Uber to the Badlands Wilderness, or to the bus station (see below) if you’re starting at the Eastern Terminus.

The Eastern Terminus at Lake Owyhee State Park is more remote. If you can find someone to drop you off, that’s definitely the easiest option. If that’s not possible, take the POINT bus Eastern route from Hawthorne station in Bend to Vale/Ontario and taxi from there. A possible option detailed on the ONDA website is trail advocates in the Lake Owyhee area who may be willing to help out hikers with transportation. Be a good trail steward and treat these people with generosity and kindness.

Of interest for those planning a section hike of the trail, the ONDA website offers the following information: “The Lake County Senior Citizen Association (LCSCA) Lake County Public Transportation program offers rides around Lake County. The priority for the service is for seniors needing medical services, but if space is available hikers are welcome to ride. Trips may travel between Christmas Valley, Bend, Paisley and Lakeview. The cost depends on location (usually between $10-20). Call to inquire about availability and schedule: 541-947-4966.”

Which Direction Should You Hike?

oregon desert trail

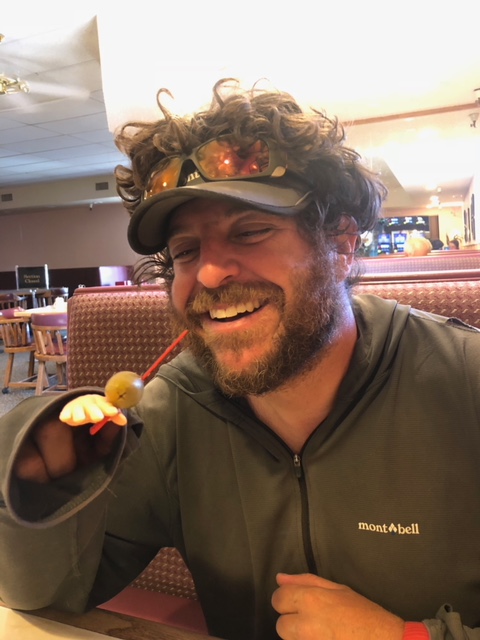
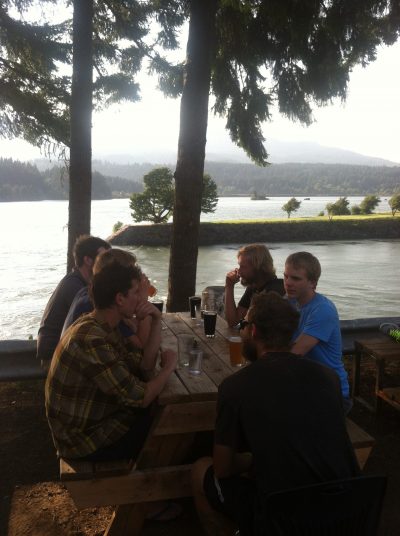
This trail can be hiked in either direction. Most ODT thru-hikers have gone eastbound, but in the last few years, at least five of us have gone westbound. The pros of traveling westbound include finishing in Bend, with its many tasty restaurants and 22 microbreweries (the highest per capita in the US). Getting home from Bend is also likely to be easier. On the downside, westbound travel means more challenging terrain at the start of your hike. Traveling eastbound, on the other hand, may mean more logistics getting home from the Eastern Terminus, but more gentle terrain to start and a much more scenic finish at the spectacular Owyhee Lake terminus.

Why Hike the Oregon Desert Trail

hot springs ODT

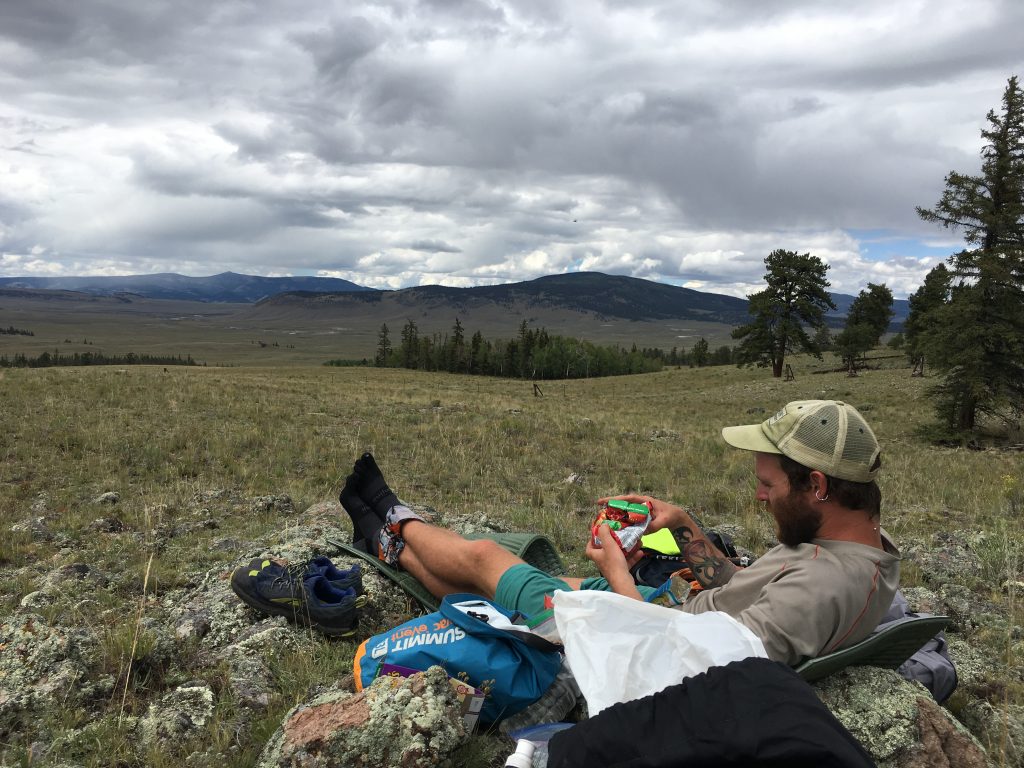
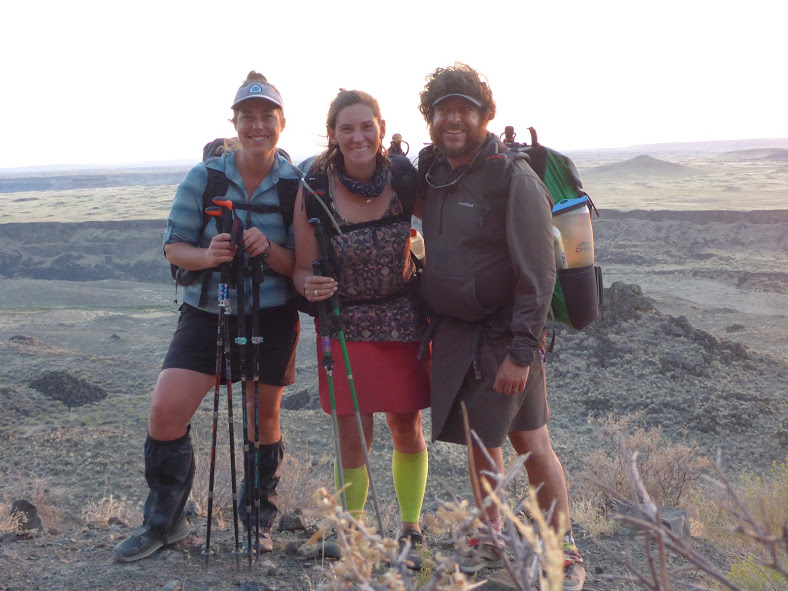
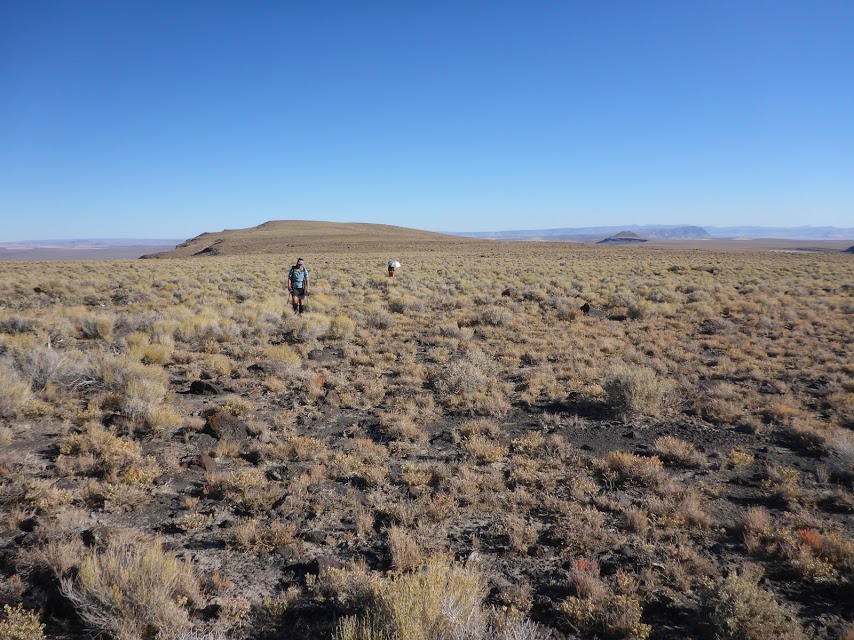
The ODT is unlike any other trail you’ve hiked, and that alone is a good reason to hike it. Southeast Oregon is one of the least densely populated regions of the country and many of the towns you travel through are one stoplight with one combined gas station/convenience store/bar/post office. I found that being on a trail without so much trail culture around it made for more genuine interactions with the locals.

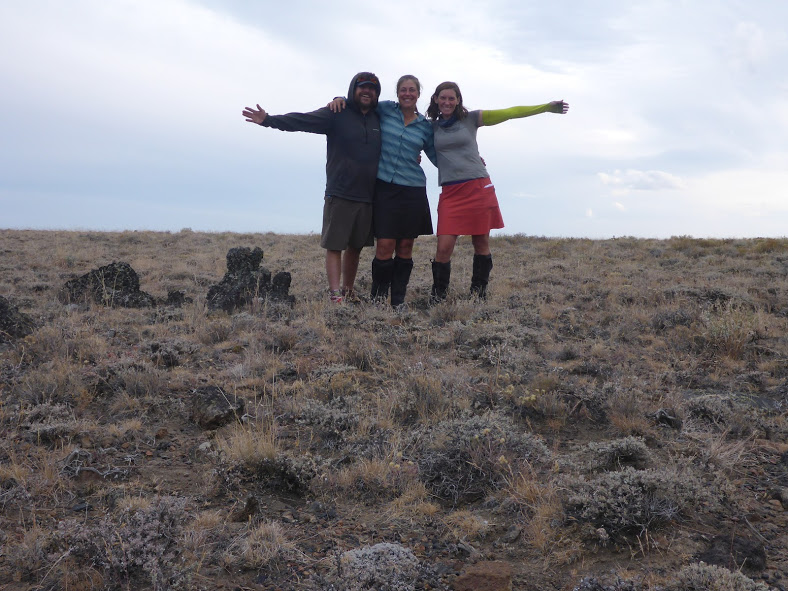
Another reason to hike this trail is the lack of crowds. The total number of permits issued for the PCT in 2018 was 7,313. That’s in stark contrast to the number of other hikers I saw aside from my hiking partners, which was zero in 30 days. This provides a wonderful opportunity to unplug and truly clear your mind.

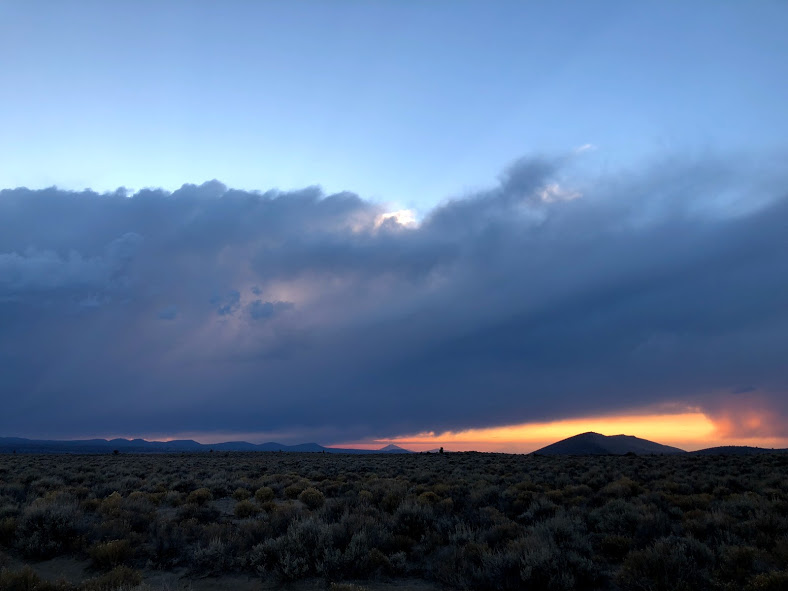
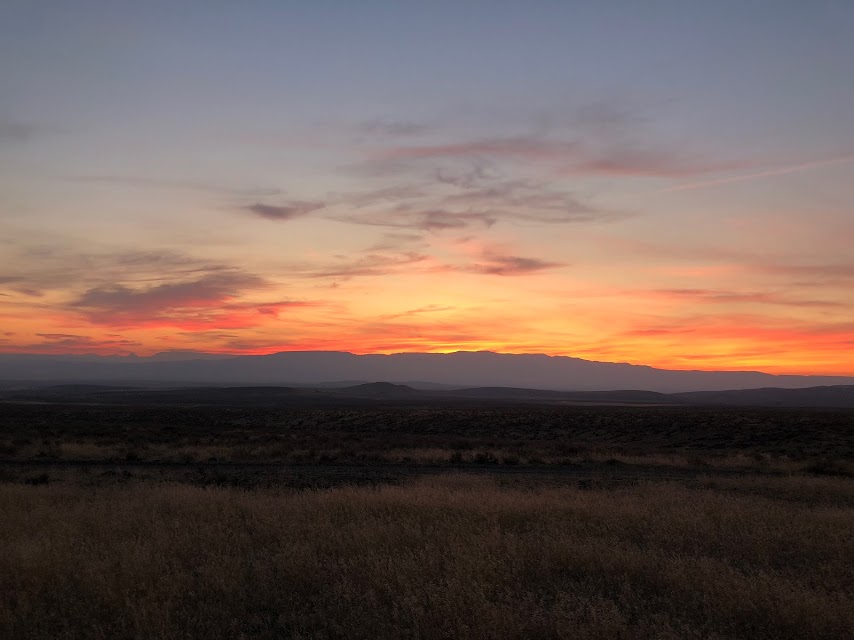
Another benefit of the remoteness of the ODT is the lack of light pollution, which allows for some of the most incredible night skies I’ve ever experienced. The wide-open expansive horizons also showcased vibrant sunrises and sunsets almost daily.

I found that being on a trail without so much trail culture around it made for more genuine interactions with the locals.

This trail also passes several hot springs, including Summer Lake Hot Springs and Hunter’s Hot Springs, as well as Hart Mountain Hot Springs, Alvord Hot Springs, and several soaking pools in the Owyhee Canyonlands. This is thanks to the region’s rich volcanic history, which adds to the interesting geologic features of the region.

Aside from all this, the greatest reason to hike this trail is for the freedom and challenge it provides. From heat to navigation to water challenges, the ODT will test your limits every day. Furthermore, the freedom to hike as you wish, without anyone telling you you’re “doing it wrong” is also extremely refreshing.

Climate, Weather, and When to Hike

cow tank water

This region gets HOT in the summer, making the ideal seasons for hiking here in the spring or fall. Each option has its own unique challenges and considerations. For example, water is more likely to be available in the spring than in the fall. However, if you start late enough, the fall is likely to be cooler. I also just find autumn to be a very pleasant time to be in the desert.

We completed our ODT thru-hike from Sept. 1-30. The first week, daytime temperatures were in the high 80s and low 90s, but cooled  to high 50s and mid 60s later in the hike. Our nighttime temps ranged from low 20s to mid 40s. The only rain we experienced was a brief shower our last morning on trail.

Oregon Desert Trail Gear Suggestions

ODT

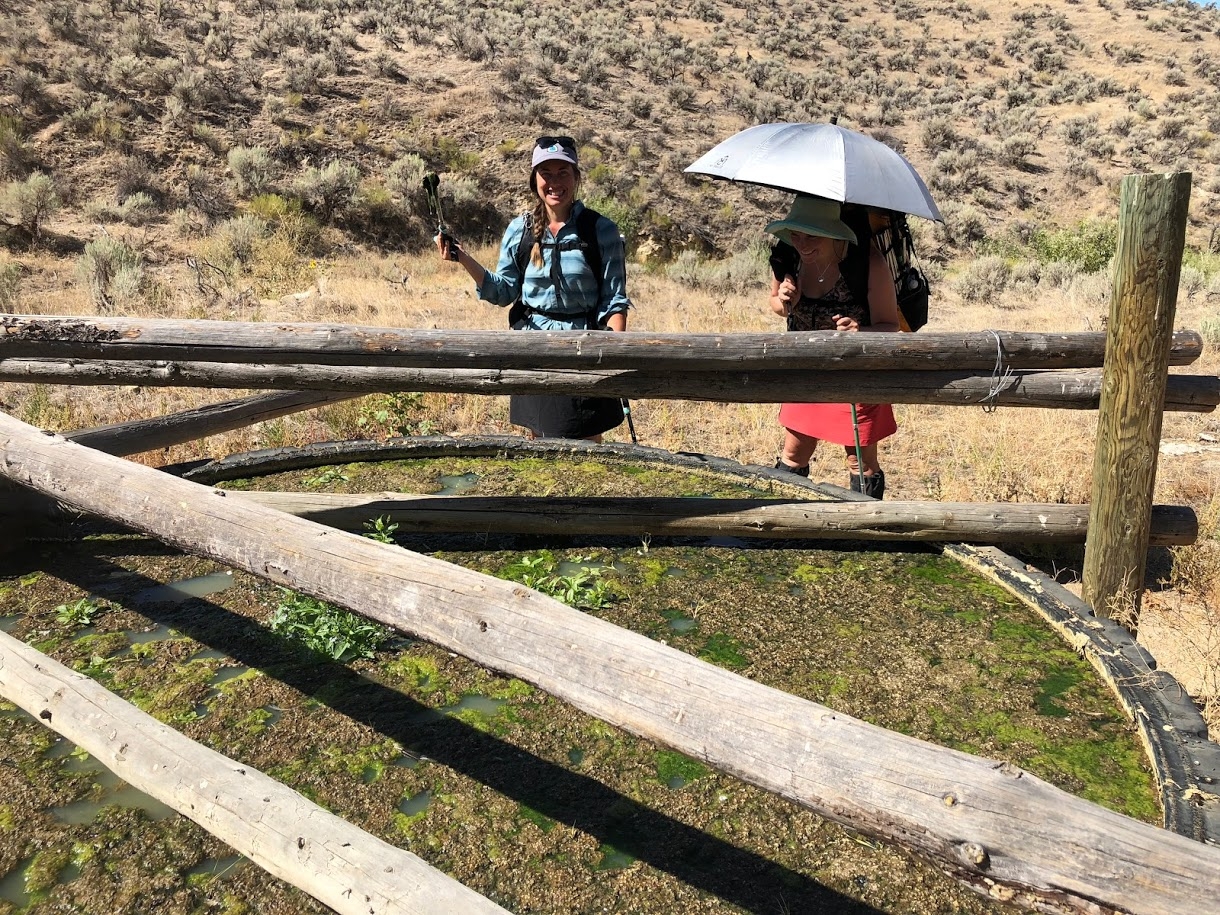
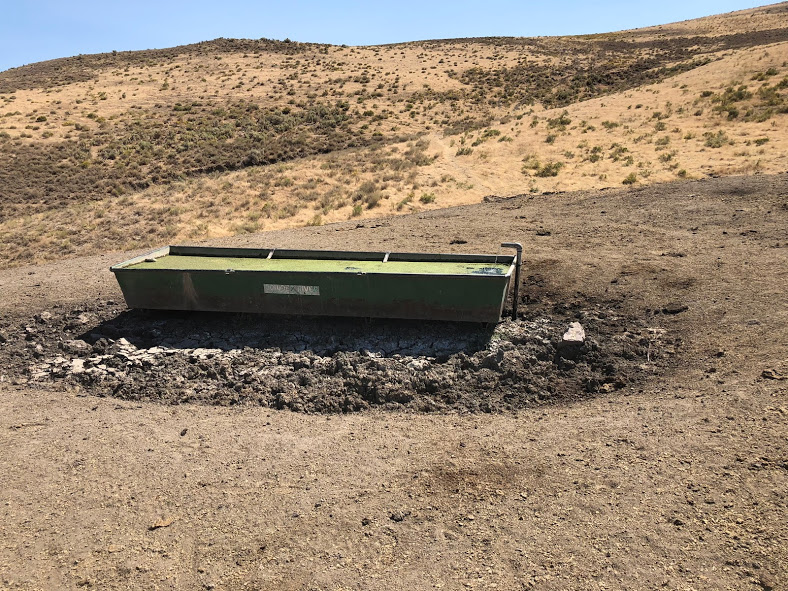
Like most desert ecosystems, the ODT is harsh. There are many pokey things, as well as venomous fauna like scorpions and rattlesnakes (we saw 13). The biggest challeng,e however is water. Water sources may include streams or springs, but more often include cow tanks. Having reliable water treatment as well as a backup method is a good idea. For example, carrying a filter plus Aquatabs, in case your filter breaks (as mine did) or freezes. This is not the trail to test your luck with not treating water.

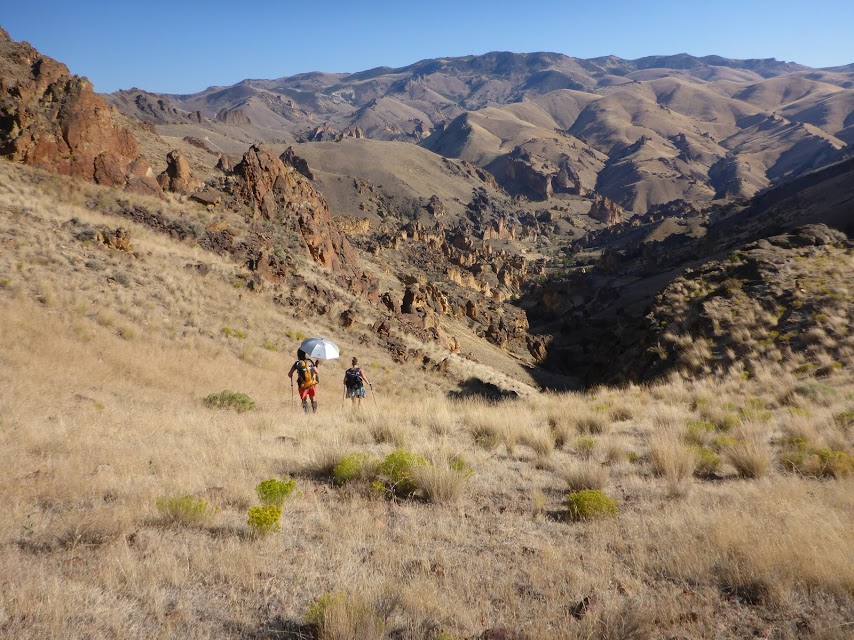
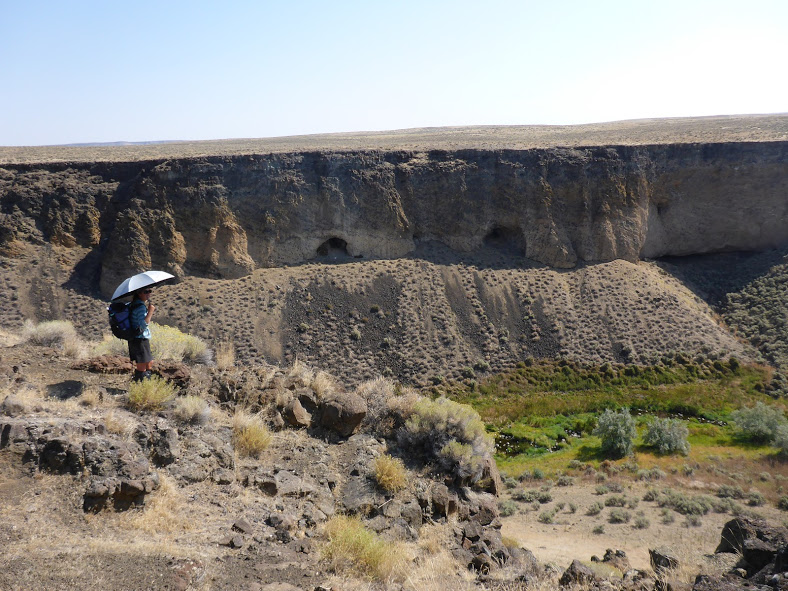
Because sources can be as far as 40 miles apart, I’d recommend a ten- to 12-liter carrying capacity. Keep in mind that these can be challenging cross-country miles with very little shade. On that note, a sun umbrella can also be incredibly helpful for creating your own personal shade.

Finally, while you certainly could hike this trail with only map and compass, I found having a GPS in addition to my paper maps made for more accurate and efficient navigation.

Camping

abert rim

As long as you’re not on private land, which is something to stay aware of on the ODT, you can essentially camp wherever you’d like. As expected, there are no shelters, and the route does not travel through any fee areas.

Oregon Desert Trail Highlights

crack in the ground

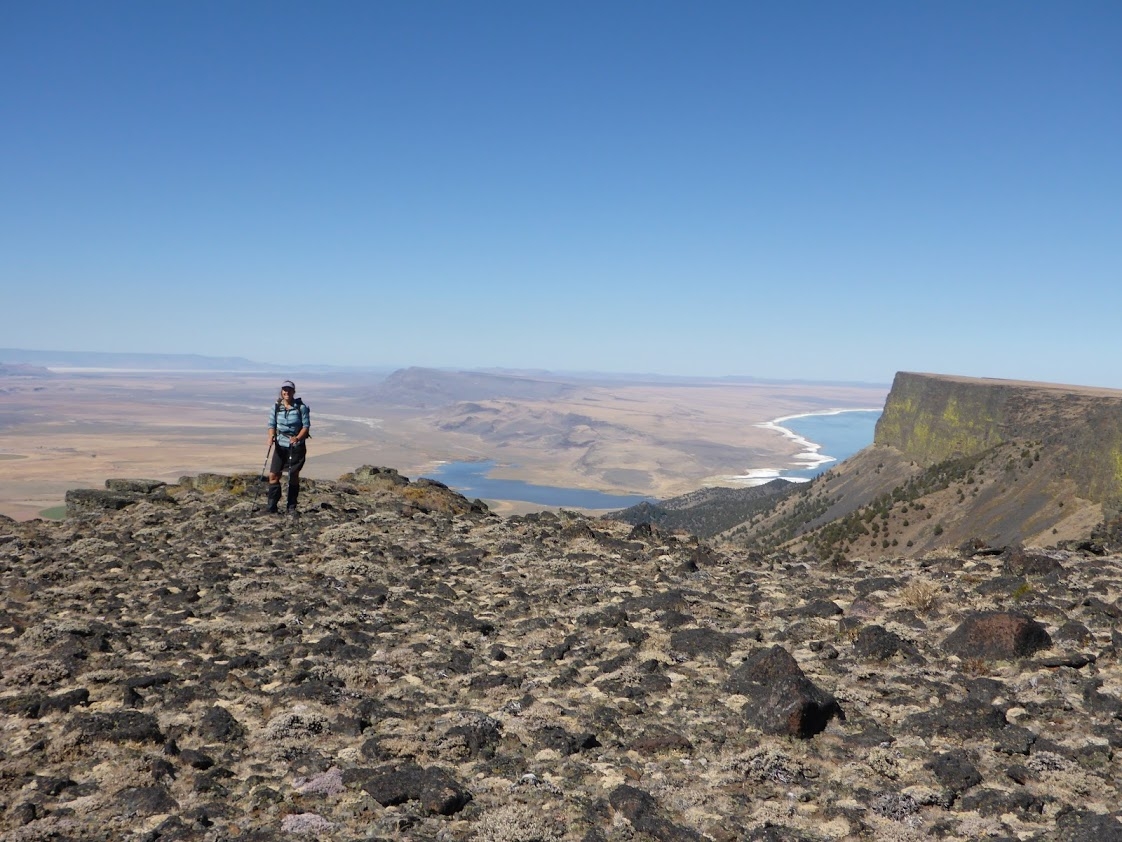
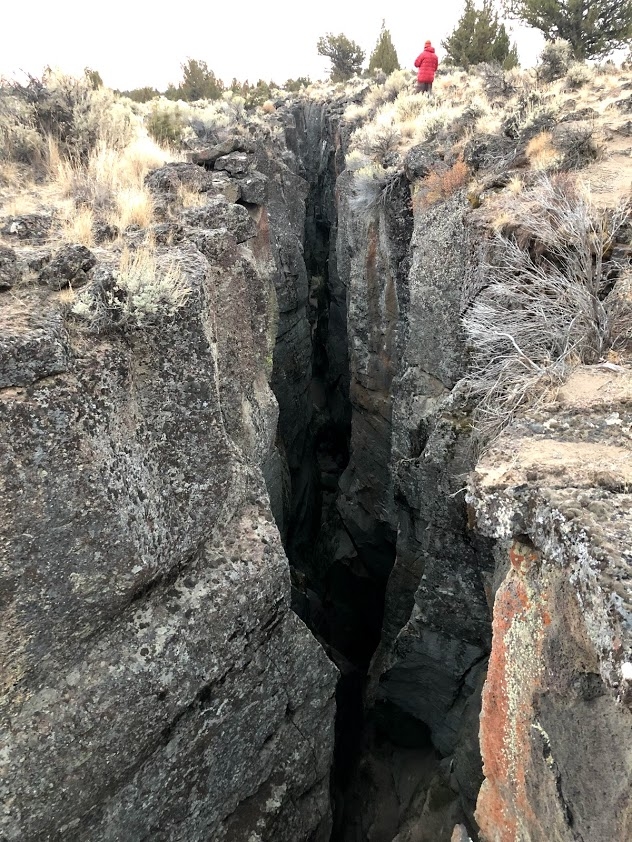
The ODT was much more diverse than I expected. In addition to the hot springs mentioned earlier, some standout sections include Steens Mountain, the Alvord Desert, and Hart Mountain Antelope Refuge. The trail also passes by petroglyphs as well as several fascinating volcanic features, like Crack-in-the-Ground.

Water Sources

Water is the crux of the route. When I hiked in 2018, the region experienced one of the hottest and driest summers on record, making water during our fall hike a challenge. At one point, we each carried three gallons (that’s 24 pounds!). Sources range from streams to lakes to springs to cow tanks. Some are clear, many are murky.

The most valuable resource for water on the ODT is the water report hosted on ONDA’s website. It’s a Google spreadsheet, so hikers are able to make notes in the field and it syncs once you’re back on Wi-Fi. Sources are ranked as unreliable, questionable, and reliable, and the report contains notes from the current year as well as past years. This was incredibly helpful as we found 2018 more closely matched with 2015 in terms of which sources we could expect to be reliable. We never counted on a source that wasn’t labeled reliable.

Most hikers will also want to cache water in the western 160 miles of trail. ONDA may be able to assist with this for a $10 donation. More details are found on the ‘Water’ tab of the Trail Resources page.

Resupply Options

oregon desert trail water

The trail travels through or near 16 communities, allowing hikers to resupply often. Many of the towns are on trail or only require a short (<10 mile) hitch. ONDA offers an extensive town guide to help with resupply planning.

Several of the towns are quite small, with limited or expensive options, so it’s helpful to send boxes.  In terms of food, you can see where and how I resupplied here, which includes where, what, and how much food I sent. I mostly mailed myself boxes and regretted the stops where I didn’t. Here’s how I approached creating a healthy resupply in a remote town with limited options.

Small, remote towns also mean you need to be more self-sufficient in your packing than you would on more well-populated routes. Be prepared for something to go wrong. For example, when my phone died on day three, there was no Apple store anywhere within hundreds of miles, let alone in the next resupply town. Without GPS, having paper maps and compass was essential. Also, do not expect many gear stores, so carry what you need or send it to yourself in advance.

The upside of all this is that the ODT was for sure, mile for mile, the cheapest trail I’ve ever hiked. With only two hotel stays, a few restaurant meals, and no reason to linger in towns, it’s hard to blow a bunch of money even if you’re trying. 

Closing Thoughts

ODT sunset

The ODT is a remote and challenging route for experienced hikers (after all, you have to sign a waiver to access planning materials on ONDA’s site). The landscape is diverse and rewarding, and those night skies and hot springs can’t be beat.

The ODT is also unique because of ONDA’s focus on conservation through responsible use. Furthermore, trail coordinator Renee “She-ra” Patrick is a thru-hiker, and she’s done an impressive job creating a wealth of resources for anyone planning an ODT hike.

For a trip report and more planning resources, including a free resupply planning template, find more at my website and on my hiking partner’s website.

Oh, and expect to see a lot of cows.

Five Steps to Prepare for a Successful Thru-hike

thru-hike

So you’ve got a thru-hike planned for this summer and you’re deep in preparation mode as hikers are wont to do in the cold, dark months of winter. But it feels like there are a million pieces to get in place. Where do you even start? What are you forgetting? As you dream of alpine lakes and sunshine, here are five key steps to consider before embarking on your adventure.

This post is designed to provide a very broad overview of the planning process and some things that you should likely be thinking about. Each of these topics alone could be an entire article (and they may be at some point).

Here’s what I’ve learned from ~5000 miles of backpacking and planning multiple thru-hikes.

thru-hike
Cross country travel on the Oregon Desert Trail

Master Your Mindset

  • Commit. You can’t be wishy-washy. You must commit in your heart to what you intend to achieve because thru-hikes don’t just happen accidentally. You can’t go out with the mindset of “well, I’ll give it a shot and see what happens”. That rarely works. Yes, be flexible and fluid, but also know your end goal. That (not fully in) was my mindset when a friend asked me join him on his thru-hike of the AT. I figured I’d tag along, and who knows, maybe I’d thru-hike. Of course, I didn’t. Shit hit the fan in my off-trail life and I had to bail early. Compare that with my PCT hike, where I went in with the mindset of “I will do everything in my power to thru-hike this trail”. And I did. Because I’d been mentally preparing for months.
  • Take personal responsibility. Commitment means taking personal responsibility for the results in your life. This means you take responsibility for your thoughts, your feelings, your words, and your actions. You stop blaming and complaining and outsourcing your happiness to the control of anyone other than yourself. When you fully step into this mentality, it’s incredibly liberating. You realize you create the results you desire and you get caught up a lot less by all the road bumps along the way.
  • Know your WHY. To stay motivated over the long haul, have a clear sense of why you’re out there. If you know your why, when the going gets tough (and it will), you’ll find reserves of energy and perseverance you didn’t even know you had.
  • Anticipate challenges and how you will work through them. Know that you’ll miss your loved ones, you’ll be physically & emotionally uncomfortable (frequently), things won’t work out as you planned, and you may be alone more than you’re used to. Be mentally prepared for all of this. But also know that your time spent on your adventure will likely be deeply transformative and nourishing to your soul, so prepare for that too 🙂
  • Spend your energy on the right things. Preparation begins in the mind, but it doesn’t end there. It helps to prepare your physical body as well. Many hikers spend far too much time obsessing over gear, food, weather and other minutiae, and while those things have their importance, it’s physical preparation (more on that in a moment) and mindset that will result in a successful journey.
thru-hike colorado trail
Snacking and strategizing on a Colorado Trail thru-hike

Start Planning. All the Planning.

  • Dial in your budget. Running out of money is one of the top reasons hikers quit long trails. That’s unfortunate because it’s totally preventable. There are lots of planning resources out there. Know your budget. Start saving months in advance.
  • Get the maps you need and know how to navigate. Do your research to determine which maps you need. If you’re hiking one of the triple crown trails, the ATC, PCTA, and CDTC are good places to start. Learn how to navigate here.
  • Know the skills you’ll need for your chosen adventure and prepare accordingly with classes, practice, and proper gear. Will there be snow travel? Desert travel? Off trail navigation?
  • Learn Leave No Trace ethics and practice them on trail. Also learn about proper town etiquette and practice that as well. Remember, that you’re an ambassador of the trail.
  • Make an itinerary and share it with loved ones. You’ll almost certainly stray from it, but it’s good to have a general outline of where you’ll be and when. Learn more about how to stay safe in the backcountry.
  • Talk with someone who has done what you’re planning to do. This can help you spot holes in your preparations and relieve a lot of anxiety (and get you even more excited). The American Long Distance Hiking Association-West Rucks are a fantastic opportunity for this. You can also read blogs and visit forums, but be careful with that. It can be a total time suck and, remember, everyone will have an opinion, but that doesn’t mean their advice is right for you.
  • Plan, but don’t over-plan. Realize that life on trail is no different than life at home and that things happen which you can’t predict. Stay fluid and flexible and willing to roll with whatever comes your way. Remember that you’re capable and nearly everything is figure-out-able. One of the greatest gifts of the trail is the self confidence gained from realizing that you can handle whatever comes your way, and that in most cases, it’s not that big of a deal.
  • A lot of anxiety comes from fears in the back of our mind. Because we haven’t articulated those concerns, they feel nebulous and give us a sense of dread. Try ‘worst case scenario’ thinking. For example, say your resupply box doesn’t show up at your town stop. Now what? What’s the worst case scenario? What would you do to fix the situation? You’ll likely come up with a solution. Play out these scenarios ahead of time and you’ll often find that you’re overemphasizing the negative consequences in your mind and it really wouldn’t be that bad.

Dial In The Gear

  • Proper gear is worth the investment. I’m not saying you need to spend a fortune, but you do need to find gear that’s durable, functional, and fits your body. I’ve made the mistake of carrying a backpack that didn’t fit me properly, but it was given to me, so I went with it. That resulted in months of back pain that didn’t resolve for weeks, even after my hike was over. Silly mistake. You don’t need to obsess or spend months shaving ounces and researching fabrics, but do make informed choices and purchase decent gear. In the same vein, replace old or worn out gear. This is essential in avoiding injury.
  • Once you’ve acquired your gear, field test it. Know how to use it. Go on a shakedown hike. You may find there’s something you need that you don’t have. Or more likely, things you have which you don’t need. Be selective. This will all be carried on your back for mile upon mile and a heavier pack means more wear and tear on your body.
  • Get a pack shakedown. Find a seasoned hiker to look over your gear. They may see something you don’t. Having an outside opinion can help you evaluate your choices.
  • Choose what’s best for you. What works for your hiking buddy or for the guy in the forum or for your sister may not be what works for you. Test your gear and choose what’s best for YOU. After all, you’ll be the one using it for months.
tiny town healthy resupply
A relatively healthy resupply bought from a tiny town convenience store on the Oregon Desert Trail

Strategize Your Food/Resupply

odt trio
Happy hikers on the ODT

Optimize Your Health

  • Physical preparation is essential to a smooth transition to full time exercise. You’ll be hiking for 8-12 hours per day. The body is incredibly adaptable, but to avoid injuries, it’s wise to prepare the body for this endeavor. There are several training plans on the internet. There’s also an entire 5 lesson module devoted to developing a personalized training plan in our online course Adventure Ready. Suffice it to say, physical preparation is a good idea.
  • Get as healthy as you can before your hike to build resiliency and to get the most out of your experience. Don’t just survive out there. Instead choose to THRIVE. Backpacking can put a tremendous strain on the body and a long hike is incredibly depleting. Illness and injury take hikers off the trail every season. Give yourself the best possible chance of success by getting your health dialed in for a successful adventure.
  • We cover all of this in the online course Adventure Ready. It’s the ultimate road map to optimizing your energy and endurance so you can take on your adventure with confidence and stay healthy to the finish line. You’ll learn mastering your mindset, eating for endless energy, optimizing gut health, preparing yourself physically, hacking sleep for better performance, and managing stress so it doesn’t undermine all your other efforts.

I hope this gave you some ideas and helped fill in gaps in your planning process. What did you find most helpful here? Which of the steps do you want to hear more about? Leave a comment below!

Get inspired, get outside, and have a safe and healthy adventure!

Oregon Desert Trail Overview

oregon desert tral

Oregon Desert Trail Overview

In the fall of 2018, I hiked the Oregon Desert Trail west-bound. I deeply enjoyed the vast open expanses and the lonesome nature of this route. I highly recommend it to other hikers, with advanced skill sets, who enjoy remote desert hiking. The present post is more of an overview of the trail, while this other post contains more photos and a few notes from my trail journal.

oregon desert trail

Distance & Location

The Oregon Desert Trail (ODT) is a 750-mile route through the high desert country of eastern Oregon. In the shape of a weird “W”, it’s made up of a network of trails, cross country travel, and two-track dirt roads. The termini are located in the Oregon Badlands Wilderness near Bend, Oregon, and in Lake Owyhee State Park, near the Idaho border.

oregeon desert trail xc

Terrain & Scenery

The ODT was developed by the Oregon Natural Desert Association as a means to promote conservation of Oregon’s spectacular high desert through low impact recreation. The trail traverses key natural areas including Hart Mountain National Antelope Refuge, Steens Mountain, Abert and Diablo Rims, and the Owyhee Canyonlands.

From ONDA’s website:

“To craft this 750-mile route located on public land and public rights-of-way, ONDA stitched existing trails, old Jeep tracks, and historical wagon roads together with stretches of cross-country travel. Our aims are to improve access to the wonders of the desert and to let explorers take a choose-your-own-adventure approach to getting to know this region.

Sections of the trail can be explored on foot or on horseback, or by boat, bike, or even skis in the winter. Some sections offer easy walks along well-marked paths. Other areas require GPS skills, significant outdoor experience, and serious preparation, particularly for water sources.”

odt sunset

I believe that interacting with a landscape is the best way to form a relationship with that land and to care about protecting it. Most of us no longer spend our entire lives on one piece of land, or even in one geographical region. We therefore lack the strong connection to a place that comes from depending on a land for your food and water, building materials, etc.

Recreating in a place for an extended time period is one of the closest proxies we have to that relationship in modern times. Rather than closing off a wild space, allowing people only to be spectators, such as in a museum, we can create corridors of travel where people can connect with a landscape by being immersed in it for days, weeks, or months.

The best resource for hikers wishing to complete the ODT is ONDA’s website. The trail coordinator for the ODT, Renee Patrick, is an experienced thru-hiker, and the resources she’s created and compiled for the trail in just a few years is incredible. You’ll find GPS data, town guides, a water report, trail conditions, and much more.

oregon desert trail jordan canyon

Weather & Climate

Most ODT hikes are completed in the spring or fall. Each option has its own unique challenges and considerations. For example, water is more likely to be available in the spring than in the fall. However, if you start late enough, the fall is likely to be cooler. I also just find autumn to be a very pleasant time to be in the desert.

We completed our ODT thru-hike from September 1-30. The first week, daytime temperatures were in the high 80s and low 90s, but cooled down to high 50s and mid 60s later in the hike. Our nighttime temps ranged from low 20s to mid 40s. The only rain we experienced was a brief shower our last morning on trail. This meant I was able to cowboy camp every single night of the hike 🙂

oregon desert trail water

Water & Resupply Options

Water was one of our biggest challenges. 2018 was one of the hottest and driest years on record in Oregon. The water report, a Google spreadsheet, is found on ONDA’s website and is updated by hikers. You can make notes directly on the spreadsheet in the field and it will automatically update the master spreadsheet when you get to WiFi.

Notes from previous years are in the document and we found the data from 2015, another dry year, most closely reflected what we could expect in terms of reliability for water sources. We never counted on a source unless it was labeled ‘Reliable’, and more than once we found ourselves carrying up to 3 gallons.  If we came upon water before we expected, it was a bonus. Sources include creeks, rivers, springs, reservoirs, and most often, cow tanks. Some were clear and delicious. Others were murky, covered in algae, and tasted very cow-y despite being filtered and chemically treated. Any water is good water in the desert.

The towns and communities along the ODT corridor are all pretty small. They have limited amenities. Partially due to lack of services, and partially due to arriving and departing at odd hours of the day, we were only able to shower twice and do laundry once the entire time. We washed our bodies and clothes on trail, where possible, but it was a very dusty, smelly, and salty 30 days overall. We used blue sponges and a small amount of water in a gallon ziploc bag each night to get the bulk of the grime off our legs before bed. This massively improved comfort, reduced foot issues, and kept sleeping bags at least moderately clean.

Small towns also require you to be more self-sufficient in your packing than you would on more well-populated routes. This means carrying a few more supplies and being prepared for something to go wrong. For example, when my phone died on day 3, there was no Apple store anywhere within hundreds of miles, let alone in the next resupply town. Without GPS, having paper maps and compass was essential. Further, you couldn’t expect gear, such as new shoes or a tent, to be available in towns. You need to send it to yourself. It’s not a big deal-you just need to think ahead, be creative with problem solving, and be flexible.

Also due to the remoteness of the route, and the small town sizes, food and resupply options are limited and often pricey. You can see more about where and how I resupplied here. I mostly mailed myself boxes and regretted the stops where I didn’t. Here’s how I approached creating a healthy-ish resupply in a remote town with limited options.

The upside of all this is that the ODT was for sure, mile for mile, the cheapest trail I’ve ever hiked. With only 2 hotel stays, a few restaurant meals, and no reason to linger in towns, it’s hard to blow a bunch of money even if you’re trying. Another upside of the ODT is that the route either goes directly through towns or very close, so there is very little hitching necessary.

odt trio

Trail Journal

I have an (almost) daily practice of journaling, whether on trail or off. See a few ODT journal excerpts here as well as many more photos.

Additional Resources

Want to stay in the loop? To be the first to know when new posts are published, subscribe to our newsletter here

How to Create a Healthy Resupply in a Tiny Town

oregon desert trail

What to Eat When the Healthy Choices are Non-existent or Obscure

Let’s start with a quick story of an experience I had like this on the Oregon Desert Trail. We had just walked the remaining 7 miles into McDermitt, NV, arriving around 8am for what would be the closest day we’d have to a zero on this 750-mile route through the very sparsely populated region of eastern Oregon.

It’d been 10 days of 90-degree dusty desert hiking since we’d had a shower, and 6 days since we’d had any meals other than backpacking food. I was jonesing for some vegetables. I’d been dreaming of a big bowl of dark leafy greens with tomatoes, beets, walnuts, avocado, olive oil, and balsamic vinegar.

Alas, as much as I’d prayed to the desert gods for some real, healthy food, I knew I wasn’t going to find it here. McD is a ranching, farming, and mining town that straddles the NV/OR border. It consists of a motel, a cafe/casino, a PO, a high school, and an all-in-one gas station/market/convenience store. This was one of the few places I didn’t mail myself a resupply box on the ODT and I was immediately regretting it.

tiny town resupply
Veggies were sparse in McDermitt, NV.

After our first (of four) meals at the Say When Casino and Cafe, it was time to create our resupply for the next 5 days. We walked into the small gas station/market/c-store and I saw about 8 rows of packaged foods, some coolers of soda and beer, and a small stand of “fresh” produce (Hey, at least there’s some produce at all!). Time to get creative.

There are many such towns from which you may have to resupply, especially if you are going to hike any trails or routes off the beaten path. And especially if you decide to hike in one of the most remote regions of the country.

convenience store

How to Approach Eating for Optimal Health and Energy in a Tiny Town C-Store

First, accept that you’ll have to make some compromises, but don’t give up on the goal of healthy eating entirely! It may all look like junk, but some choices are better than others here. Let’s look more closely.

Don’t make the process overwhelming. The process is simple.

  • Make Your List

Until you get the hang of what items you need for a healthy resupply, and before going into the store, write a short list of ideas for breakfast/lunch/dinner/snacks/beverages. For efficiency and cost, choose items that can be used in multiple ways for different meals (like corn chips you’ll eat with PB for lunch and again with beans for dinner OR trail mix that can be added to oatmeal for breakfast or used as a stand alone snack). Keep your list general: nut butter, salami, breakfast bars, oatmeal, nut butter, etc. Be sure to have a mixture of flavors and textures as well as macronutrients (aiming for about 20% protein, 40% fat, 40% carb-or whatever feels best for your body).

  • Choose Your Food

Browse the shelves. When you see an item from your list, you’ll likely see multiple different varieties (chips/pb/trail mixes/etc). Which to choose? Look at the ingredient label. You are looking for the least number of ingredients possible. You are also looking to avoid added industrial oils, preservatives, food colorings, and high fructose corn syrup when possible. Unfortunately, it’s not always possible in these tiny stores, but do your best. You are also looking for items in their most whole food/least processed form. Focus on proteins, healthy fats (olive oil, avocados, coconut oil, nuts), and low sugar carbs.

If there is a produce section, look for the freshest (not wilted or bruised), most nutrient-dense items to either pack out or eat before leaving town. Amazingly, many of these tiny places sell avocados (great for potassium, fiber, antioxidants). Bags of spinach or carrots are also widely available and easy to pack out.

  • Calculate Your Calories

Before leaving the store, use your phone calculator to quickly get an estimate of the calories. This takes less than 5 minutes and can help you avoid overspending on (and carrying) food you don’t need and/or assure you that you have enough if you’re feeling uncertain.

For the amount of calories you need each day, that will take a bit of experimentation, but use this calculator (or something similar) to get in the ballpark, and adjust from there depending on terrain, climate, and whether you’re losing a bunch of weight or not. Add up the calories in your basket and divide by the number of days you plan to be out. Voila. If you want to go above and beyond, calculate your macros to be sure you have the right ratios of fat, protein, and carbs. This would likely be easiest by entering the foods into a free app, such as MyFitnessPal.

tiny town healthy resupply

What I Chose in McD for my 5-Day Resupply

My calorie goal for 5 days early in the trip was about 11,500, or 2,300 per day. Here’s what I found in the convenience store. A couple items, where noted, were leftover from my last box, but these calories could have been substituted with other bars or trail mix or another avocado from the c-store.

1 lb bag Tortilla Chips=1500 calories

1 lb whole carrots=150 calories

1 large avocado=300 calories

1 apple=100 calories

Dehydrated Refried Beans=300 calories

2 Coconut Oil packets (leftover from my last resupply)=240 calories

3 coconut-greens-collagen smoothie mixes (leftover from last resupply)=600 calories

3 Kates/Fourpoints bars (leftover from last resupply)=900 calories

3 Granola packets (leftover from last resupply)=750 calories

4 tuna pouches=300 calories

1 lb peanut butter=2600 calories

3 bags of fruit/seed/nut trail mix=2300 calories

Chocolate Bar=600 calories

Pepperoni=800 calories

Salami=700 calories

Electrolyte drink mix=50 calories

Kombucha (drank in town)=80 calories

total= ~12,200 calories

I usually pack just a little bit extra, such as a couple bars, for calories in case I’m hungrier than expected or take longer to reach the next town than expected.

As you can see, it’s not ‘perfect’ in terms of being organic, super high quality food, but it covers my nutritional bases, and it’s far from the typical pop-tarts/snickers/doritos resupply that could be purchased from the same store.

Even when options are limited, you can still make good choices that will fuel you for optimal energy and endurance!

For a deep dive into performance nutrition and meal planning for backpackers, check out our online course on the topic.

Fueling a Healthy Adventure on a Budget

wind river hike

This post originally appeared on the Trek


Besides “Do you carry a gun,” one the most common questions on trail is “What do you eat?

From battling constant hunger, to pack weight considerations, to sticking to a budget, planning your food strategy can be one of the most challenging aspects of a long-distance hike. If you want to eat healthy on trail? That can feel even more daunting. Aside from gear, food is one of the biggest expenses of a thru-hike.

A trait I’ve noticed in the most savvy, enduring hikers—those who find the resources to hit the trail again and again—is frugality. I don’t mean simply being cheap—I’m referring to an ability to optimize and use one’s resources wisely. Whether you’ve got a $3,000 budget or a $10,000 budget for your hike, the goal is finding the sweet spot of saving money without feeling deprived.

happy hikers sunset

If you don’t know your budget, try to figure it out. In 2017, running out of money was the second-leading cause of hikers quitting the AT and PCT, second only to injury. Make a plan and do your best to stick to it. More on that in a moment.

Many hikers believe that eating healthy on trail is more expensive than eating junk food. They also assume it’s time-consuming and difficult, which can drive many otherwise healthy eaters to choose readily-available, packaged foods. If you’re not sure how healthy eating can increase your performance on trail, check out this article about the potential dangers of fueling on processed foods.

Tips for hiking healthy on a budget

Yes, it’s possible to eat well on trail without breaking the bank. Once you train your mind to optimize for both healthy and budget-friendly options, they’ll start popping out everywhere. All recommendations are designed to be calorie-dense, nutrient-dense, and as lightweight as possible.

budget

Preparation before hitting the trail

Planning for a thru-hike is a lot of work, but preparing for a life-changing endeavor is part of the excitement. As far as food prep goes, I’m not going to sugarcoat it: healthy eating on a budget involves more effort than winging it and hoping you don’t go broke. Having a plan will prevent impulse spending and easily avoidable budget mistakes.

Many hikers are ambitious Type-A planners anyway, so dig into the details, make a spreadsheet, and have fun optimizing.

How to prepare in advance:

  1. Determine your resupply strategy. Will you be mailing boxes, resupplying in towns, or a combination of both? Do your research and choose what’s right for you. For the purposes of healthy eating and saving money, I’ve found a mix of in-town resupply and maildrops to be optimal. If you prefer hard-to-find items, such as specific supplements or protein powders, or if you have food intolerances, consider sending those items to your resupply location, and buy common items, such as cured meats, nut butters, and trail mix in town.
  2. Look over your potential resupply locations. In the places where a gas station or tiny store is your only option, send a box. Otherwise, you’re stuck paying high prices for less than optimal food. Five dollars for a Snickers bar? No thanks.
  3. Now that you know how many boxes you’re sending and where you’re sending them, it’s time to gather food. It’s beyond the scope of this article to detail how you determine your food requirements, but as a general rule, it will be based on your body size (and correspondingly, your base metabolic rate) plus how many miles you plan to hike per day. For example, I need about 3,500 calories per day—or about two pounds of food—to fuel 25-30 mile days once I’m a few weeks into a thru-hike. If it’s colder or the terrain is particularly rugged, that fuel requirement amount increases. Each person will have different needs based on their size, climate, terrain, etc. Make a list of healthy trail foods you know you’ll enjoy. Consider dried fruit, dehydrated beans and veggies, oats, quinoa, nuts, and nut butters, plus any other whole foods. The shorter the ingredient list, the better. For additional ideas, dive online or reference my ebook.
  4. With this list in hand, search online for the best price. Buying in bulk is a great way to cut costs.
    1. Consider Costco, Trader Joes, and grocery outlets like Shop’n’Kart, where you can find both conventional and organic options at lower prices. Find stores with bulk bins, which not only cuts down on packaging, but is often where you’ll find more whole-food options like nuts, dehydrated beans and grains, and dried fruit.
    2. Watch out for freeze-dried meals or protein bars marketed as “backpacking food.” These are often overpriced and not always particularly healthy. With a little know-how and experimentation, creating your own healthy meals can be easy and inexpensive.
    3. Consider shopping online. Find dehydrated fruits, veggies, and beans here and here . Choose products with nothing added-just the fruit/veggie/bean. Rehydrating these on trail is simple and an easy way to pack in fiber and vitamins. There are many online hubs for healthy snacks including Vitacost and Direct Eats.
    4. Depending on time and budget, you may opt to dehydrate some of your own meals. This is more labor intensive, but can save money in the long run. If you have access to inexpensive organic produce, a dehydrator, and you enjoy the process, consider this option. However, dehydrating your own meals is not essential for eating healthy on a budget.
    5. Brainstorm options based on personal connections, and where you live. Do you have a friend in the restaurant industry? Ask them if you can tack on items to their next wholesale order, or ask if they’ll take you to Restaurant Depot. Pay them back promptly and do them a favor in the future. I worked as a pastry chef before my PCT hike and this strategy is how I made 30 pounds of various trail mixes for much cheaper than purchasing retail.
    6. Once you have all your materials, sort them into location-specific boxes. The amount of food in each box will depend on your daily calorie requirements, your daily mileage, and the distance to the next resupply point. Estimate for now, then dial it in on trail and make adjustments. Supplement your box with town purchases or hiker box snacks. Repackage food into appropriate serving sizes and divvy the food up into boxes. Spreadsheets are great for this.

For the love of whole foods

Eating more whole foods means you need less food. Even if personal and planetary health is low on your list of priorities, pretty much everyone cares about saving money and reducing pack weight. Research suggests that the added fiber, essential fatty acids, protein, and micronutrients in whole foods are more satiating and filling than ultra-processed foods. This means you can eat less, buy less, and carry less. Win win win.

cascade locks pct

On trail and in town

It can be hard not to spend a ton of money when you walk into a town famished. You’ve been dreaming about burgers, pizza, and beer for the last 100 miles. Enjoy yourself, but remember to have a plan.

  1. If you have a resupply box, pick it up before going to the store. Pack your food bag, and use extra food as town snacks. Yes, you’ll want to eat 24/7 while in town, but lessen the blow to your wallet by snacking on food you’ve already paid for.
  2. Take advantage of hiker boxes before you resupply at the grocery store. Sometimes you find gems like nut butters, healthy bars, olive oil packets, and dehydrated veggies. Be judicious, don’t empty the entire box into your food bag, and be sure to pay it forward by donating to hiker boxes down the line.
  3. At restaurants, have a tall glass of water (or three) and a salad before binging on all the pizza and ice cream. Celebrate that you didn’t have to carry that water from the source. When you fill up on veggies and hydrate yourself, not only are you making up for micronutrient deficiencies in your normal veg-poor diet, but you won’t need three large pizzas, two burgers, a case of beer, and a gallon of ice cream to feel full. Plus, the extra fiber will benefit your gut microbiome, which impacts your immunity, energy levels, and mental health.
  4. Buy in-town meals and snacks from the grocery store rather than going to restaurants for every meal. You’ll eat healthier and spend less. Pick up materials for a deluxe salad to make at the hotel room. Grab a bag of veggies to finish before hitting the trail again. Shop at stores with bulk bins, so you can get the exact amount you need and reduce packaging. Team up with your hiking buddy to add variety and split purchases when a desired item comes in a bigger size than you need.
  5. Buy from the grocery store rather than a gas station or small market. You’ll find healthier options, fresher food, and lower prices.
  6. Limit your time in town. Ultimately, spending time in town costs money—everything from lodging to food to transportation, so get in, get your chores done, rest, and get back out.

pacific crest trail

The Most Important Rule: Know Thyself

  • How much prep are you willing to do? Remember that buying is easier than dehydrating your own food.
  • What do you actually like to eat? Test it out before you send it in every resupply box.
  • Do you mind eating the same thing everyday? I don’t, but many people need variety.
  • How much do you eat? Hiker Hunger is real and it will set in eventually.
  • Are you prone to impulse buys in town? Set yourself up for success. Enjoy a good meal or two, but keep your long-term goal in mind.

Sticking with your budget shouldn’t feel like deprivation. It should feel good because you’re being considerate to your future self who wants to have the health and cash to finish the trail.

Pay attention

This final tip is simple, but generally overlooked (on and off trail). Awareness is the first step to behavior modification. Pay attention to where your resources are going. If you’re always looking for ways to optimize eating healthy and cheaply, the opportunities present themselves.

Small improvements in your eating and spending habits add up to big changes. You make it to the end of the 2000-mile trail one step at a time.