In August of 2020, Mountaineers Books reached out to Heather and I with the idea of writing a holistic guidebook to long distance hiking.
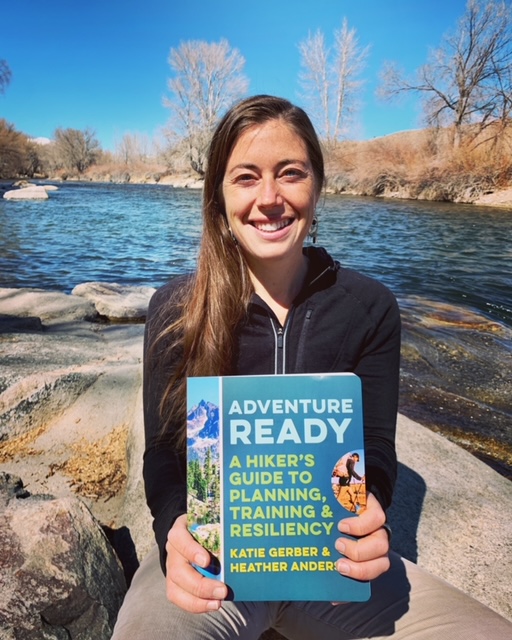
Today, after many hours of writing, editing, and waiting, it’s awesome to finally hold the finished physical book in my hands (see happy photo above) – AND for it to be ready to go out into the world.
Adventure Ready is a prescriptive guidebook to long distance hiking. It’s designed to maximize your enjoyment of your hike whether you’re a beginner who’s aspiring to complete your first long trail or a seasoned thru hiker who wants to improve your preparation, health, and overall experience on your next long walk.
In addition to providing our take on the traditional topics of trip planning, safety, navigation, and gear, we dive deep into the lesser explored areas of trail nutrition, physical training, and mental preparation. We also talk about how to take care of your body and mind during the challenge of transitioning back home after the trail.
The Adventure Ready book will be released in June 2022.
When you pre order using the below links, you’ll receive a SIGNED COPY from me as well as a DISCOUNT CODE to use on the more in depth Adventure Ready online curriculum so that you can get started learning today!
I was recently interviewed for a project with a popular outdoor magazine about my favorite methods for purifying water, how to find water in the backcountry, how to stay on top of hydration, and the effects of dehydration. I ended up not moving forward with the project after seeing the contract, but the interview had already been done and we covered some important topics, so I wanted to recreate it for this post.
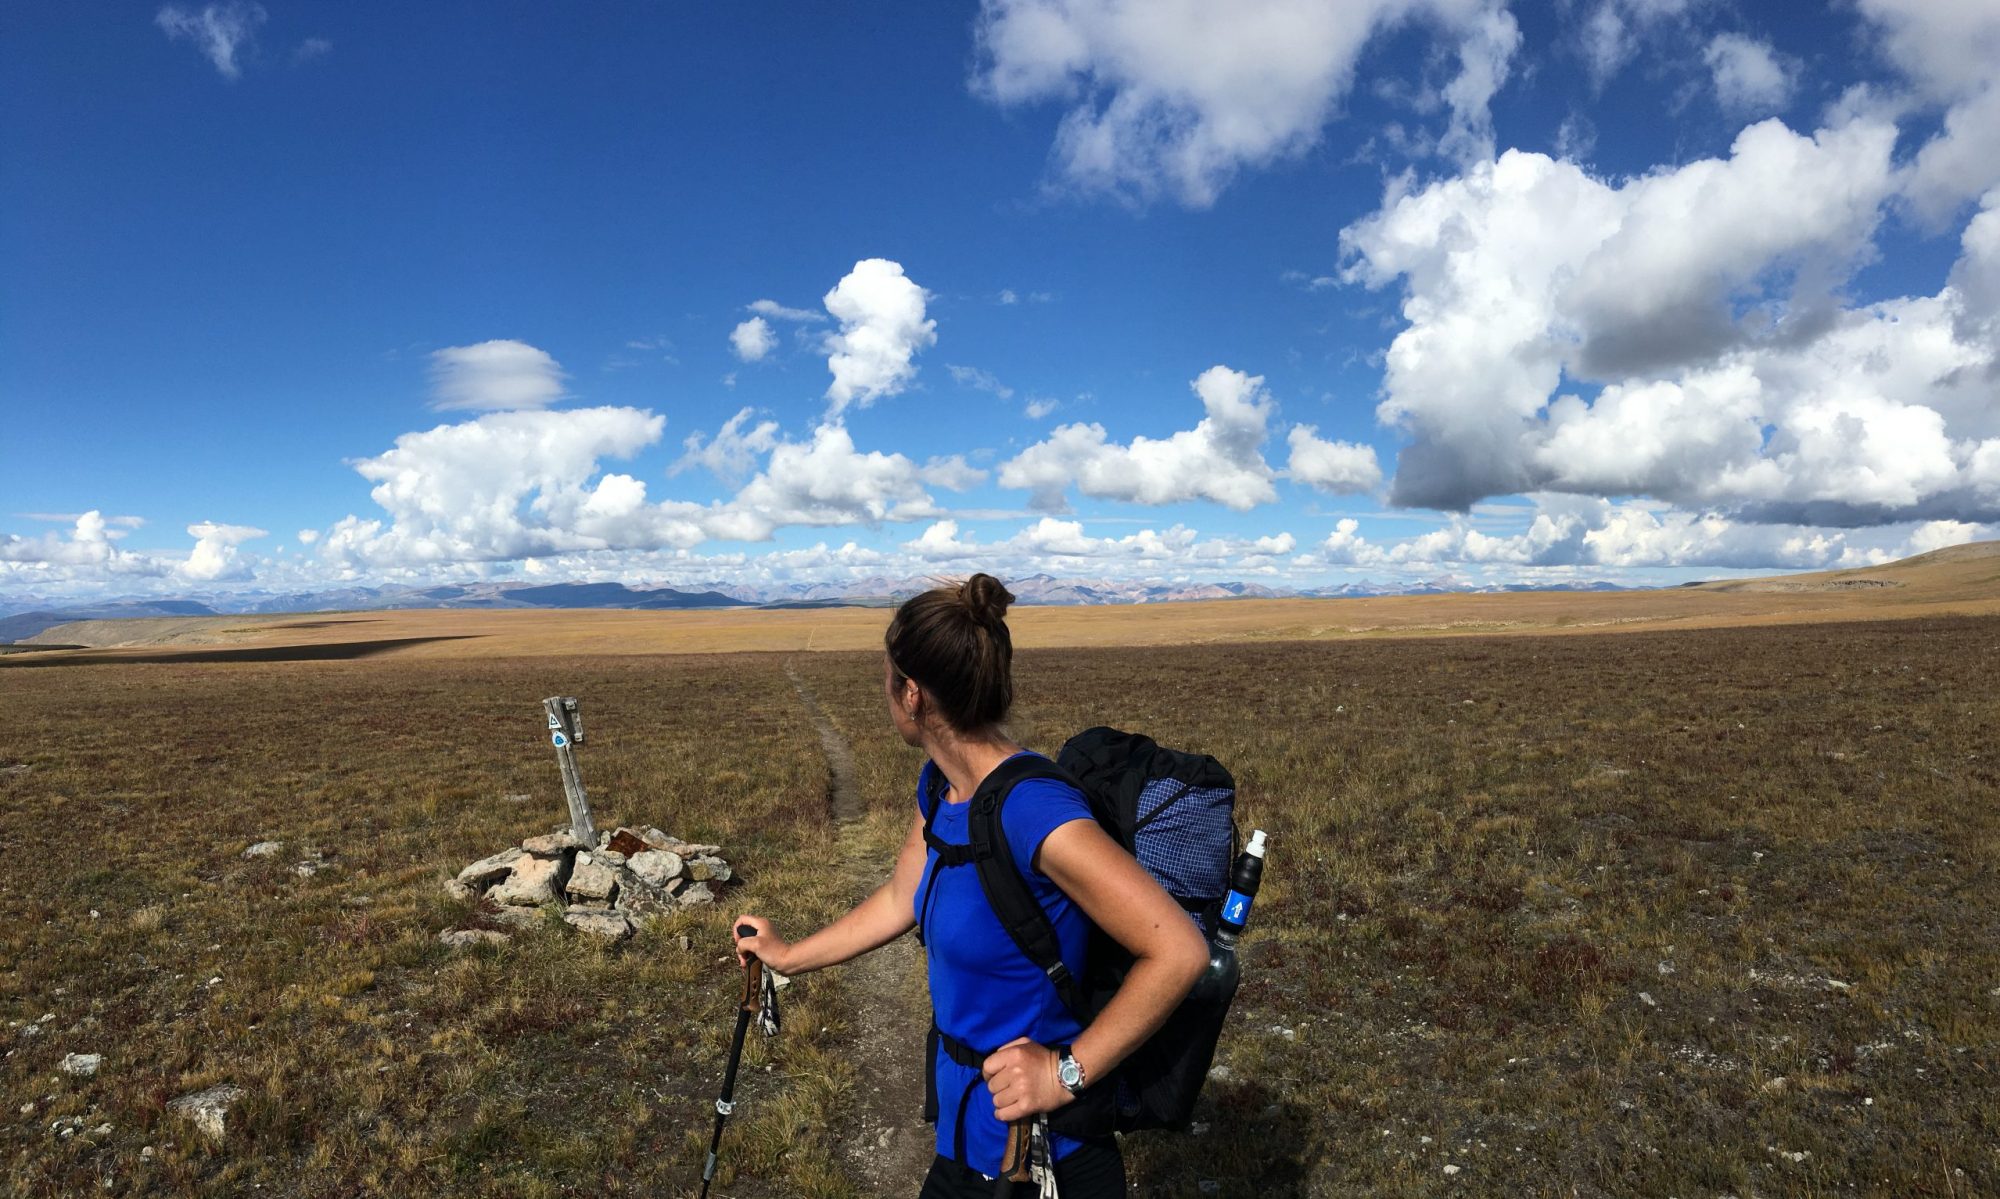
For context, this is based on my experience backpacking the Pacific Crest, Continental Divide, Oregon Desert, Colorado, and Great Basin Trails, in addition to dozens of shorter trips. I’m not a water expert, but I do have a lot of personal experience with this topic, and that’s what I’m sharing here.
Water is essential for survival and finding it and treating it can be a concern for many backpackers. Learning this information gets you one step closer to feeling more confident on your next backpacking trip.
How do you find water on a backpacking trip?
Above all, I believe that knowing how to read and interpret a topographic map is an invaluable backcountry skill. You can learn the basics by reading articles online or taking a course, and best of all, practicing in the field.
Before heading out for a trip, use a paper or digital map to locate water sources, such as lakes, rivers, creeks, etc. However, keep in mind that just seeing a blue line on the map is not enough. It’s important to think about when the map was created, how reliable the water source is, and whether it is likely to be flowing at the time of year you’ll be there. For example, sources are generally more likely to be flowing in the spring versus the fall. Satellite imagery, such as Google Earth and specific layers on mapping apps, such as the US Hydrography layer on Gaia GPS, can also be helpful for locating sources. Contacting locals and/or land managers can provide further insight into whether sources are flowing when you plan to go on your trip.
In addition to the above research, when you’re hiking a more established trail, such as the PCT, you can reference crowd-sourced water reports, such as sites like pctwater.com and on apps like the FarOut app (formerly Guthook). Be sure to note the date of any information you’re reading and take that into consideration.
How do you assess water quality in the backcountry?
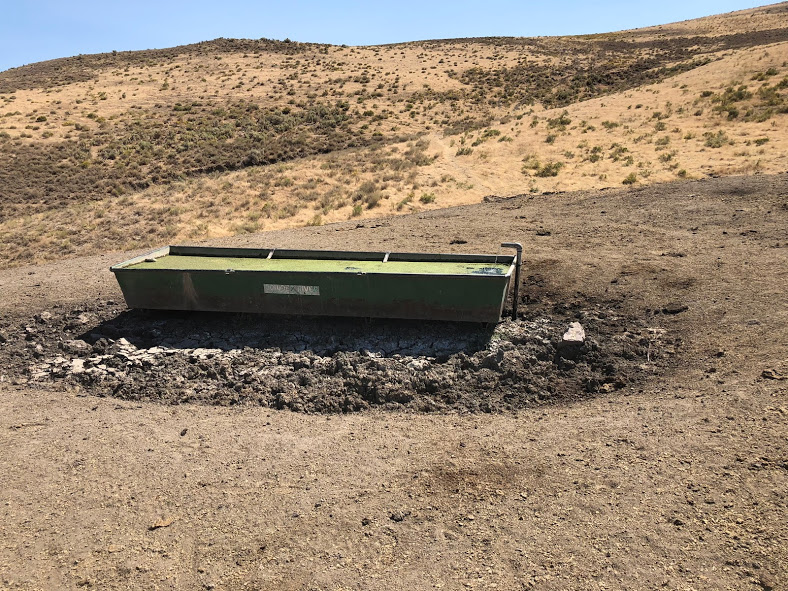
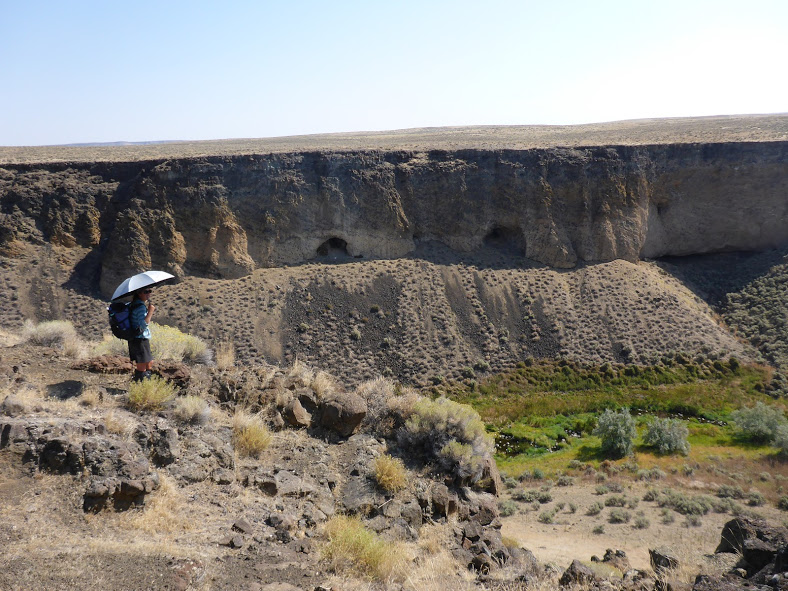
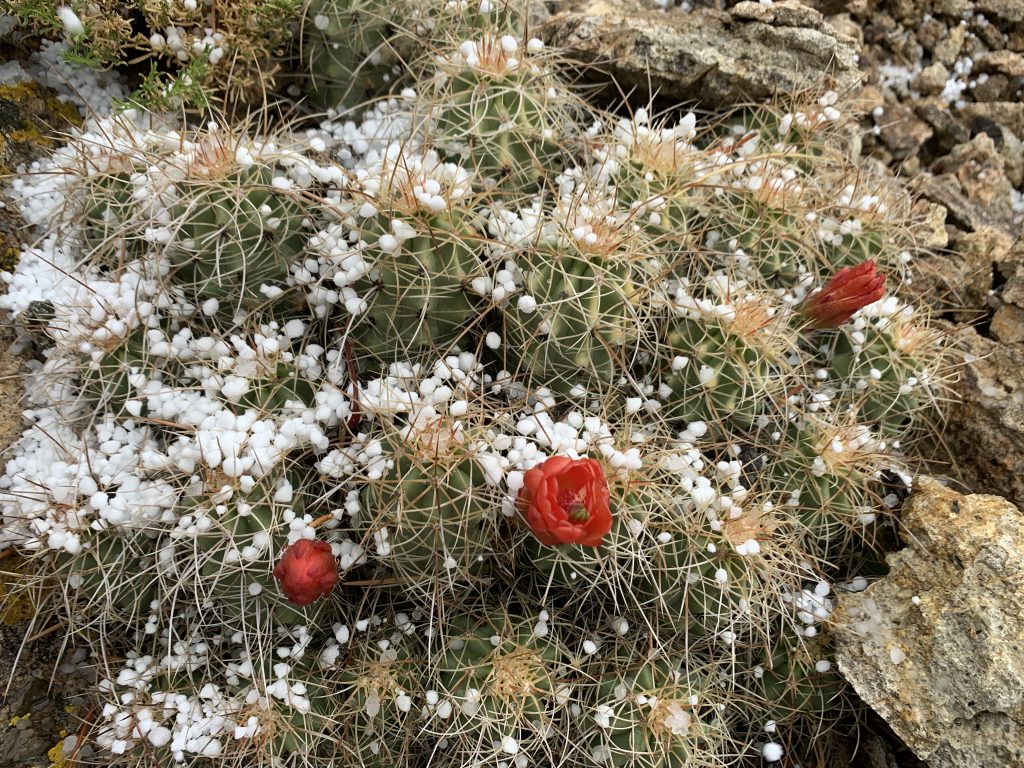
I’ve hiked in a lot of dry places, such as eastern Oregon, the Great Basin, the Mojave and other parts of Southern California, southern Utah, the Red Desert in Wyoming, and southern New Mexico. Water sources are often questionable and it’s not uncommon to need to collect water from cow tanks, potholes, and other less-than-ideal sources. That said, I always assess water quality, and choose the least disgusting source possible.
Some factors I use to assess water quality include:
Considering how far I am to the source – the closer to the source I can collect, the better.
Considering what’s upstream, such as livestock, wildlife, and other hikers.
The turbidity of the water – the clearer the better since sediment can reduce the effectiveness of certain purification methods, such as UV and chemicals.
Is there a chemical film and/or dead animals, such as cows, mice, or birds in the water? Dead animal water and chemical water is a no-go for me.
Does the source smell bad?
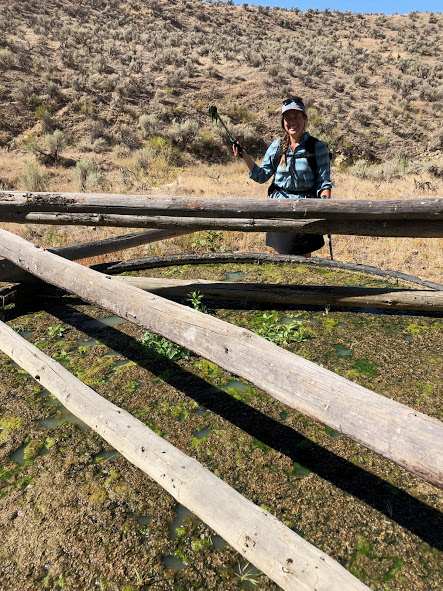
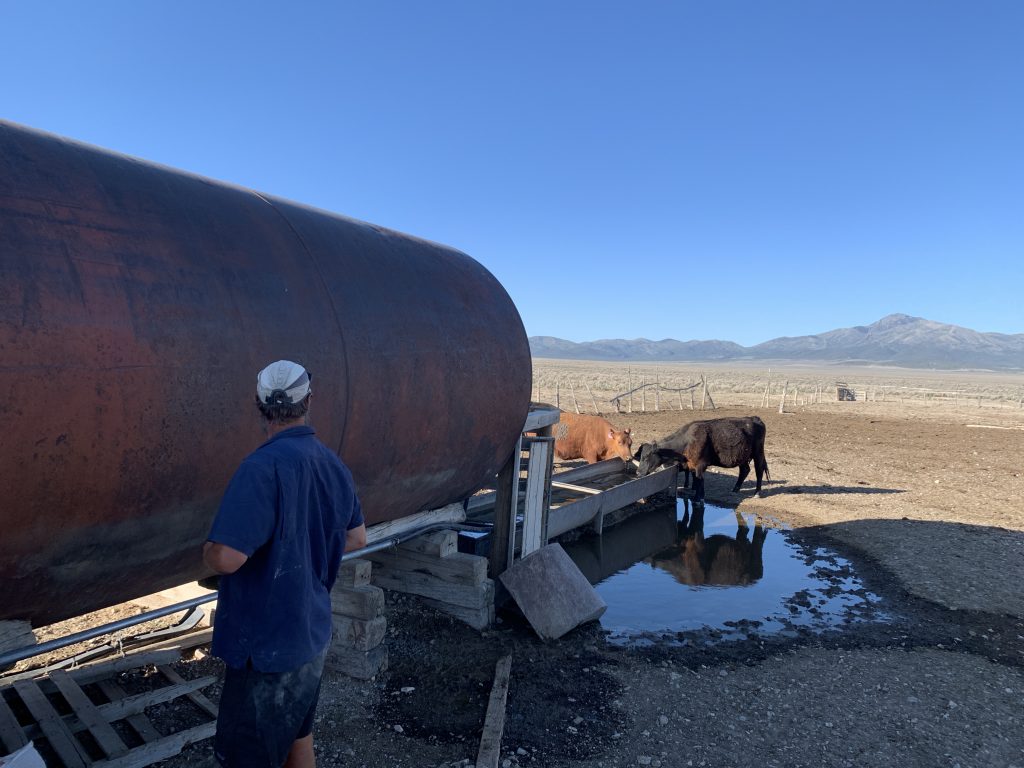
After pushing aside a layer of green, this source was clear and cold, but we avoided floaties all together by collecting right at the spout.
What is your favorite method for treating water?
There are several methods for treating water, including boiling, chemical, filtration, and UV light. My personal method of choice is an inline squeeze filter, such as a Sawyer Squeeze, which is compatible with a variety of water containers including hard-sided bottles and collapsible pouches.
I also use chemical filtration, such as Aquamira (aka chlorine dioxide) drops or tablets when it’s below 15 degrees Fahrenheit.
If I’m drinking from a particularly gross source, I might use multiple methods, such as filtering through a bandana or shirt to remove sediment, then treating chemically, then filtering through an a water filter.
When selecting your filtration option, it’s valuable to know the likely water contaminants in the area you’re traveling and what your chosen treatment method is, and is not, effective against. For example, most filters don’t filter out viruses, though viruses aren’t that common of a contaminant in most backcountry water sources in the U.S.
What do you look for in a water filter?
When selecting a water filter, I look for one which removes bacteria, parasites, and most chemicals and microplastics. I also want something lightweight, ideally less than 4-5 ounces including the bottle or pouch. The higher the flow rate the better as the time really adds up when you’re filtering 4-6 liters per day for months on end. I also want something compact so it doesn’t take up much space in my pack, and I want something that’s durable and made from high quality material so that I don’t have to constantly replace it and I can avoid creating more waste that will go into a landfill.
I spy water!
How do you stay on top of hydration during long days in the backcountry? What is the effect of dehydration? How do you avoid overhydration?
Staying hydrated is important for optimal functioning of your mind and body. As little as 2% dehydration can have impacts on your performance, including increased fatigue, muscle cramping, and a decline in cognitive function. I make sure to balance my water intake with electrolytes, such as potassium, magnesium, and sodium to avoid hyponatremia.
To ensure I stay hydrated, I know where my water sources are and I make sure I carry enough water with me to get from one source to the next. That amount varies based on the temperature, sun exposure, wind, and intensity of the section, but generally I carry enough to drink about 1 liter per 5 miles. I carry more if my next source is questionable, especially on a route where I have no one hiking ahead of me to provide beta. In addition to carrying enough, I make sure to keep water in an easy to access location, such as my side pockets, so that I can drink on the go without needing to take off my pack.
Any hydration or water tips you’d add to this? Share them below.
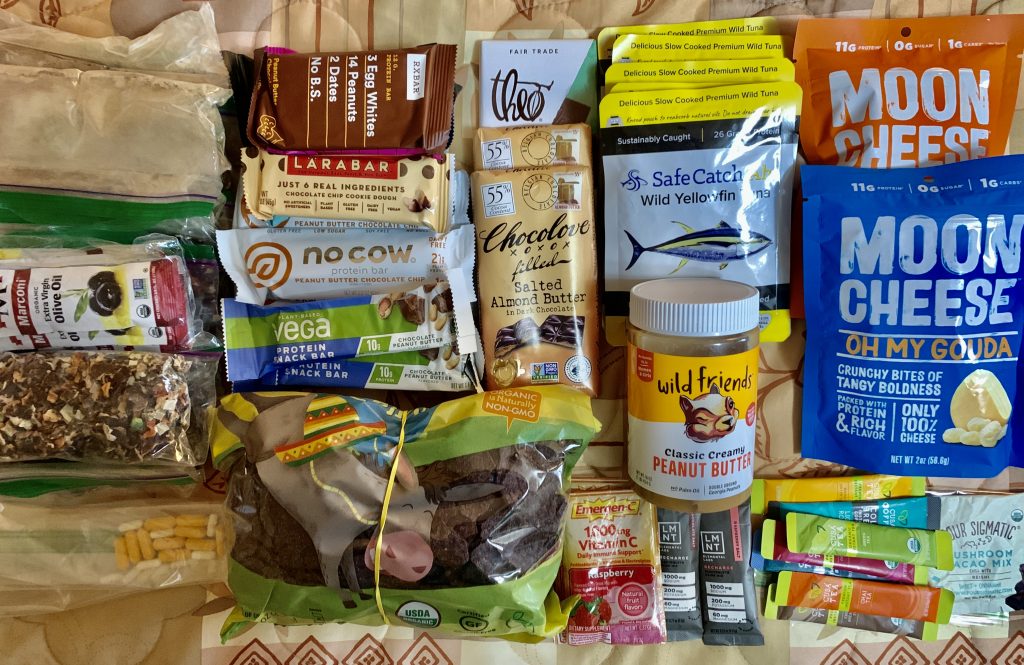
Today I’m featuring 8 of my favorite healthy hiker foods and trail supplements (and one book!) which enhance my energy, immunity, and performance in the backcountry. These products increase my enjoyment of my time outdoors and my intention with sharing is that they’ll do the same for you. Every one of these products are ones that I’ve used for hundreds of miles of backpacking trips and they’ve allowed me to stay strong and healthy on trail. Each makes a great gift for yourself or a health-minded outdoor enthusiast in your life.
After a few years of research and experimentation, collagen is now an essential component of my nutrition program, both on trail and at home. I have it every morning on trail as part of my daily trail smoothie. At home, I blend it into green smoothies, coffee, and even soups for added protein and joint support. In addition to using the powder, collagen bars are a great snack as well that I know are full of healthy protein. Collagen is the main structural protein in the various connective tissues in the body. Having enough collagen in the body is essential to good health, specifically stronger bones, pain-free joints, and a more secure gut lining.
Supplements are how I take my nutrition–and health–in the backcountry to the next level. They’re one of the factors I credit with being able to maintain consistent 30+ mile days on the CDT with an autoimmune condition. Even with good nutrition, it’s hard to get everything my body needs on trail exclusively from food. This is particularly true since vitamin and mineral stores are depleted more quickly with heavy exercise. Supplements help me fill in the gaps. This post shares the supplements I carried on the CDT. The standard disclaimer applies: I’m not a doctor and this is not a prescription. It’s just my experience. To ensure that I’m getting professional-grade supplements that haven’t been tampered with and aren’t full of sawdust, I order through Fullscript.
By setting up a free account here, you can receive 15% off of any supplements you order from November 28-December 2. If you already have an account, you’ll automatically receive an email for the promotion!
I discovered LMNT electrolytes last winter and used them on all of my hikes this past summer, including the Great Basin Trail, and while guiding as part of Andrew Skurka’s team. I’m hooked. Many electrolyte powders are high in sugar and low in actual electrolytes. No so with LMNT. They contain a good amount of the key electrolytes I’m looking for: Sodium, Potassium, and Magnesium, plus they’re sugar-free, gluten-free, and void of any other weird fillers. And the best part is their flavors are incredible. My favorites are chocolate salt and lemon habanero.
Access to fresh fruits and veggies is limited on trail, which is unfortunate because they’re powerhouses of antioxidants, which combat the exercise-induced oxidative damage caused by hiking for 10+ hours daily. To make up for micronutrient deficiencies on trail and support better energy and immunity, a serving of greens powder is another key ingredient in my daily trail smoothie. In addition to getting in more than a full serving of fruits and veggies, this product adds 1 billion+ CFU of probiotics to my trail diet to support better digestion and overall gut health.
This is another ingredient in my daily trail smoothie. Cordyceps increases oxygen uptake and has been shown to increase energy, endurance, and muscle recovery.
Protein is essential on trail for many reasons including minimizing muscle breakdown, supporting muscle synthesis during recovery, improving endurance, and enhancing glycogen storage in muscles, which is essential when you want to push your body. It also supports balanced blood sugar, and therefore, steady energy levels. I find it’s the most overlooked macronutrients in most hikers’ diets. When I found Wild Zora meat and veggie bars at Outdoor Retailer a few years ago, I was stoked. Not just a good source of protein, but with veggies included as well! Plus they’re paleo-friendly and offer a variety of tasty flavors. They’re a great alternative to the abundance of sweet bars out there.
Another good find at Outdoor Retailer. These granola-like clusters are the type of whole food snack I look for. They’re rich in antioxidants so they support good energy, immunity, and muscle recovery. They’re gluten free, dairy free, paleo and keto friendly. My favorites are the dark chocolate nut crunch and triple berry vanilla crunch.
I like these chips because 1) they’re salty and crunchy and 2) they contain only 3-4 real, recognizable ingredients rather than the 40+ ultra-processed ingredients found in other brands. They’re high calories per ounce, so they keep pack weight low, and they’re void of the inflammatory industrial seed oils found in most brands. These are something I tend to only indulge in on trail, but if I’m going to eat chips, this is what I look for.
After hearing the author, Michael Easter, interviewed on several podcasts and jiving with what he had to say, I recently decided to pick up his book and I’m so glad that I did. He weaves together personal stories, wisdom from traditional cultures, and science on why our modern lives often leave us tired and unfulfilled and how doing hard physical challenges in nature (e.g. backpacking) can refresh us physically, emotionally, and spiritually. A lot of it hits home for me and if you’re into the outdoors, it might for you too.
I hope these products add to your time in the outdoors as much as they have to mine.
In this video I share the mindset and health strategies that have helped me navigate post trail depression during the reintegration period after a thru-hike or other long adventure. My intention in sharing it is that it will help you navigate this seasonal transition as well.
Keep in mind that the scope of this video is limited. If you’re experiencing mental health struggles, please reach out to a licensed mental health practitioner.
For more support on the strategies discussed in this video or if you’re planning an upcoming backpacking trip, check out the Adventure Ready online course. It’s a complete roadmap to increased energy, optimal strength and health resilience on your next long distance hike.
Find the full curriculum, including mindset, physical training, nutrition, gut health, sleep optimization and more here!
In this video, I share the planning template I’ve been using short backpacking trips and for 14ers adventures this summer. Having a template or checklist helps me go from adventure idea to getting out the door faster without forgetting anything.
Feel free to use this template and customize it for your own adventures!
We’re in the thick of the wildfire season in the Western United States. There are currently 86 active large fires, which have burned 2,678,196 acres in 11 states. To date in 2021, there have been 43,017 fires that have burned 4,946,000 acres. Over 25,000 wildland firefighters across the country are working on these fires and thousands of residents have been evacuated. National Forests are being closed and many backpackers’ trips, including a large group that I was supposed to guide, are getting cancelled or re-routed.
Due to drought conditions, climate change, poor forest management, and an increasing urban-wildland interface, wildfires are an increasingly common and challenging part of living in the West. While wildfires play a critical role in ecological health, they also cause a lot of damage, destruction, and difficulty for humans. Aside from property damage, lost lives, and evacuations, the smoke from wildfires has the potential to negatively affect our health.
As wildfires are now a part of living life in the American West, what can we do to prevent or mitigate damage to our health, especially for those of us who love to spend time outdoors or during times when inhalation of smoke is inevitable?
Health Dangers of Wildfire Smoke
Wildfire smoke is composed of a mixture of fine and coarse particulate matter (PM), and gases, including carbon monoxide, nitrogen oxides, and volatile organic compounds. This mixture varies based on fuel, fire intensity, moisture, and other factors. One of the dangers of wildfire smoke is due to the ability of the particulates to become lodged in the lung tissue and other sensitive mucosal membranes and to create inflammation. Systematic reviews have revealed associated between wildfire smoke and all-cause mortality, as well as exacerbation of asthma, COPD, and respiratory infection. Evidence also suggests links between wildfire smoke and adverse reproductive, developmental and neurodegenerative diseases. Potential health risks depend on the sensitivity of the individual and the severity of the smoke.
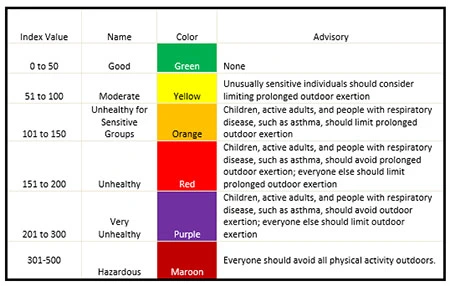
The severity of wildfire smoke is quantified via a value called Air Quality Index (AQI). AQI is the EPA’s measurement for reporting air quality. AQI is reported on a scale from 0-500+ with higher numbers indicating worse air quality and higher health concerns. An AQI below 100 indicates that air quality levels are generally safe for everyone. See chart below. Real time air quality index map.
Image from lung.org
Exposure to wildfire smoke may cause coughing, trouble breathing, runny nose, and in some cases symptoms similar to sinus infection, such as headaches, sore throat, and tiredness. Groups particularly at risk for health risks from wildfire smoke include children, pregnant women, the elderly, and those with heart and lung diseases. As one would expect, conditions such as asthma and COPD, may be exacerbated by smoke. The main concern for all individuals is damage to the respiratory and cardiovascular systems.
While inhaling wildfire smoke can certainly be unpleasant and potentially dangerous, in many cases damage does not appear to be long term, though more wildfire-specific studies are needed. Regarding the respiratory system, the lungs of most healthy adults can recover from smoke damage, according toJohn Balmes, MD, a pulmonologist and an expert on the effects of air pollutants. In terms of the cardiovascular system, short and long-term risks includes inflammation in the lungs which can become systemic and affect the whole body’s vascular function; increased risk of blood clots, which may lead to heart attack or stroke; and autonomic nervous system stimulation, which can lead to heart arrhythmia. As with respiratory damage, these effects seem to be temporary and subside when the smoke does.
How to Monitor Fires and Smoke Levels
An essential component of preventing health damage from wildfires and being aware of where large, active fires are burning, how large they are, wind direction and speed, expected precipitation, etc. If you plan to spend time outdoors, it also helps to read up on best practices during wildfire season.
Most public health recommendations for avoiding exposure to wildfire smoke include staying indoors, limiting the outdoor air that is brought indoors, and filtering indoor air. But what if you plan to be outside near an area where active fires are burning or what if you’re in a situation where some amount of smoke inhalation is inevitable? If you’ll be exposed to ongoing wildfire smoke and you’re concerned about potential health risks, and particularly if you’re sensitive to the effects, public health officials advise that the best form of individual protection is a well-fitting N95 or P100 respirator, which filters out PM2.5.
How to Take Care of Yourself After Wildfire Smoke Exposure
As mentioned, the respiratory and cardiovascular systems of most healthy adults will naturally recover from exposure to wildfire smoke in most cases. After you’ve been exposed to wildfire smoke, there are also actions you can take to support your body’s natural detoxification pathways and enhance the excretion of airborne pollutants.
The body detoxifies itself through the skin (sweat), the lungs (breath), the colon (bowel movements), and the liver and kidneys (urine). Engaging in practices that support the body’s natural detoxification processes and support healthy immune function include:
Drinking a lot of water
Choosing high quality whole foods which are rich in antioxidants
Using a sauna
Getting plenty of rest
Using a saline nasal spray or rinsing sinuses with a Neti Pot
Consuming specific foods, which enhance detoxification and support a healthy immune system:
Broccoli sprouts
Beets
Chlorella
Spirulina
Ginger
Matcha
Olive Oil
Wild Caught Fatty Fish
Teas with bitter herbs, such as dandelion, yellow dock, turmeric, burdock
Wondering how to stay strong and healthy on a multi-week backcountry trip?
It’s one of the most common questions I’ve been receiving recently from clients and readers and it’s a topic I spend a lot of time thinking about for my own adventures.
Taking care of your body on trail can help you avoid injury, illness, and the general depletion that many hikers experience towards the end of a long hike. While some degree of depletion is inevitable on a long trip, there are definitely strategies to slow the rate so that you can finish your hike successfully (and not be laid out for months afterward)
To that end, I just recorded a video with 5 strategies to stay healthy once you’re actually out on trail. You can find it here in the Holistic Hiker FB group or here if you’re not on FB.
In the video, I discuss:
*the importance of preparation before heading out for your adventure
*the role of your diet in staying healthy on trail and some resources for how to get started
*tips for taking care of your muscles, fascia, and joints on trail
*how to get adequate rest on trail
*how your pack weight influences your endurance on trail (this goes beyond just having lightweight gear)
Go give it a watch and let me know what you think!
Love,
Katie
For a deep dive into performance nutrition and meal planning for backpackers, check out our online course on the topic.
Wondering how to use nutrition to best support your body in repairing and replenishing after a challenging day hike or during a multi-day (or -month) backpacking trip?
I just went live in the Holistic Hiker FB group sharing the strategies I’ve gleaned from researching this topic while writing my upcoming book. This is what I teach clients when they ask:
>>What should I eat after hiking for faster recovery and increased performance the following day?
In the video, you’ll learn: *the benefits of optimizing your recovery nutrition *nutrient timing for maximum glycogen synthesis so you have the oomph to hike/train again the following day *the role of each macronutrient in a recovery meal *some myth busting around the type of protein and carbs that are ideal
In the video, I also share more about some big events in my life this past summer, the reason for the lapse in communication from me recently, and where things are headed next.
As always, thanks for being here.
I hope you’re staying healthy and having a fantastic summer with plenty of time spent outdoors.
Love, Katie
For a deep dive into performance nutrition and meal planning for backpackers, check out our online course on the topic.
This post is the second of two parts about my hike on the Great Basin Trail. You can read part 1, which is an overview of the trail, here: The Great Basin Trail: Trip Report & Guide. This part focuses on the gear I carried, how I prepared, and what I’d do differently.
Gear:
You can find my GBT gear list and rationale for the selections in this post, which I wrote before I left. For the most part, I was very happy with my gear selections.
Changes I made on trail or would make next time:
I would’ve carried tall gaiters or opted for pants instead of a dress. I love hiking in a dress, but there was A LOT of bushwhacking through sagebrush, mahogany, young aspen, briars, willows, and more. My legs got shredded, scraped, and bloody. I tolerated the discomfort, but the off trail sections would have been less taxing if I wasn’t also dealing with painful, scraped legs.
Two weeks in, once the weather was warming up, I mailed out my stove. I also mailed out my buff (which I wasn’t using), a pair of ankle socks, and a mid-layer fleece I threw in my pack last minute when I saw the potential for snow storms. Speaking of socks, I decided I prefer calf socks over ankle socks, which caused the skin on my Achilles to dry out and become irritated, so I won’t bother bringing any ankle socks in the future.
I swapped out my water filter for chemical water treatment. I highly prefer a water filter over chemical treatment because I don’t like the taste of chemically treated water and I value the health of my microbiome. However, we were often treating many liters of water at once and filtering was taking a long time. I’d still be at a water source filtering when my hiking partners were long gone.
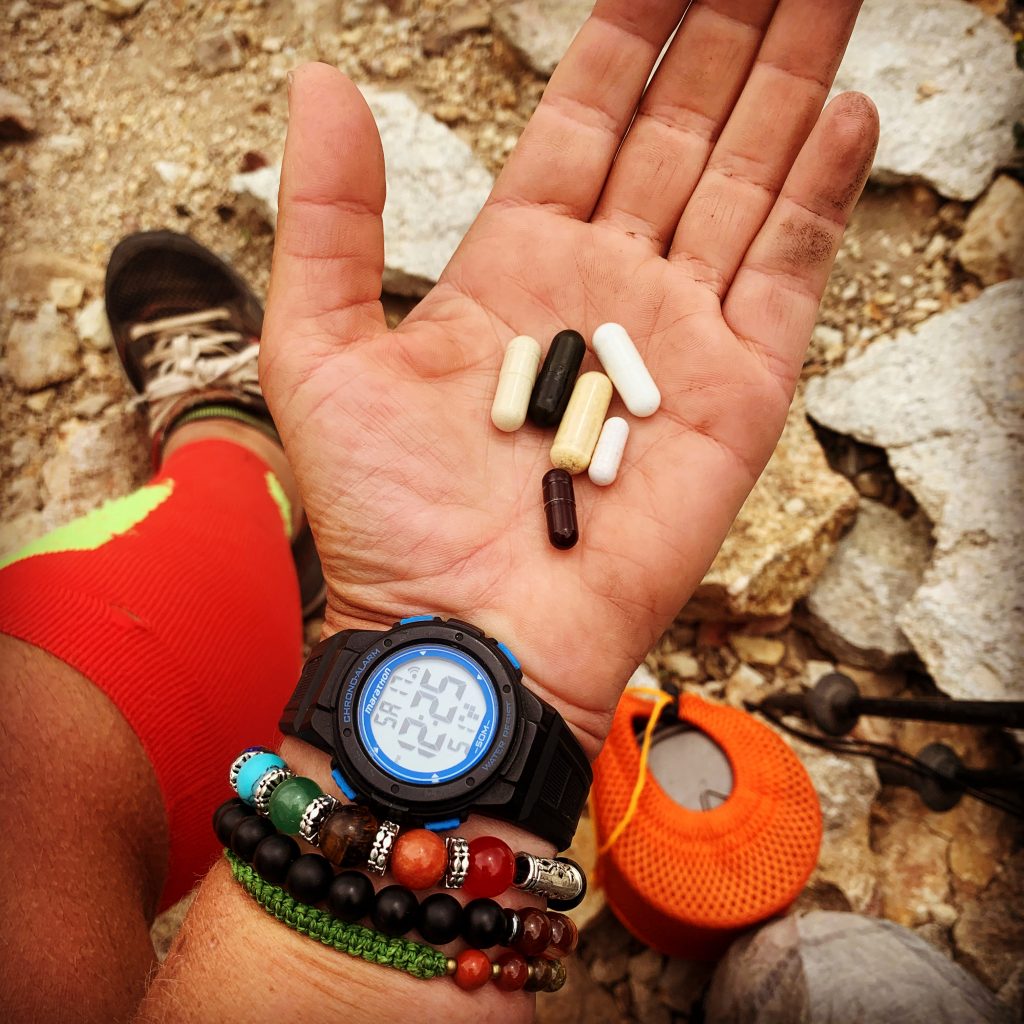
I use supplements at home and on trail to stay healthy and perform optimally. Pictured: probiotics, b12, astaxanthin, curcumin, ashwagandha, multi-vitamin.
Training & Preparation:
One of my biggest concerns before embarking on this hike (and every long hike) is how my body will hold up to the rigors of 12-14 hours days of backpacking across difficult terrain. As I’ve written about here, here, and here, I’ve been using diet and lifestyle strategies to manage an autoimmune condition since ~2015. That means I prioritize getting my body as healthy as possible before a hike so that I have reserves to draw upon once I’m out there. I know once I’m on trail, no matter how well I try to eat, sleep, and care for my body, a long distance hike slowly wears down the body. Furthermore, even with a healthy hiking diet, there’s limited access to the antioxidant-rich fresh fruits and vegetables that fight oxidative stress and inflammation from hard exercise, sun exposure, and other factors.
Ensuring that my body is prepared for a long hike consists of the following components:
This is what’s covered in the Adventure Ready course and it’s the same process my clients use to increase energy, endurance, and overall resilience before their backcountry adventures. I generally always take care of myself, but I really get serious about 3 months out. The more rigorous the hike, as I expected this one to be, the more rigorous my training.
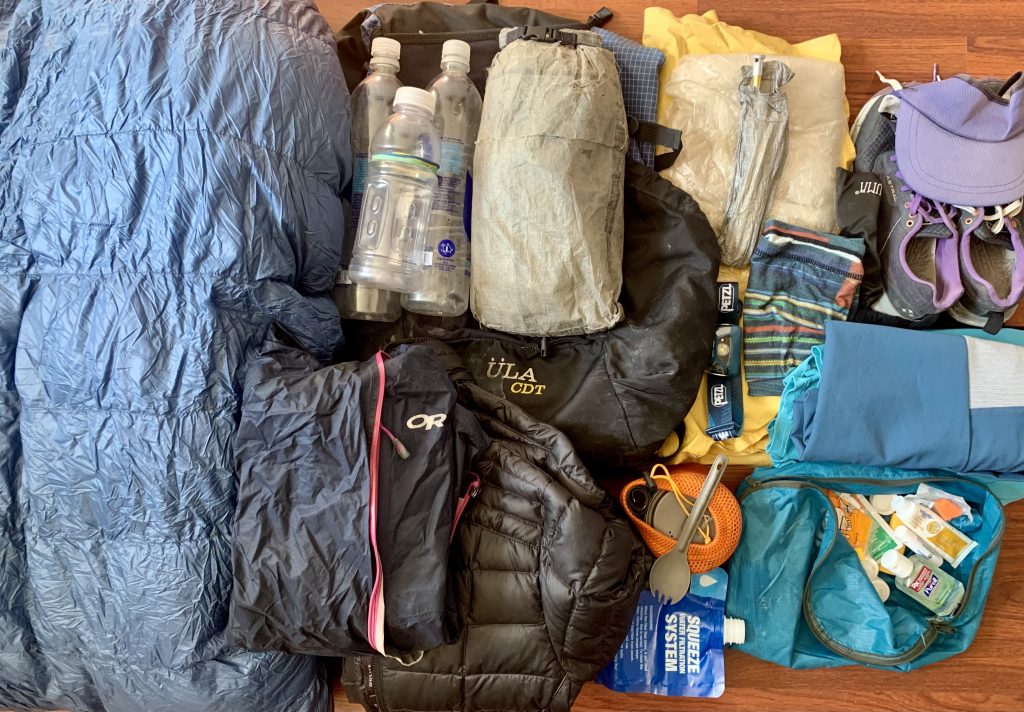
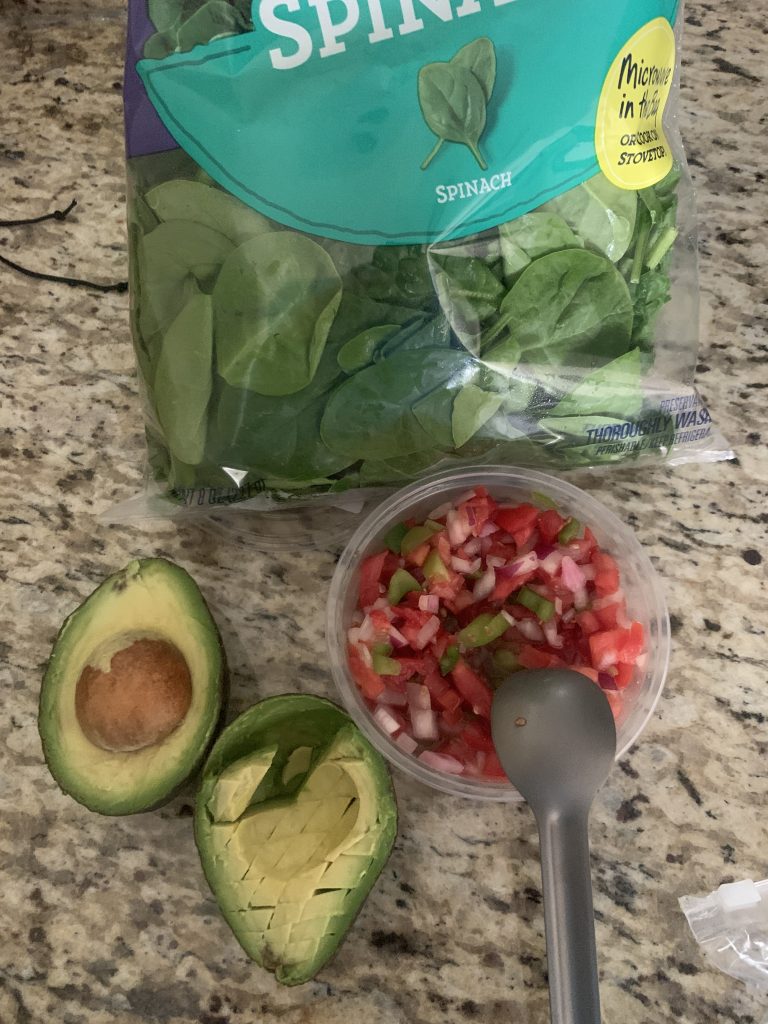
A 5-day resupply with about 3000 calories per day.In town, I focus on fresh, nutrient dense foods.
Food/Resupply:
When selecting food for a backpacking trip, my goal is to follow the same anti-inflammatory eating principles that I do at home, but adapted to the constraints of backpacking. I focus on high fat, whole foods as much as possible (the fewer the ingredients the better) and filter my options through the following criteria:
Ultralight (energy-dense): I prioritize trail food that is energy-dense, meaning high calorie per ounce. I aim for >125 calories per ounce, but some foods fall short of that which I’m okay with if it’s a high protein food. At nine calories per gram for fat compared to four calories per gram for protein or carbohydrate, this makes fat a good option for weight efficiency for long distance hiking.
Nutritious: I want my trail food to promote steady energy by containing a balance of macronutrients (protein, carbs, and fat) that stabilize blood sugar, either within one food or when combined. I look for foods that combat inflammation rather than contributing to it.
Appealing: It’s a miserable feeling to reach the top of a big climb feeling famished, only to open your pack to a bag full of unappetizing food. Just like with the food you eat at home, there’s no reason the food you eat on trail shouldn’t be delicious. I carry a variety of textures (crunchy, smooth, etc) and flavors (spicy, salty, sour, etc) to keep it interesting.
Simple: There are so many logistics to consider pre-hike that finding a way to make healthy, ultralight eating easy is a priority for me. You may have a different preference on how much food preparation you prefer to do, but most of the meal options I put together contain only a handful of ingredients that can be found in most stores or purchased in bulk and easily assembled at home.
Sample Day of Eating
I didn’t have a lot of time to prepare food for this trip, so I kept it pretty basic. Generally I prefer to mail boxes rather than shop in stores, especially in small towns in central Nevada, which aren’t likely to carry a lot of the healthy foods I like. Furthermore, when I’m in town, I don’t enjoy exploring a foreign grocery store looking for what I need when I’d rather just be relaxing. So, I sent boxes to probably about ⅔ of the towns we stopped in, and in the larger towns or where it would conflict with our schedule (getting to town on a weekend), I shopped in town.
Before leaving, I prepared several trail smoothies and bean dinners. Find the trail smoothie recipe here and the bean dinner recipe (and a few others) here. Super simple, but I enjoy them and they make me feel good. I also bought a bunch of gluten free protein bars, nut butters, and organic tortilla chips.
Here’s what a sample day of eating on trail looks like for me:
Breakfast: Trail smoothie; a bar with 20+ grams protein; nut butter with gf granola
Snacks/Lunch: tuna packets; nuts; seeds; nut & seed butters; organic tortilla or sweet potato chips (ideally w/ coconut oil rather than inflammatory industrial seed oils); salami or meat sticks; moon cheese; cheese sticks; bars (ideally 10+ grams protein and 1:1 or 1:2 ratio of protein to carbs; whole food ingredients, if possible).
Dinner: Beans, dried veggies, organic olive or coconut oil, spices, crushed chips. Meat and cheese. Rice noodles with spices, olive oil, and tuna. Dark chocolate for dessert.
Drinks: instant coffee or tea in the morning, usually mixed into my smoothie; electrolytes in the afternoon (on this trip, it was EmergenC and LMNT).
How Much Food to Pack:
To determine how much food to take, I take past experience into consideration and calculate calories. You can use a free BMR calculator online, and adjust for activity (see this video). Then test it out and take note of how much food you returned with or whether you ran out. Like most hikers, I get hungrier the longer a trip lasts. For that reason, I generally plan for a higher calorie intake later in the trip. For this trip, for example, I ate about 2700-2800 calories for the first two weeks, then 3000-3200 for the last 2.5 weeks. Cold temperatures, a high amount of elevation gain, and cross country hiking over uneven surfaces make me hungrier, so I also try to plan for that. As far as macronutrient ratios, I feel best eating about 50-60% fat, 20% protein, and 20-30% carbohydrates. Prioritizing fat is also more weight efficient than a carb-heavy diet. See this video on macronutrients for backpacking.
Overall, my food choices and amounts worked out well. The changes I would’ve made would be to bring more savory/salty stuff, such as spicy nuts and seeds or meat sticks, and fewer bars. Maybe one bar a day instead of three. I craved salt, as usual, and anything even remotely sweet (such as a date-based bar) often sounded gross, especially in the heat. For the calories, I was a bit on the low side for the level of exertion required by this route, but the deficit wasn’t debilitating.
To get started with your own healthy backcountry meal plan, I invite you to check out this free backcountry meal planning course.
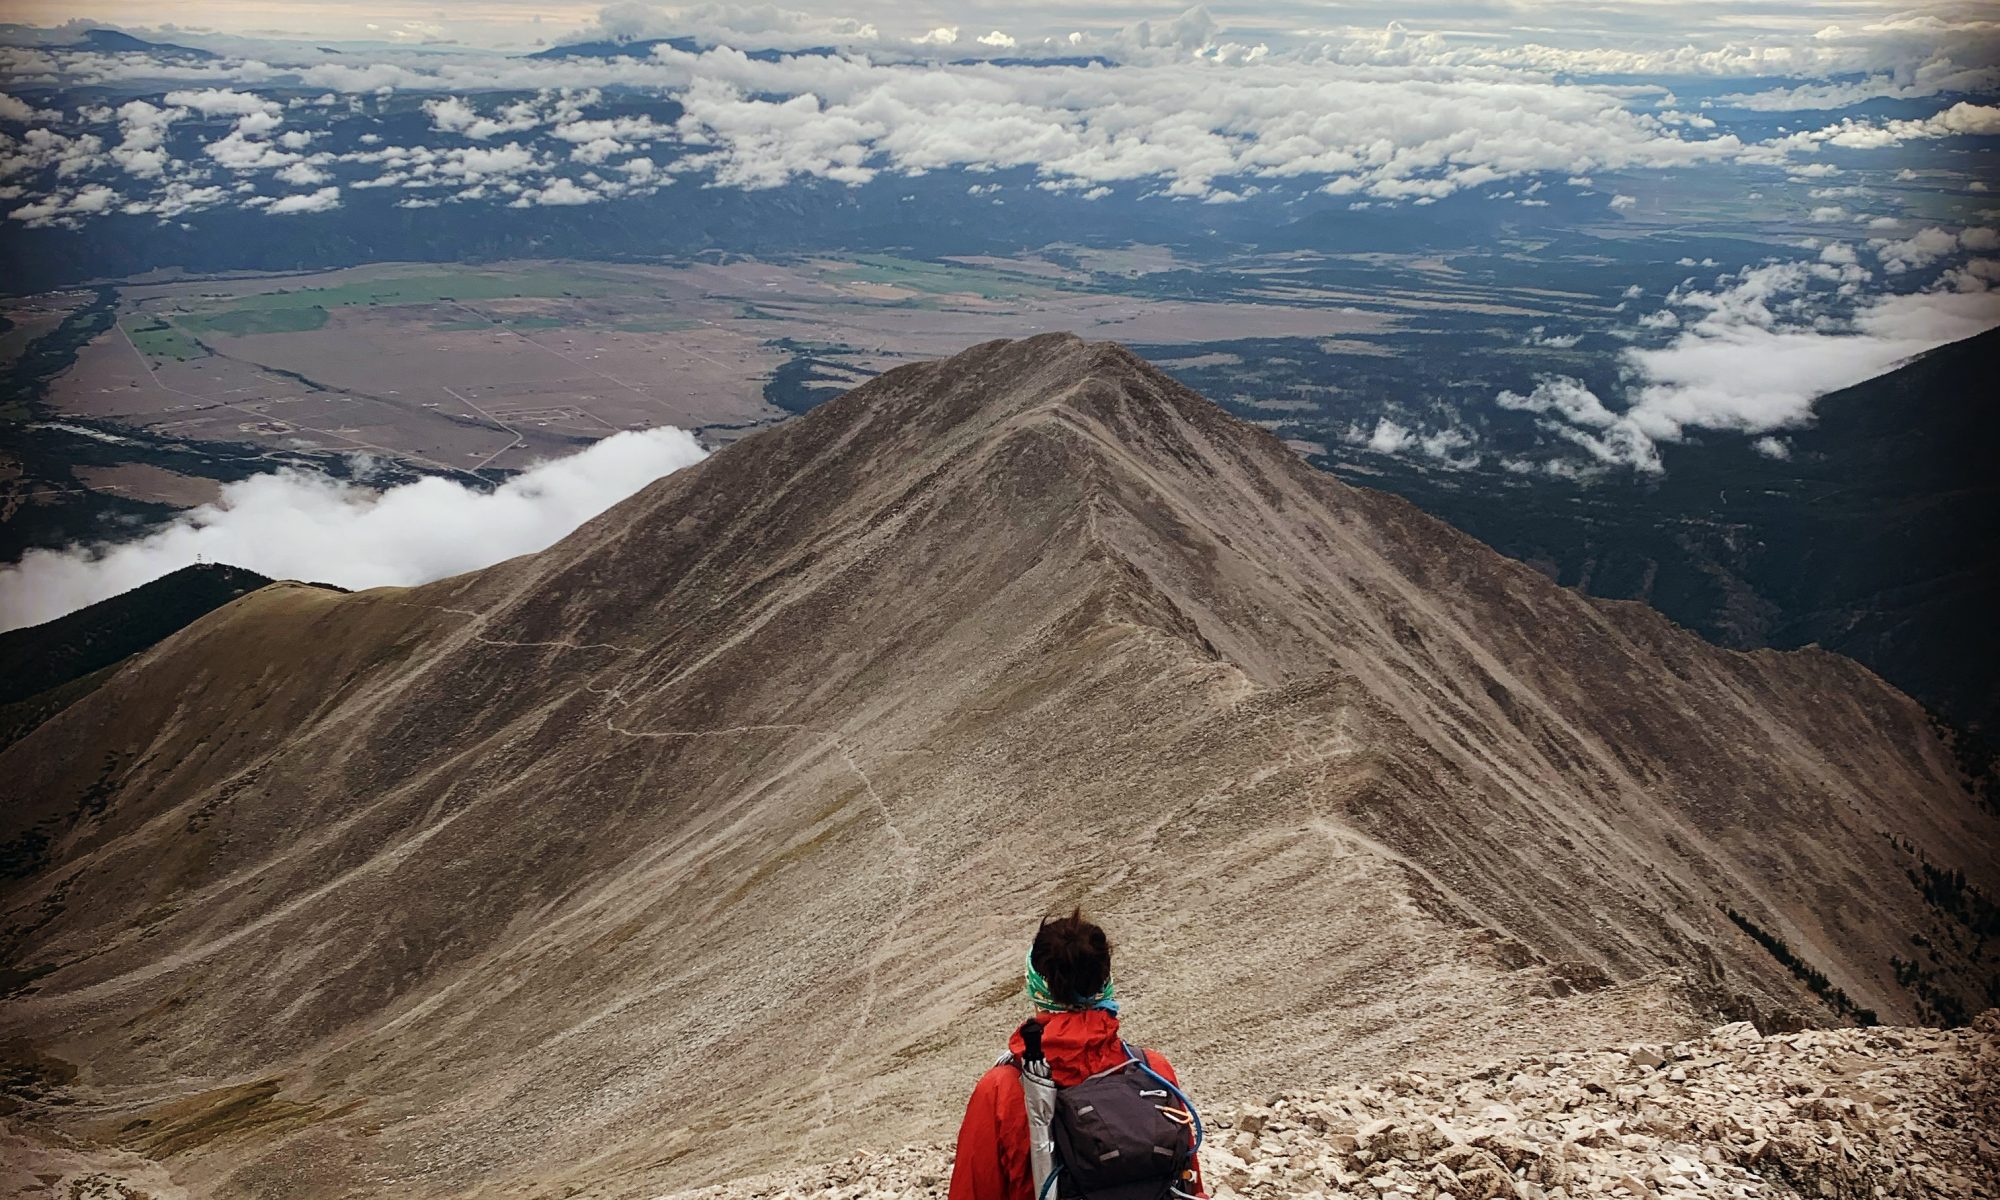
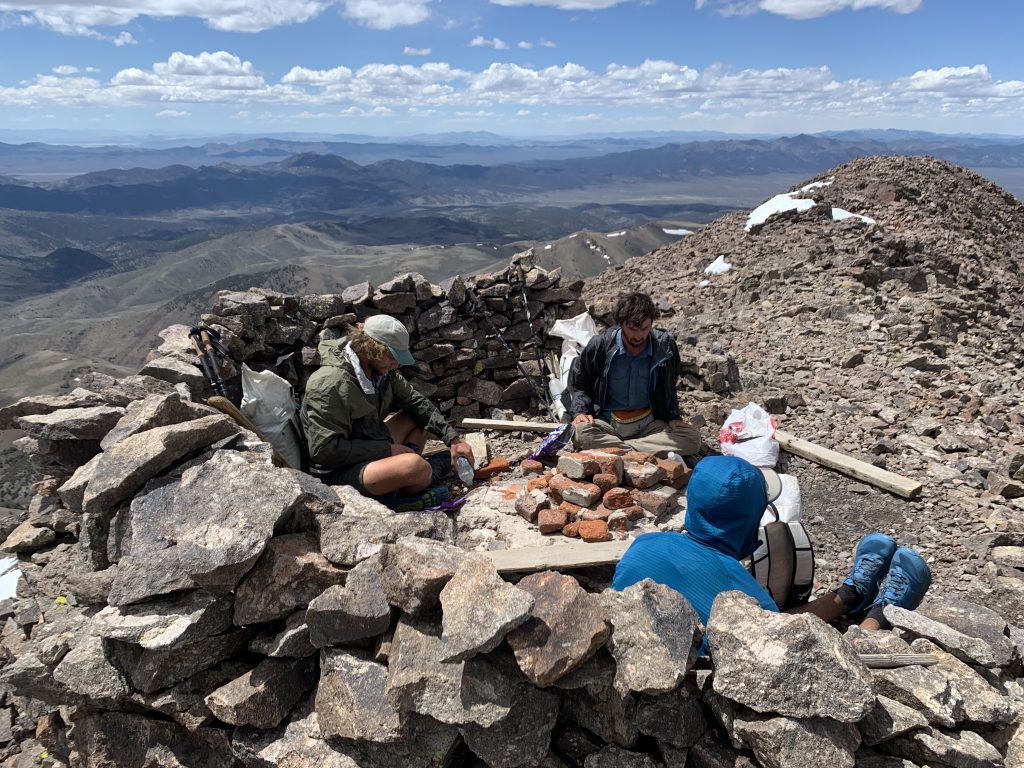
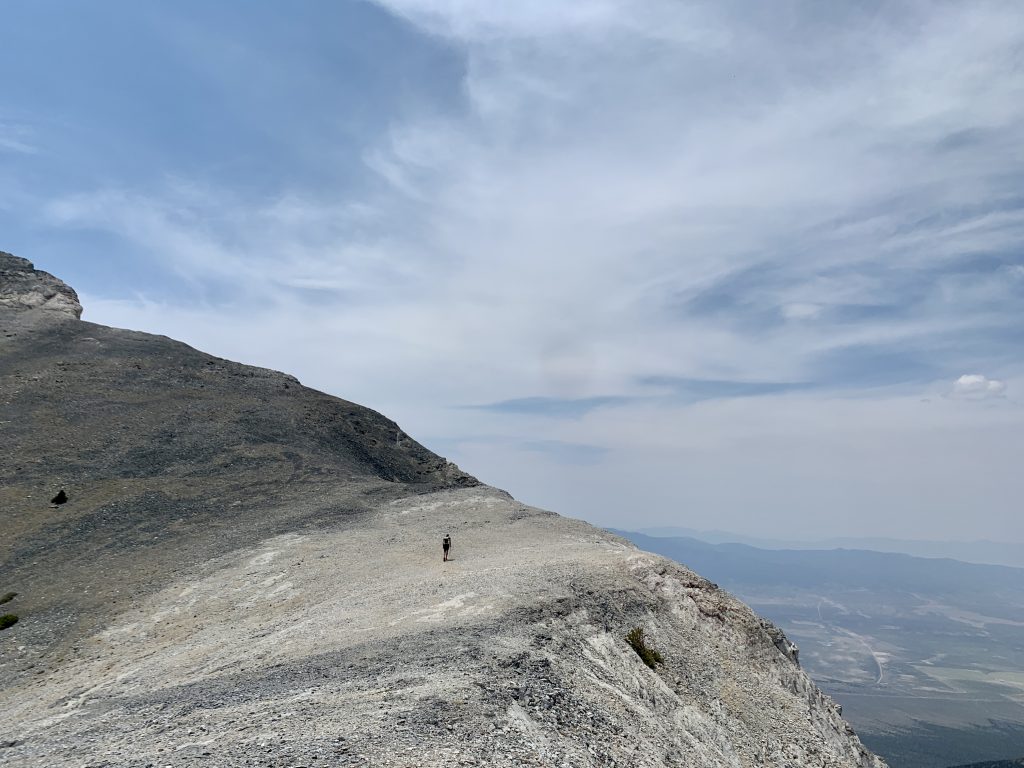
Summit snacks.
Final Thoughts
The GBT is one of the most challenging routes I’ve hiked, but that also made it an incredibly rewarding experience. The degree of difficulty of this route forced me to look at my deeper motivations for being out there. On a route like this, you need a reason to be out that’s bigger than ego validation or checking off a box.
For me, I love just being out there walking, all day, at the mercy of the conditions; moving forward in the face of heat, cold, wind, rain, and the difficulty of the terrain in front of me. To experience all that being in a human body has to offer -the challenges and the rewards – hunger, thirst, sweating, shivering, itchy bug bites and scrapes, thigh-burning climbs, AND taking in endless mountain views, gulping down fresh spring water, and inhaling the scent of sagebrush after a rainstorm… it makes me feel like I’m actually living this life I’ve been given. Extended backcountry travel allows me to reconnect with myself and nature, to see who I become when I lean into discomfort, and to be present to what’s in front of me. The effect is even greater in harsh, remote, desolate landscapes.
Nevada consists of 87.8% public land. That’s more than any other state in the contiguous US. That’s special. And there are so few people out there exploring it. At least, that was my impression since I saw less than 10 other hikers the entire time I was out. This route offers the opportunity to enjoy true solitude and adventure for those who seek it.
Another unique feature of the GBT is the experience of hiking in a loop rather than point to point. A loop that centers on one geographic feature allows the hiker to become more intimately connected to a specific landscape and it’s rhythms. There’s also a sense of timelessness of walking a loop, enhanced by the remoteness of the GBT. From each point on the loop, you can look across basins to see ranges that you hiked days and weeks before. It’s quite an experience.
A snippet from my trail journal on our last full day that I feel sums up a lot: A big day on top of a big week, at the cap of a burly route. The GBT continually asks: What do you have left? Are you up for it? And step by step you move forward. Can I handle what’s in front of me right at this moment? Yep, okay, keep going. I’ll figure out the rest when I get there.
Additional Resources
The best source of information on the Great Basin Trail is on Ryan “Dirtmonger” Sylva’s website. He’s the creator of the route and his site contains a GBT overview, guidebook, water chart, trail journal, and more.
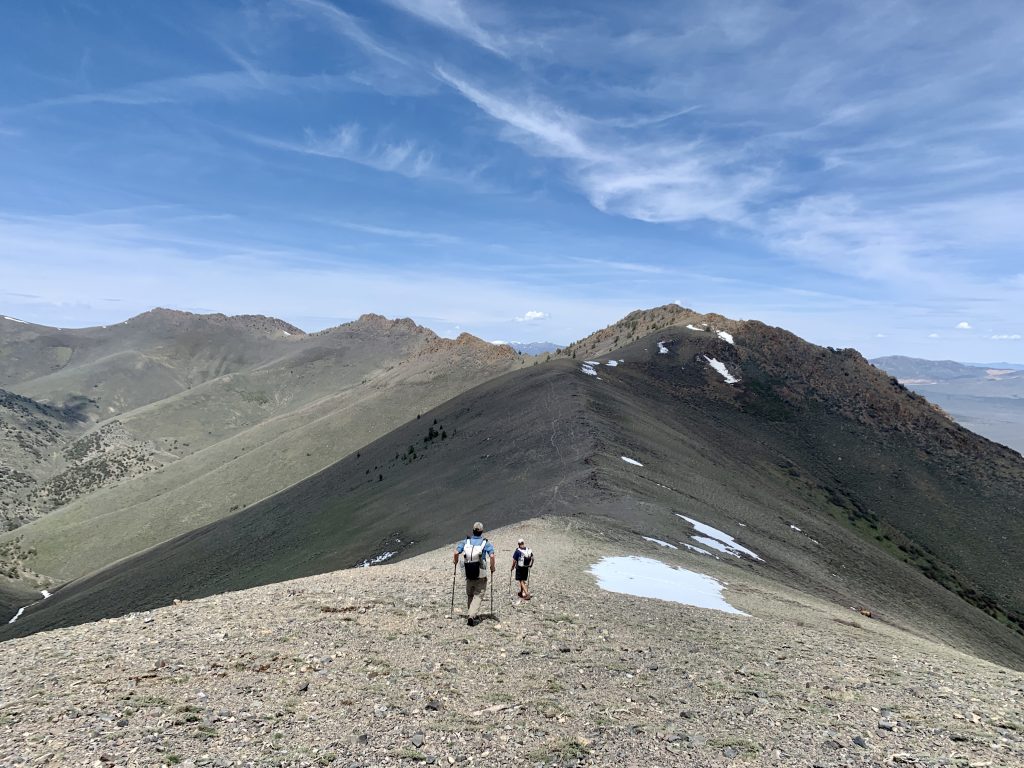
One day towards the end of the trip, we were nearing the end of a 15-mile ridge walk that included summiting several 12,000+’ peaks. My legs were exhausted and I was thinking “I’m not having fun anymore. I want to be done now.” But there was still more ridge walking and hiking to do for the day, so there was nothing to do but keep pushing forward. That moment reminded me of every time I’ve ever been out drinking with Dirtmonger. There’s a point where I’m ready to call it a night and Dirt looks around and says “I’m gonna have another round or two. Anyone else?” This route is very much a reflection of it’s creator, and as such the GBT is always pushing the edge of what feels reasonable or even possible. In the end, it makes for quite a rewarding experience when you persist beyond what you believed you were capable of.
This spring, I hiked 850 miles of the Great Basin Trail. In this post, I’ll provide an overview of the trail and my key take-aways on what went well and what I’d change if I hiked it again. My intention is to provide potential hikers with an idea of what to expect, and to provide insight into my preparation process and considerations before I embark on any long distance trek.
Introduction to the Great Basin Trail
Length & Elevation Gain:
The Great Basin Trail is ~1100 miles, of which I hiked ~850 miles between May 16 and June 17 of 2021. It contains 194,000 feet of vertical gain.
Location:
The Great Basin Trail is a loop route and its entirety is located within the state of Nevada. It features a geographic region known as the Great Basin. From Wikipedia: “The hydrographic Great Basin is a 209,162-square-mile area that drains internally. All precipitation in the region evaporates, sinks underground or flows into lakes. The region is bounded by the Wasatch Mountains to the east, the Sierra Nevada and Cascade Ranges to the west, and the Snake River Basin to the north. The south rim is less distinct. The Great Basin includes most of Nevada, half of Utah, substantial portions of Oregon and California, and small areas of Idaho, Wyoming, and Baja California, Mexico. The term “Great Basin” is slightly misleading; the region is actually made up of many small basins. The Great Salt Lake, Pyramid Lake, and the Humboldt Sink are a few of the “drains” in the Great Basin.”
The Great Basin Trail travels through:
27 mountain ranges: Fortification, Wilson Creek, Highland, Chief, Delamar, South Pahroc, Hiko, Mt. Irish, Worthington, Quinn Canyon, Pancake, Hot Creek, McKinney, Toiyabe, Toquima, Monitor, Antelope, Fish Creek, Diamond, Southern Ruby, Ruby, East Humboldt, South Pequop, Dolly Varden, Schell Creek, Moriah, Snake
19 Basins/Valleys: Lake, Delamar, Pahroc, Pahranagat, Garden, Railroad, Hot Creek, East and West Stone Cabin, Ralston, Big Smoky, Monitor, Little Fish Lake, Huntington, Clover, Independence, Goshute, Spring (x2), Snake
17 Wilderness Areas: Fortification, Parsnip Peak, South Pahroc, Worthington, Quinn Canyon, Palisade Mesa, Arc Dome, Alta Toquima, Table Mountain, Antelope, Ruby, East Humboldt, South Pequop, Becky Peak, High Schells, Mt. Moriah, Highland Ridge
Trail Type:
The route mileage breaks down to about 30% cross country, 50% road, and 20% trail. A description of each category:
Cross country: In the basin, the cross country hiking includes sections in which the hiker must weave her way through dense sagebrush, along with more open areas, such as playas, with less vegetation. Though exposed, hot, and dry, the basin walking provides a break from vertical gain and navigational challenges. In the mountain ranges, cross country travel includes long, ridgelines above tree line where walking surfaces range from large, stable boulders to loose ankle-rolling rocks and scree. Bushwhacking through sagebrush, mahogany, briars, streams, creeks, marshes, and groves of small, crooked aspen while going up, over, and through the ranges is not uncommon. There are occasionally horse and/or cattle trails which can be found and followed for easier travel through these sections.
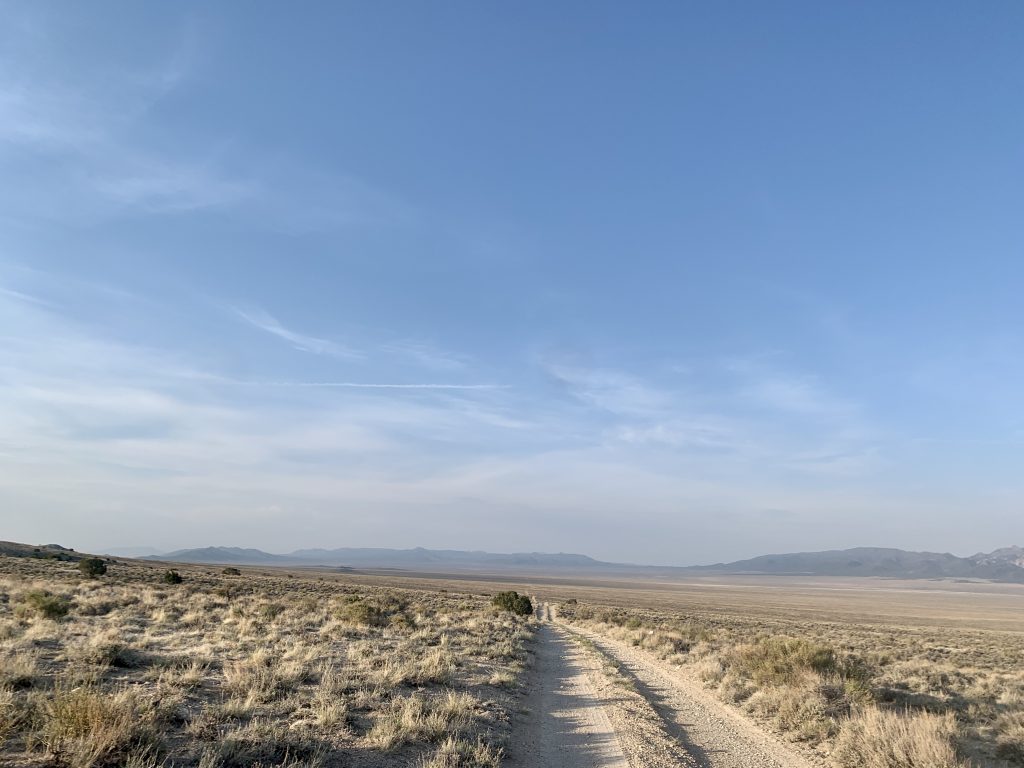
Road: Either faint two track or jeep track or dirt road. No pavement. Not your typical “road walk”, these miles are generally pleasant miles through scenic terrain. They provide a welcome relief to the more challenging cross country and trail miles.
Trail: Occasionally distinct, clear, cushy trail, but more often overgrown, faint, or non-existent trail (which may have been marked on a map 100 years ago, but which no longer exists).
Terrain:
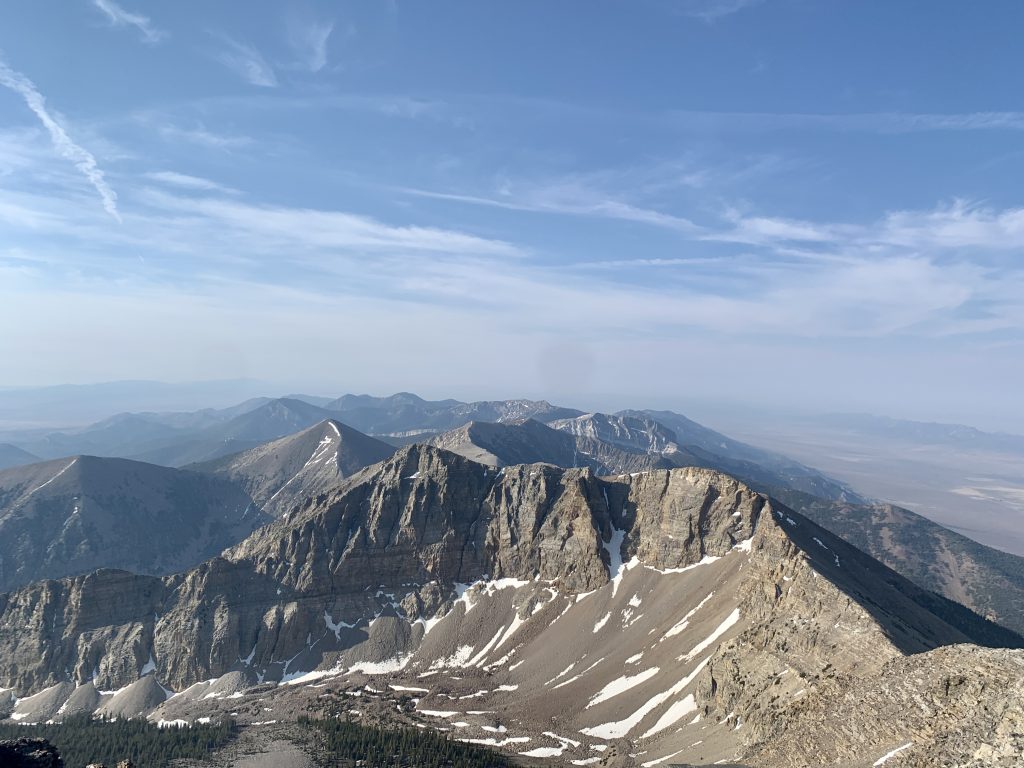
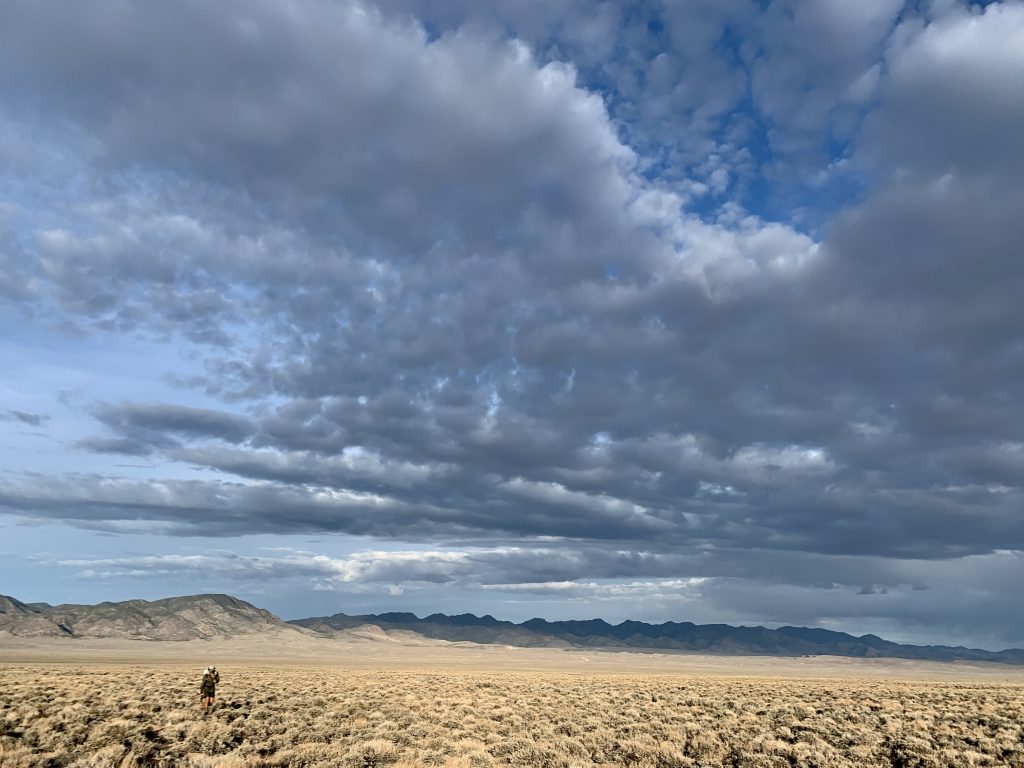
The Great Basin consists of basin and range topography, meaning that the landscape exhibits alternating parallel mountains and valleys. Generally speaking, the Great Basin Trail hiker can expect to travel over a mountain range, then drop down into a basin, hike across the basin, and then back up into a mountain range. This repeats throughout the loop with varying mileage in the ranges and valleys depending on which part of the loop you’re in and whether you’re hiking east/west or north/south in that section.
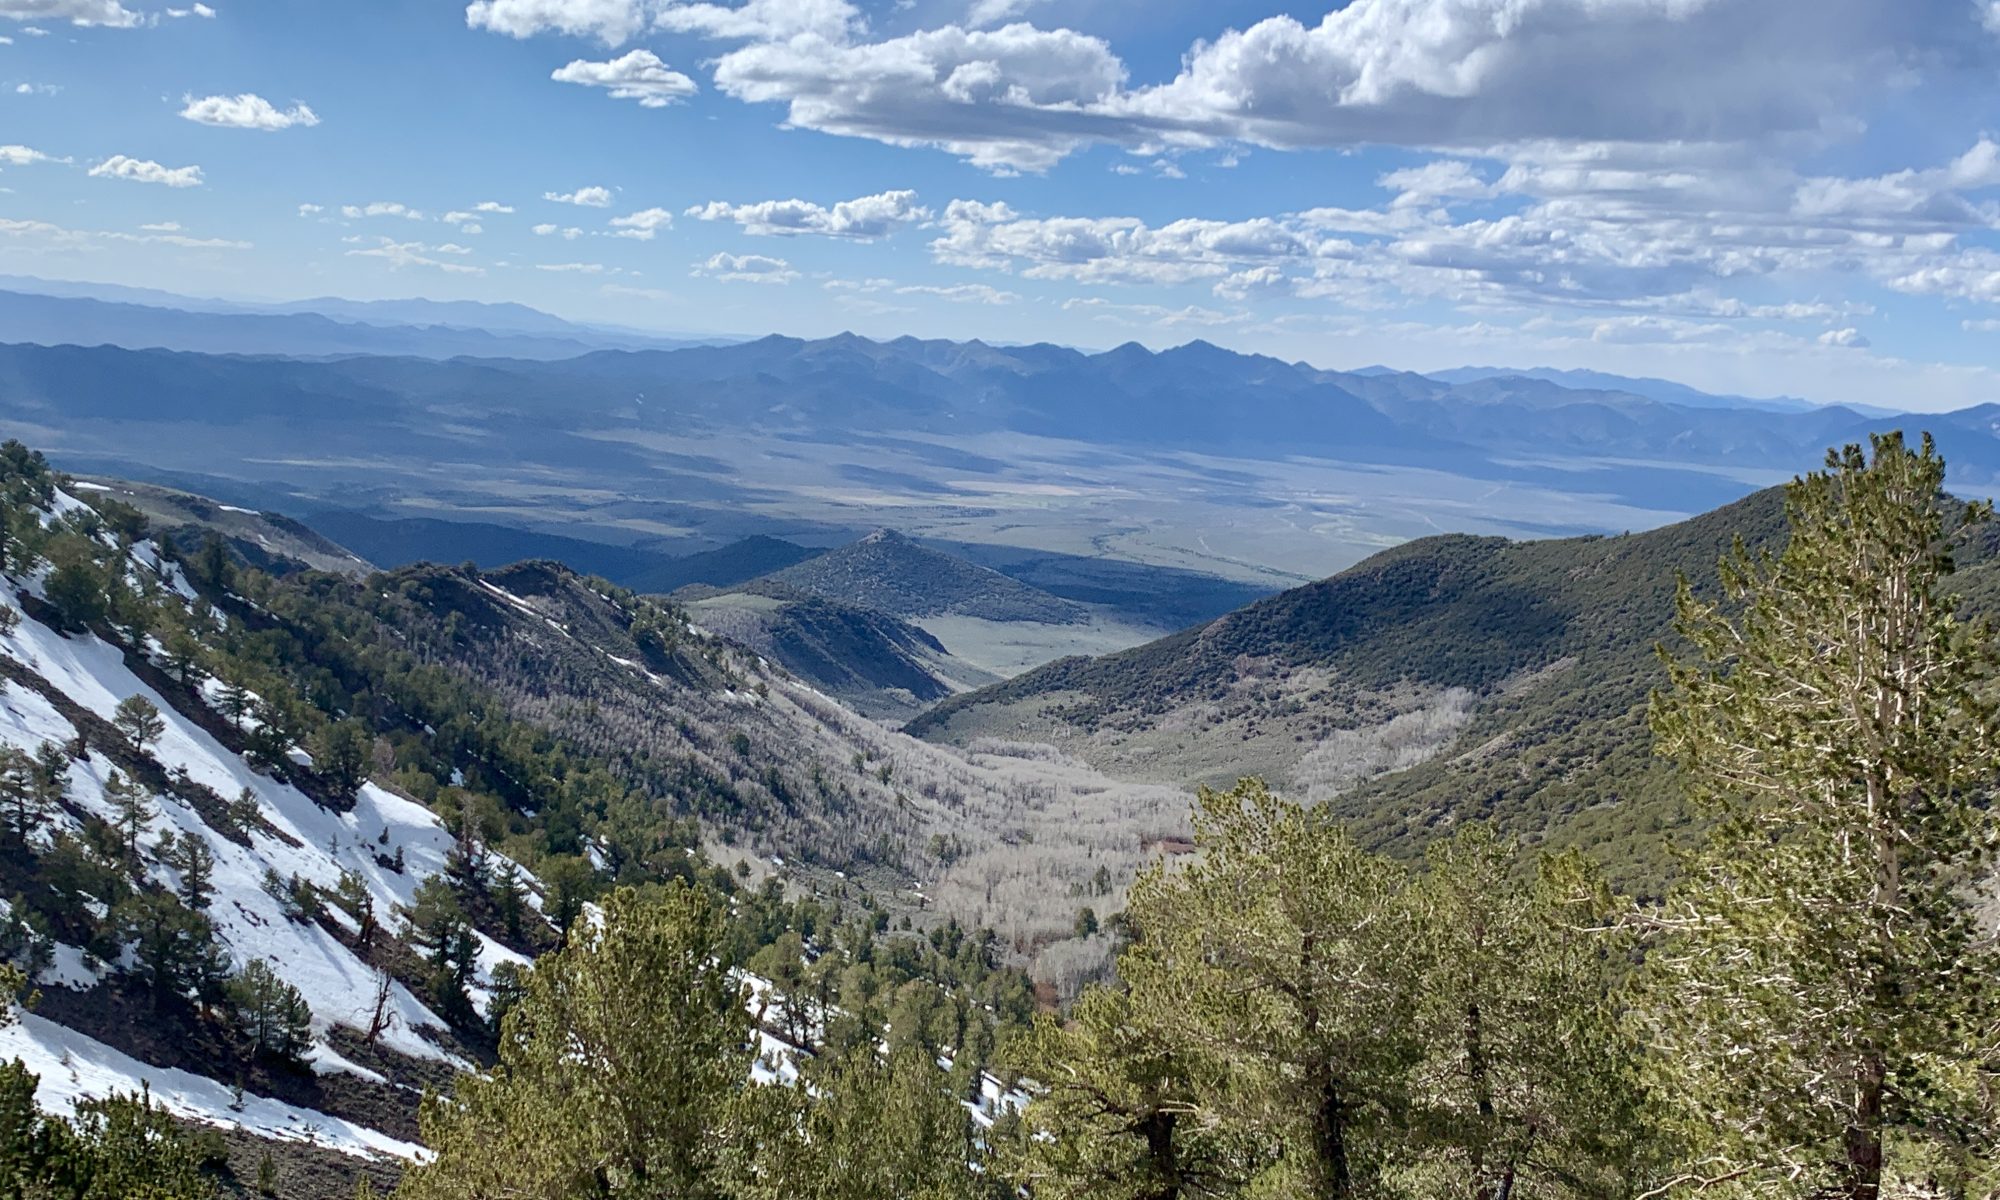
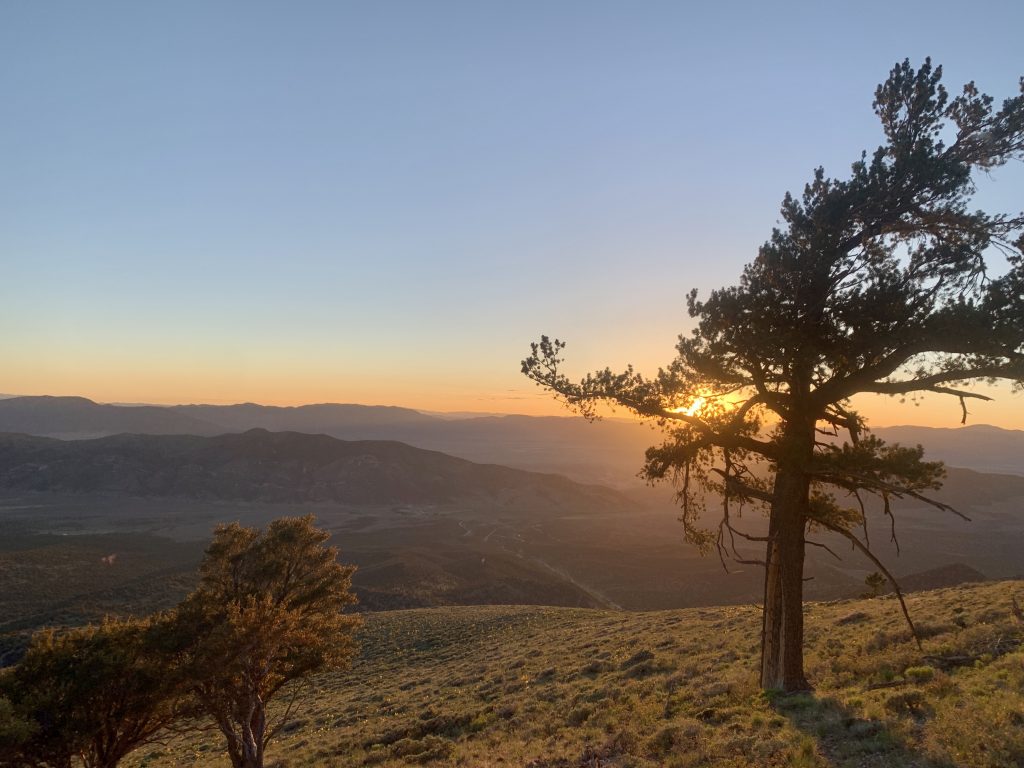
Scenery:
The scenery of the Great Basin Trail is diverse. There are endless horizons, seas of sagebrush, impossibly dark starry nights, and 360-degree ridgeline views featuring layers upon layers of mountains. And that’s just a taste. The best way to get a sense of what the trail looks like is to see my GBT highlights on my Instagram page: @katiegerber.
Climate, Weather & Optimal Hiking Season:
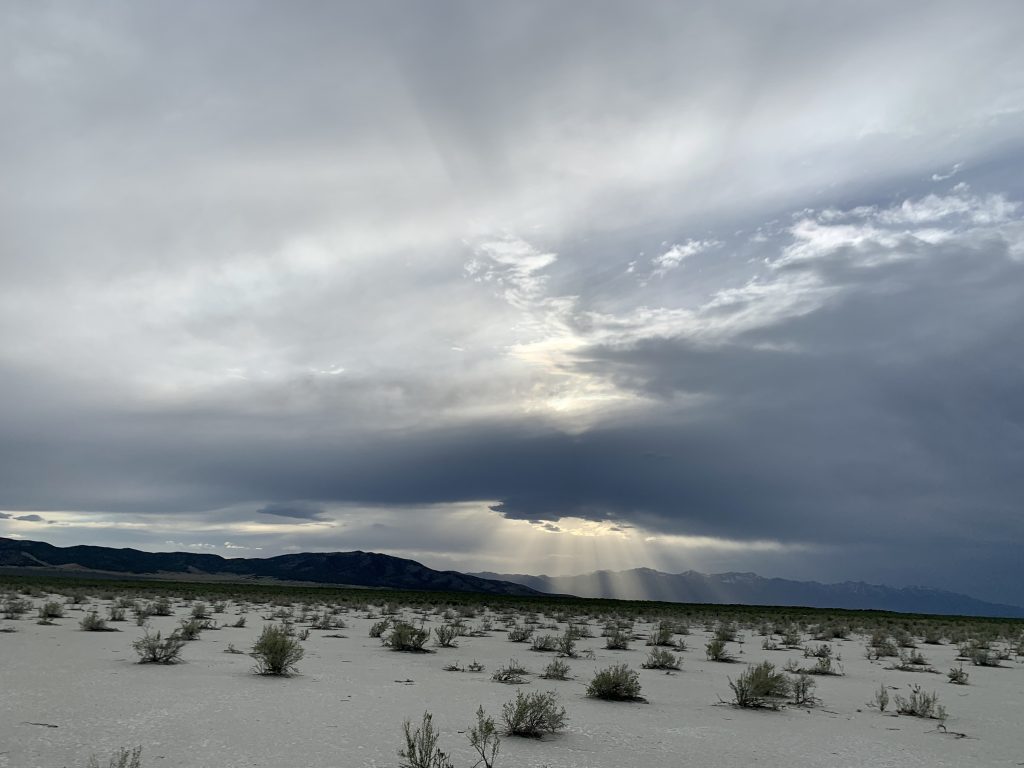
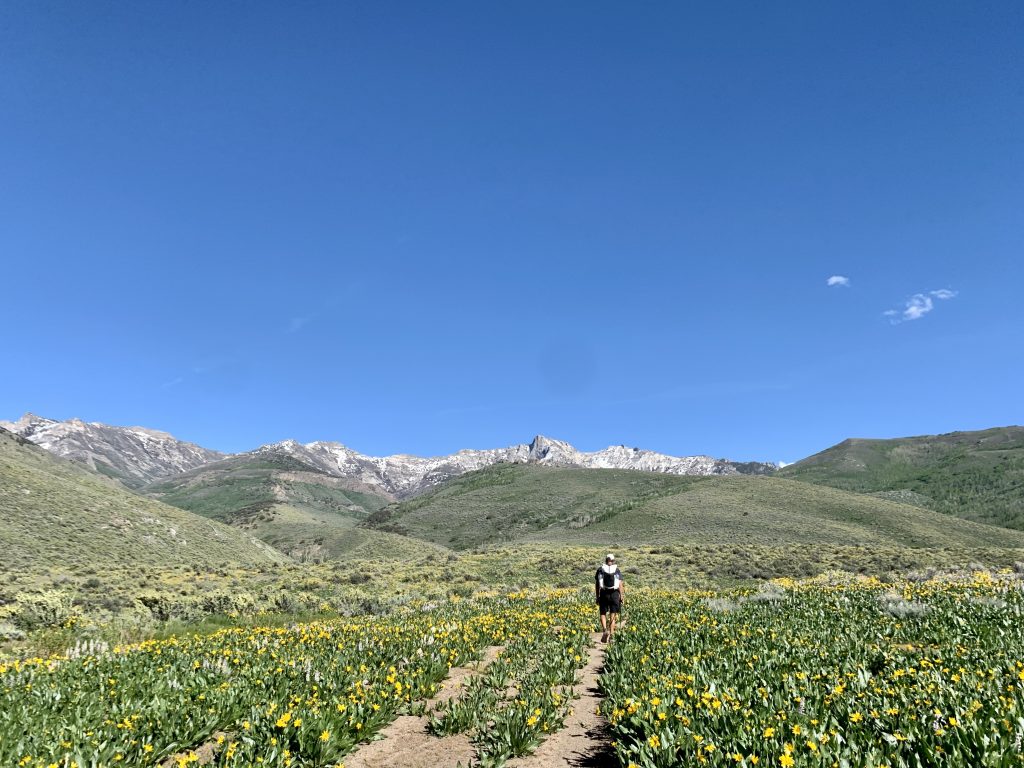
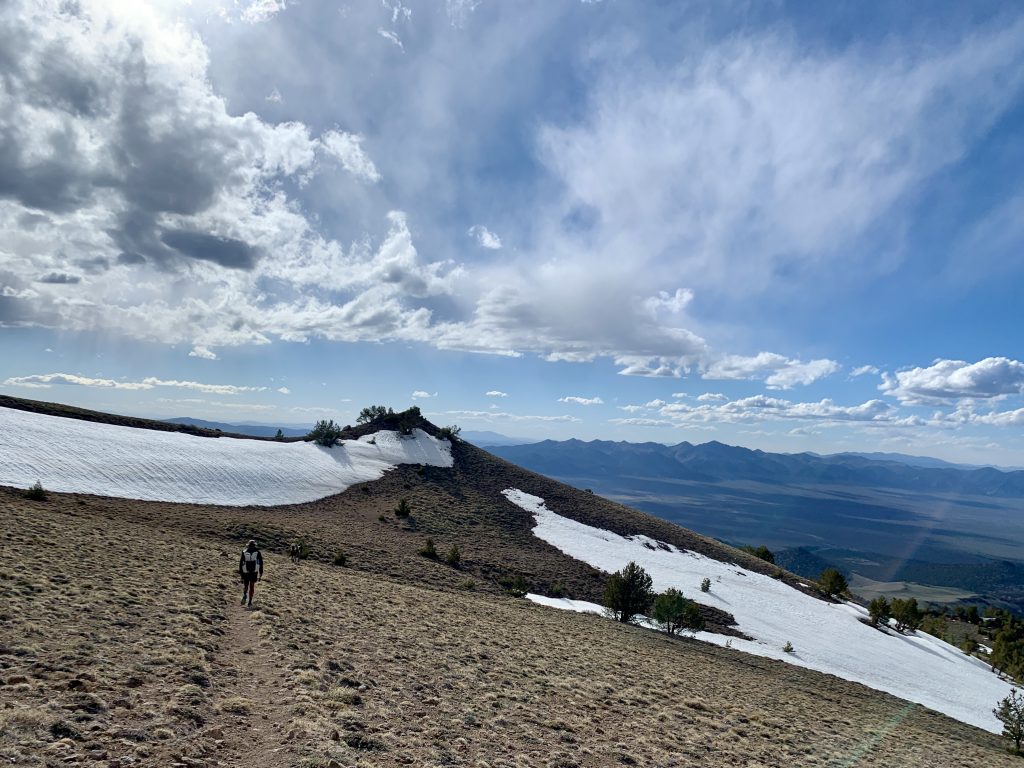
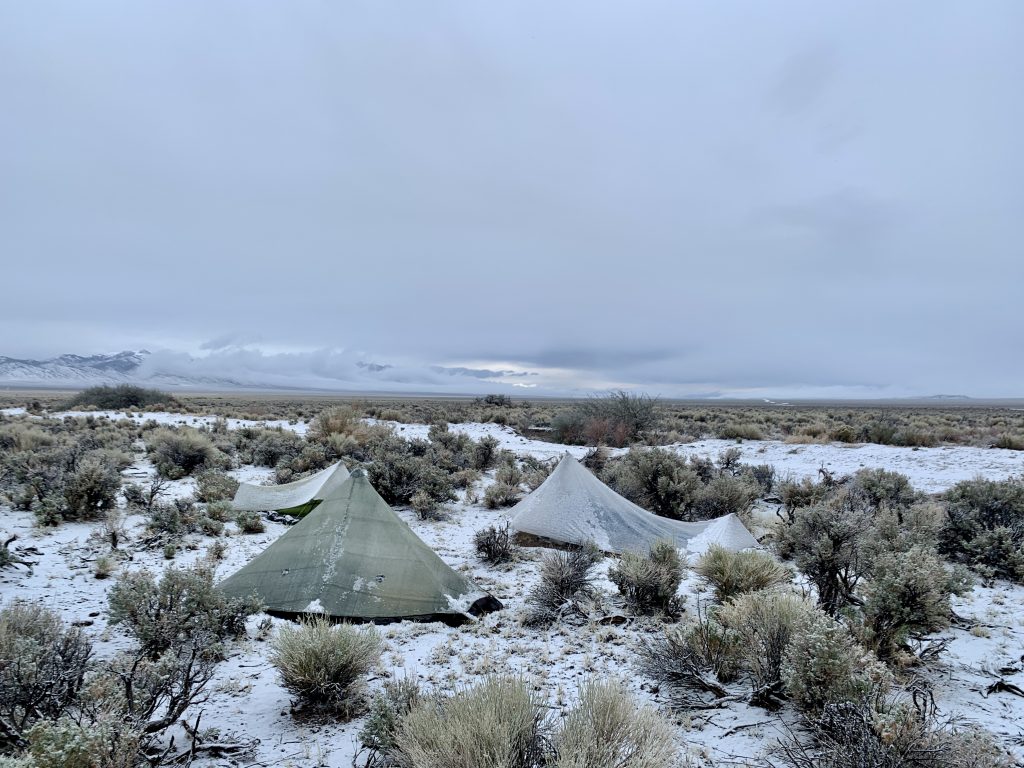
The Great Basin is known to be a harsh environment. It’s arid, often extremely hot, and weather changes can occur quickly. I started hiking in mid-May near Tonopah on the southwestern portion of the loop and hiked clockwise. In my first week on trail, I hiked through shade-less basin stretches in 90-degree heat and then through rain, snow, hail, and fog just days later. Aside from the storms in the first week or so, there was very little precipitation for the remainder of my hike. Hiking clockwise around the loop, daytime temperatures for most of the trip were pleasant: 60s to low 70s in the mountains and high 80s in the basin. Towards the end of the hike, nearing Great Basin National Park in mid-June, temperatures in the basins got up into the high 90s and became uncomfortably hot. I wouldn’t have wanted to be on the southern portion of the route any later than mid-June. Spring and fall are ideal times for hiking this trail to experience the most moderate temperatures.
Potential hikers should note that this route requires skill in desert hiking. Learn the foundations of backcountry safety, including hot weather and desert hiking, in the Stay Safe in the Backcountry online course.
Navigation:
The Great Basin Trail requires the hiker to be proficient in off trail travel and navigation. I utilized paper maps (1:24,000 scale printed on 11×17 paper), a compass, and GPS tracks loaded to the Gaia GPS app on my phone. I mostly used the GPS to navigate while hiking, but appreciated having paper maps to give me a better sense of the broader area through which I was traveling. The maps also came in handy when determining detours due to weather and, of course, provide a backup in case my phone broke, got lost, or failed. Plus, paper maps are just fun to look at.
If you’re interested in improving your navigational skills so that you can embark on your next trip with more confidence, check out the Become a Better Backcountry Navigator online course.
Water & Resupply:
One of the most common questions I received while hiking the route was about water sources and availability. Water on the Great Basin Trail was surprisingly plentiful considering that the Great Basin is one of the most arid regions in the country.Ryan ‘Dirtmonger’ Sylva, the route creator, did a fantastic job of scouting out and mapping a surprising number of water sources along the route. These included springs, creeks, and rivers, as well as livestock guzzlers and troughs. His GBT resources include a water chart that lists potential sources along with degree of reliability. Though water was less abundant overall this spring than in previous years, all but one of the mapped sources had water, and the longest water carry was about 45 miles.