We are taught that healing is a climb—a steady, upward trajectory toward a summit called “Perfect Health.” We think that if we just pack the right gear, follow the strict protocols, and exert enough willpower, we’ll eventually reach the peak and stay there.
But that’s generally not how the body works, especially when it comes to navigating chronic illness or injury, or just run-of-the-mill aging. We encounter false summits. We hit valleys we didn’t see on the map.
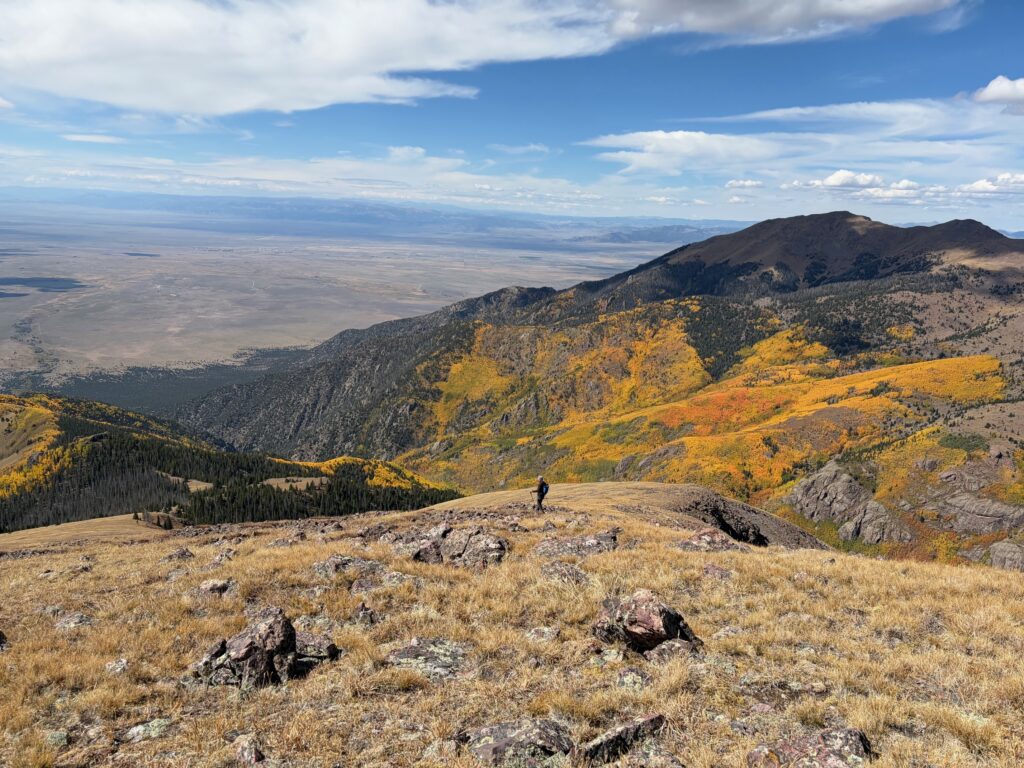
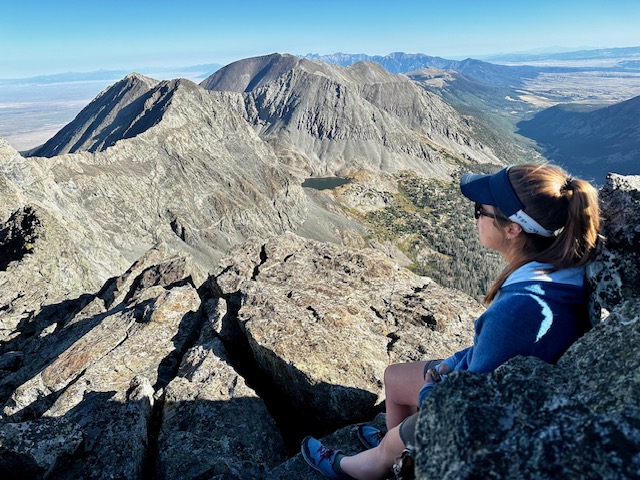
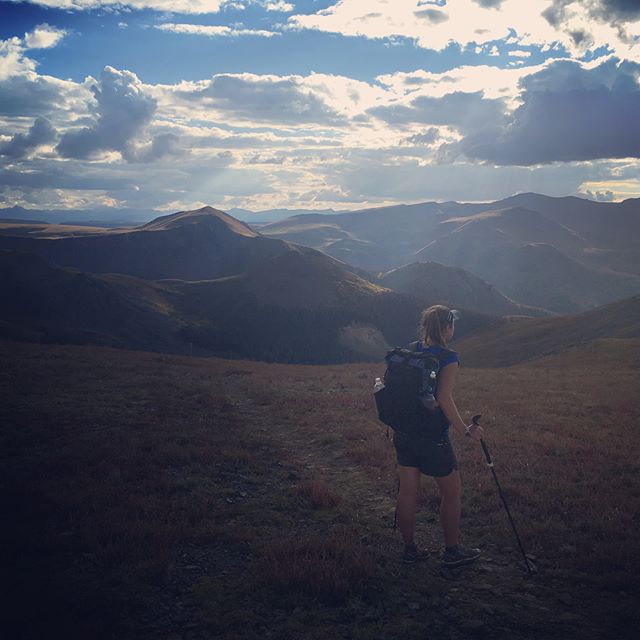
Last September, on a 13,000-foot ridge in the Sangre de Cristo mountains, I hit one of those valleys. And it resurfaced a question that’s hit me before when my body has failed to “perform”: who am I, and what value do I have, when my endurance and strength are gone?
It was the last Saturday in September. I’d just returned from my final guiding assignment of the season, Yellowstone, on Wednesday. I was so excited to be back home with Troy; excited to get out for long days in the mountains as we love to do. Colorado was having an exceptionally beautiful display of autumn colors and I was relieved I’d made it home in time to enjoy it.
We’d planned on Pyramid Peak, one of the Sangres 13ers we hadn’t completed yet. At 5300’ of vertical gain, it’d be a challenge as I hadn’t completed a day like that in about a month, but I’d been backpacking daily during that time so it didn’t feel like too much of a stretch.
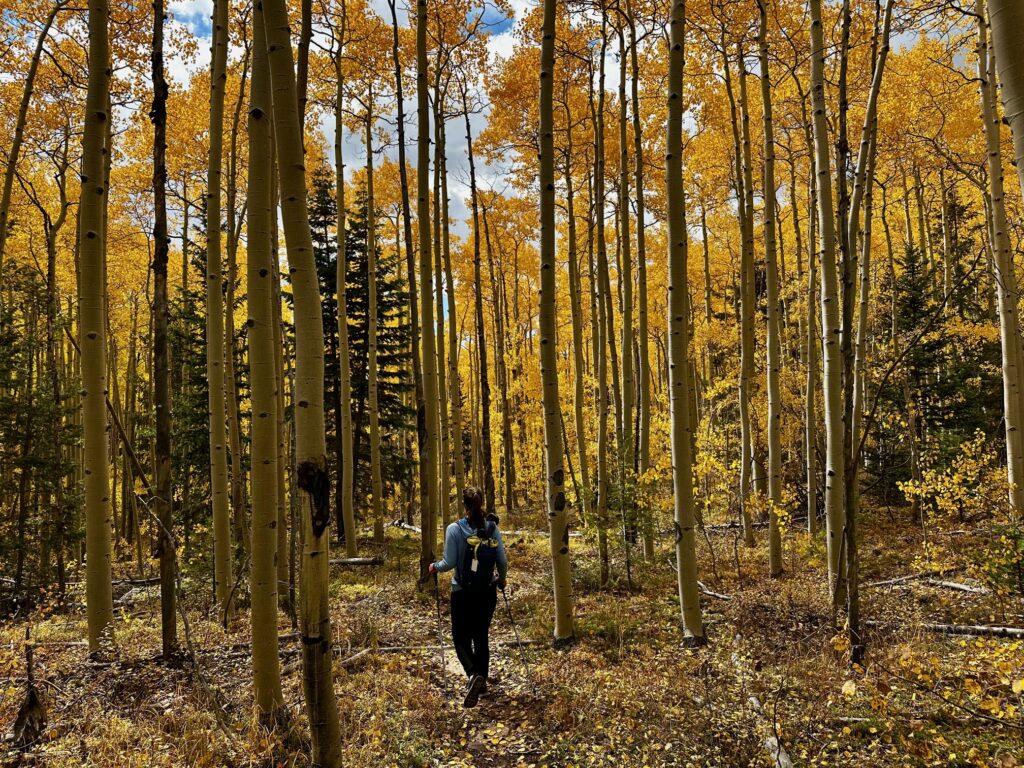
The day started beautifully: a cool, crisp trail winding along a creek through the changing aspens down low. Near the 10,000’ topo line, we veered off trail and started ascending more steeply towards the summit, still 3000’+ of climbing away. Trudging up towards the treeline on a 40-degree slope, my legs turned to lead and my heart hammered in my chest. Just keep going, you’ve got this, I encouraged myself, trying to stay positive.
Troy was pulling away ahead of me. He reached a shoulder and waited for me to catch up. “Everything okay?” “I feel awful,” I blurted out, “Empty.” “Do you want to take a break?” “I’m fine” my Pride responded. He shrugged and we pushed on. Again, he pulled away. Wallowing in my frustration and self pity, I dragged my limbs up the slope, stumbling over rocks and my own resentment. Today was supposed to be fun. My first day back at home, in the mountains with Troy. Why am I so utterly drained?
Troy waited, and again I slowly caught up. “Are you sure you don’t want a break?” “Fine,” I replied dejectedly. I didn’t want to take a break, but I needed to. I slumped down in the tundra and stared blankly into the San Luis Valley, a beige mirage thousands of feet below. I didn’t want to be grumpy. I didn’t want to take my frustration out on him. I wanted my body to cooperate. I wanted to feel strong. That was me; not these heavy legs, this lack of energy. I should be able to do this. My mind shuffled through a rolodex of mental snapshots. Moments when I felt strong, powerful, virtually limitless in the mountains. Why am I struggling so much?
My mind began the familiar mental inventory of all the things I could have or should have done differently that might have affected my physical performance that day: maybe I’ve been eating too much dairy, or not enough antioxidants; maybe it’s because I haven’t been taking my supplements all summer; maybe I had too much caffeine this morning; maybe I had too much blue light exposure before bed… and on and on. Dissecting every minutiae of the day to figure out how to fix the problem (my body).
Beneath the frustration of this outing, and the true root of my foul mood, was the fear that I was right back where I was last winter (and where I’d been many times before), in the worst autoimmune flare I’ve ever experienced, unable to ski uphill more than a few thousand feet without being so fatigued I needed to go home; unable to ski downhill even a lap or two without my muscles aching. Feeling victimized, angry. It was the fear that I was back where I was in 2014, post-PCT, when I couldn’t even run a few miles without my muscles burning, even though I’d just hiked 2600+ miles. Why won’t my body just cooperate? This repeated scenario rattled the deepest part of me: my identity; my life-long self concept as “strong and capable.” If I wasn’t that, who was I? What value did I have?
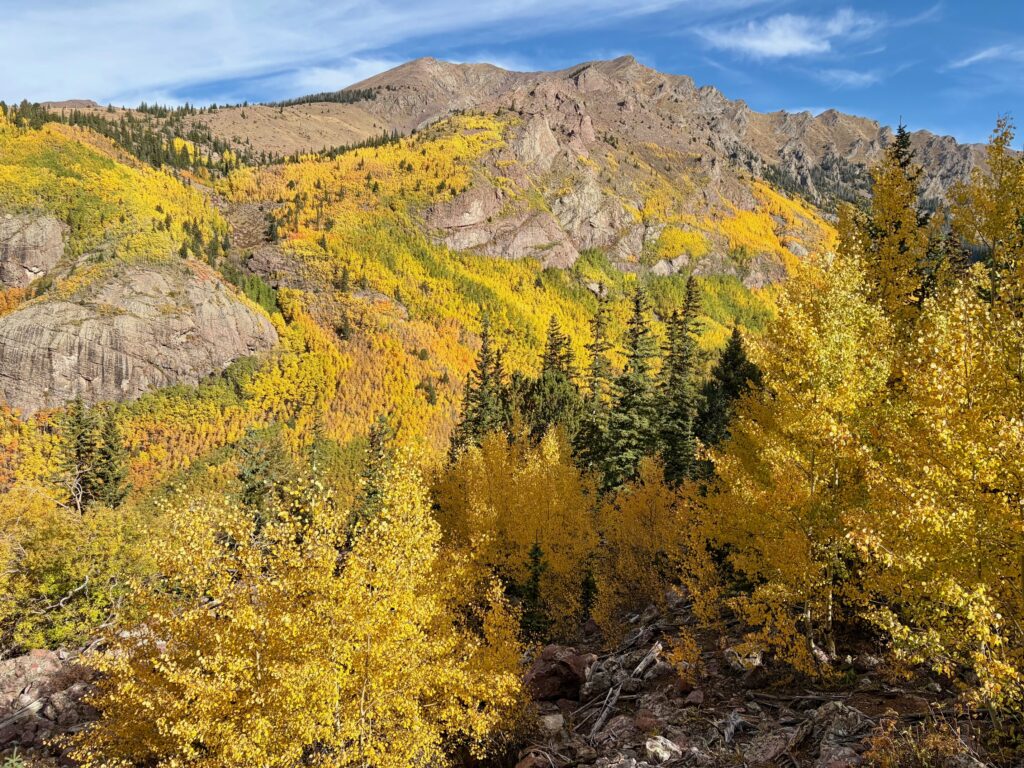
Troy tried to comfort me, offering me snacks and kind words. “We can turn around here. It’s no big deal. And look how beautiful it is.” I looked up, actually seeing what was around me for the first time since starting the off trail ascent. Aspen trees covered the hillsides and ridges in every direction. Their leaves glittering orange, red, and gold in the autumn afternoon light. I was so stuck in my head, in my frustration, that I hadn’t even noticed. Here I was, in one of my favorite places, at the most perfect time of year, with the person I loved most, not enjoying a single moment of it.
The Health Hustle Rabbit Hole
I thought about the whole arc of my health journey from the desperation to control to the eventual surrender to my body’s cycles. It’s been a decade since I found out about the Hashimoto’s, an autoimmune thyroid condition. The crushing fatigue, the inexplicable weight gain, the cold hands, the hair falling out, the inability to effortlessly run for hours in the forest as I had before. That’s when I first felt the frantic desire to “figure it out,” to “fix” my body, ashamed that I could no longer “perform” in the mountain.
After bloodwork confirmed my thyroid and adrenals were dysregulated, I went down the rabbit hole, spending hours on PubMed reading research articles, pouring through books, consuming dozens of hours of information from medical experts. I was willing to try anything and everything to get my body back to normal. I eliminated any food I may have an intolerance to. I ordered hundreds of dollars worth of supplements and blood tests. I said “No” to dinners with friends, unsure if there would be anything I could eat. I avoided hiking with others, not wanting to slow them down if I was having a “bad” stamina day.
The nutrition, sleep, and supplement protocols I implemented were largely successful, but the path wasn’t linear; it looked like a topographical map of a mountain range—peak, valley, peak, valley. Improvement, setback, improvement. I thought I’d get better and stay better, but it was more complicated than that.
Despite massive leaps forward, this time was also marked by desperation, grasping to attain and maintain the health of the capable outdoors person I knew myself to be. Every 6-12 months when I would get my bloodwork done, I’d be anxious to see the result, knowing it had the power to alter my mood for days. It might look great, or it might send me into a tailspin of What did I do wrong? What else do I need to change? Why can’t I figure this out? I need to try harder, control more. I’d wrack my brain, trying to make sense of things. Maybe I accidentally ate gluten. Maybe it’s that I’m spending too much time in front of screens or not enough time outside. Maybe I need to cut out nightshades. Maybe it’s mold, or a hidden virus.
Eventually I hit a breaking point. The health hustle was too much. Exasperated and confused during a particular low point, I asked myself, “Even if I never figure this out and my body never gets better and I’m never able to do what I used to be able to do, can I be okay with that? Can I find a way to enjoy the outdoors and be okay with myself?” I had to let myself think through this worst-case scenario and decide that, “Yes, I could be okay with that.” Facing that allowed me to begin to break free of the pursuit of perfect health.
At this point, I’d been through enough cycles of progress and setback to understand the ways in which my pursuit of health had become its own prison. It was costing me time, money, connection, and, above all, peace of mind. I came to terms with the fact that sometimes, despite doing everything “right,” the body operates on its own timeline.
The Stress Epiphany
Back on the tundra choking down a dry peanut butter sandwich between sobs, Troy attempted to console me. “You’ve had a really busy summer. Your body just needs some rest. This doesn’t mean anything about you or your capabilities. We both know you can still kick my ass up this mountain. And even if you couldn’t, that doesn’t mean anything about how amazing you are and how much I love you.”
He said to me the things I needed to be saying to myself. I reflected on the busyness of the preceding six months. Since late April, I’d spent 70 days in the field guiding (not including travel), across four different locations, and also squeezed in a 14-day walk across Iceland. And then there was the persistent underlying stress of my mom’s declining health always in the back of my mind, along with several smaller “death by a thousand cuts” type incidents, such as losing my phone in a stream midway through my Yellowstone guiding assignment.
As I sat there, I realized this wasn’t just a bad day; it’s a pattern that started in 2014 and which has revisited me at various times and with varying degrees of intensity since: most of my “health crashes/autoimmune flares” root back to stress. I thought back to the previous winter, one of the worst “flares” I’d had in decades. It started with a cold from which my body never fully recovered and which snowballed into a season of struggle.
A journal entry from that time:
“I’ve been in a cocoon this winter. My former self melting into a puddle, unclear what forms it’s to take next, unknown transformations happening beneath the surface. It’s been painful and confusing. I’d like to be skiing this morning, but my body will not allow it today, so I guess this is the day I finally sit down to write up this post that has been on my mind for months. The intention of sharing it on the blog is to be a resource for others who deal with Hashimoto’s disease and the flare ups, or anyone who’s familiar with the non linear healing journey, or anyone whose self concept is one of ‘strength, endurance, doer of hard mountain things’ and they find their body uncooperative in the pursuit of their identity-defining features. Alchemizing this shitty thing into something useful.
Since about mid-November (2024), or at least since Thanksgiving, I’ve not been doing well. In addition to getting sick, I was immediately plunged into a heavy workload. My resting heart rate was through the roof (for me); similarly my heart rate variability in the low-30s had rock-bottomed (for me). On the days I went out to ski uphill at Monarch with Troy, I was exhausted, dragging ass up the hill; a far cry from my normal endurance base. When I skied down, my leg muscles searing so bad that I had to stop multiple times on a short run to keep from collapsing. I’m frustrated and disheartened by my fatigue, my inability. This time has not only been extremely challenging on a personal level but extremely hard on my relationship with Troy as well.”
Gazing out across the valley, I thought about how I am an expert at the ‘I’m fine’ lie, ignoring quiet signals until they became screams. I tell myself, and I truly want to believe, that stressors aren’t affecting me, but the body doesn’t lie. This denial leads to overextending myself emotionally, mentally, and/or physically.
And much to my dismay, there’s no quick fix for creating a true and lasting sense of nervous system safety. You actually have to do the hardest work of all: listening to your body and slowing down. Choosing to rest, or turn back, when your ego wants to push through. It’s easier to try to supplement your way out when what’s really being asked is to address what’s not working in your life and what your body is actually asking for (e.g. rest).
I tried to internalize Troy’s reminder: even if you aren’t the strongest, you’re still valuable. While I rationally know this to be true, it’s taken years of reprogramming to actually believe it and embody it. Whether it’s Hashimoto’s, aging, or injury, we all eventually face this gap between who we think we are and what we can physically do. How we respond to that gap – whether we choose to fight it, deny it, or come to peace with it – shapes how we move forward.
“Should we head down and head to the hot springs?” Troy asked. Internally I protested for a moment, wanting to say “Let’s keep going. I can do it.” I exhaled deeply, a weight lifting off my chest, “Let’s stay a bit longer and enjoy the trees, then we can head back. I’m bummed but I guess the summit will be here for another time.”
As I soaked in the hot water, staring up at the golden ridgeline we’d just come from, I considered this winding journey I’ve had with adapting to these health complications that have affected my sense of my endurance, strength, identity, and ultimately, value.
Throughout this 12-year journey, there are a lot of practical tools I’ve learned that have helped me to recover faster, hike longer, and generally enjoy my time in the outdoors more. I’ll cover those in Part II. But it’s using these tools in conjunction with the right mindset that make navigating inevitable body changes a source of resilience and wisdom rather than frustration and desperation.
The Mindset Lessons
If you find yourself on your own version of that tundra, here is what I’ve learned to be most impactful in navigating this path:
Redefine success. A good day in the mountains no longer has to include a summit, big miles, pushing through, or feeling strong. Similarly, the destination with the “health tools” I employ isn’t glowing health. Time well-spent outside includes presence and appreciation for nature; listening to my body and honoring my needs. It’s about enjoying time with people I like, eating good snacks, drinking from creeks, soaking in the sun, and generally reveling in the gift of being in this body while I can. “Success” is doing what I can to support my body’s health as much as possible but not beating myself up if I can’t climb or hike as hard as I used to; it’s being able to still enjoy the outdoors no matter the state of my body.
No comparison allowed. The only person whose experience I can fully understand is my own. It’s a waste of mental energy to feel self-pity because I’m dealing with a certain set of circumstances that others aren’t. Or envy that another person seems to be having an easier time moving through the mountains than me. The “no comparison” rule also applies to comparing myself to past versions of myself. I’m in the body that I’m in now and that’s all that actually matters.
Come back to gratitude. Always a powerful tool for shifting perspective. It’s only in hindsight that I could see how much I took my functional body for granted. Instead of sadness for what my body can’t do, how about appreciation for what it can do? Or even gratitude that I have a body at all.
Remember why I love being outside. Instead of a stage on which I perform athletic feats, it’s a place to feel grounded, clear, and free; to reconnect with myself; to shake off the mundanity and distraction of modern life; to be part of nature; and to have fun and play.
Accept what is. This is the recognition that, like nature, the body has cycles. It’s naïve and immature to expect the body to only get stronger when the biological reality is that we’re all on a slow, steady march towards death. This doesn’t mean that we don’t continue to push ourselves to do hard things or to take care of ourselves as well as we can. We do, but with more wisdom, grace, and inner attunement. We learn how to be adaptable and responsive to what’s present versus what we planned. It’s a more honest relationship with ourselves and with life.
While I know that it’s these mindset tactics that will help me navigate the next health valley with more composure, trust, and wisdom, there are specific tools I’ve used to support my body and pull out of each slump faster, including this most recent one in autumn of 2025. In Part II, I’ll share the specific nutrition, sleep, and supplement protocols that help me manage my Hashimoto’s and stay in the mountains.
I lean into the wind—a solid, invisible wall—forcing my body forward, toward the valley head. It takes the full weight of my body just to maintain balance. Next to me, I see Troy’s silhouette fighting the same impossible force, bracing against the whipping dust. The sky is gone, replaced by a churning, opaque fog of beige dust. Every inch of me is covered, yet the sand finds a way in. Beneath my buff, grit scours my teeth, and my eyes, burning behind sunglasses, water incessantly. All I hear is the constant rattle of thousands of grains of dust blasting the hood of my jacket. Two questions swirl in my head: What am I doing here? Why did I feel drawn to come here?
But we’re getting ahead of ourselves. Let’s start from the beginning.
Route Overview & Intentions for Going
Iceland had been on my radar as a backpacking destination for a long while, and being on the cusp of my 40th birthday, I decided this year was the year to make it happen. I was drawn to the natural beauty, of course. I also wanted to experience what makes the culture and people unique, and to enjoy a multi-week backcountry trip with Troy. At least these were the logical-sounding reasons that I told myself and others when they asked.
To be honest though, I wasn’t sure exactly why I was going. I just knew that it was a destination that kept surfacing in my mind, and I was confident that at the end of the day, if I was spending two weeks moving through nature, wherever I was, it’d likely be worth it.
So, I set to planning and in August of 2025, Troy and I spent two weeks walking across Iceland, an island of rough, volcanic extremes that’s nestled in the North Atlantic a few degrees south of the Arctic Circle. It has a subpolar oceanic climate that creates famously unpredictable weather, with strong winds and frequent rain being common year-round. Our route covered roughly 340 miles and consisted of cross country travel, rugged 4×4 roads, and maintained trails. Walking surfaces included sand, volcanic rock, dirt, gravel, moss and grass.
It’s a desirable destination for many reasons, not the least of which is the unparalleled natural beauty. Known as the land of ice and fire, the landscape is shaped by ongoing volcanic, tectonic, and glacial activity. Traveling across the country meant an immersive tour of the powerful forces of ice and fire: massive glacially-fed rivers, expansive ice caps, and a variety of geothermal features including volcanoes, fumaroles, boiling mud pots, lake-filled craters, steaming rivers, and black sand beaches.
That wind would be our faithful companion throughout the journey, driving us mad in one moment and offering an opportunity to practice ultimate surrender the next; our response dictated by our current moods and capacity for discomfort. Of course, I’d known this was likely to be the case when I started my trip research eight months prior. But it’s always hard to imagine exactly how challenging something might be from the comfort of your desk, well-fed, in a temperature-controlled room. From there, the idea of hiking across Iceland sounded great.
Iceland day-by-day
Húsavík to Reykjahlíð
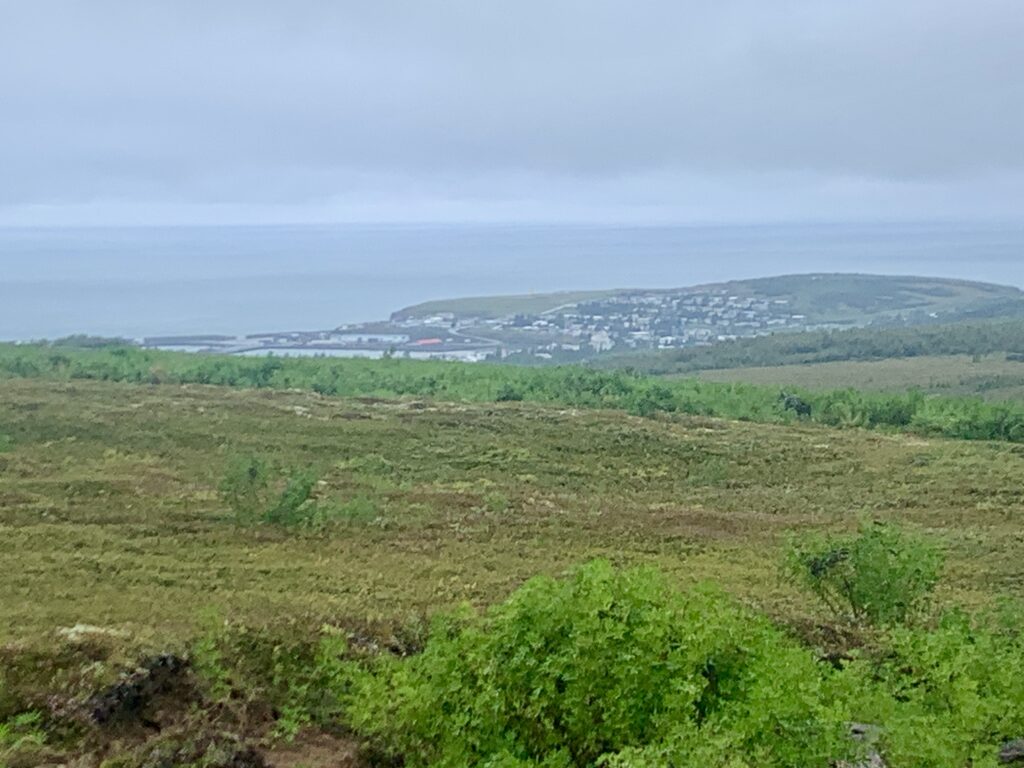
Shortly after 1pm on a drizzly gray afternoon, we set out east from Husavik, a town of about 2,500 inhabitants best known for its incredible whale watching. True to our natures, like we’re heading out for a walk up our local Tenderfoot Hill, we set off in silence. No fanfare, just walking.
While creating our route in the months prior, we quickly found that the options for crossing the island are many. Ultimately, our decision to start from Husaik, rather than the northernmost lighthouse of Hraunhafnartangi, was a logistical one. There’s no longer public transport to the lighthouse and our schedules didn’t allow for us to spend an unknown amount of time waiting for a hitch. Walking out of town was easiest and most efficient.
Loaded with 12 days of food, the shoulder straps of my pack dig into my shoulders and cause my iliac crest to go numb, but I barely notice as I’m so delighted to finally be walking after nearly 48 hours of travel and final preparations. Birch trees and lupine blooms line the path drawing me towards the first of hundreds of lakes to come. Half a dozen gulls dot the surface. As we climb above the shrubbery, I look back over my shoulder to see the town nestled into a small bay. Beyond is the ocean, an endless expanse of aqua blue beneath a low gray cloud. After months of planning and ironing out details, it’s liberating to finally be executing the plan. Nothing more to do except walk now.
The remainder of the afternoon is a blur, time muddled as we hike alongside a road, in a cloud. Fortunately, traffic is sparse and the miles go quickly. Road walking is never my preference, but as I gaze up at our off-trail high route option encased in cold rain and wind, I’m grateful to be down low. It’s day one and already I’ve worn all the layers I’m carrying. I feel justified for throwing in the extra mid layer and heavier rain gear.
Around 7pm, we find a protected spot behind a knoll to set up camp in a clearing of dwarf birch. I’m satisfied to have put in a solid day of walking despite our late start. We get a hot meal in us and, still jet-lagged, fall into a deep sleep soon afterwards.
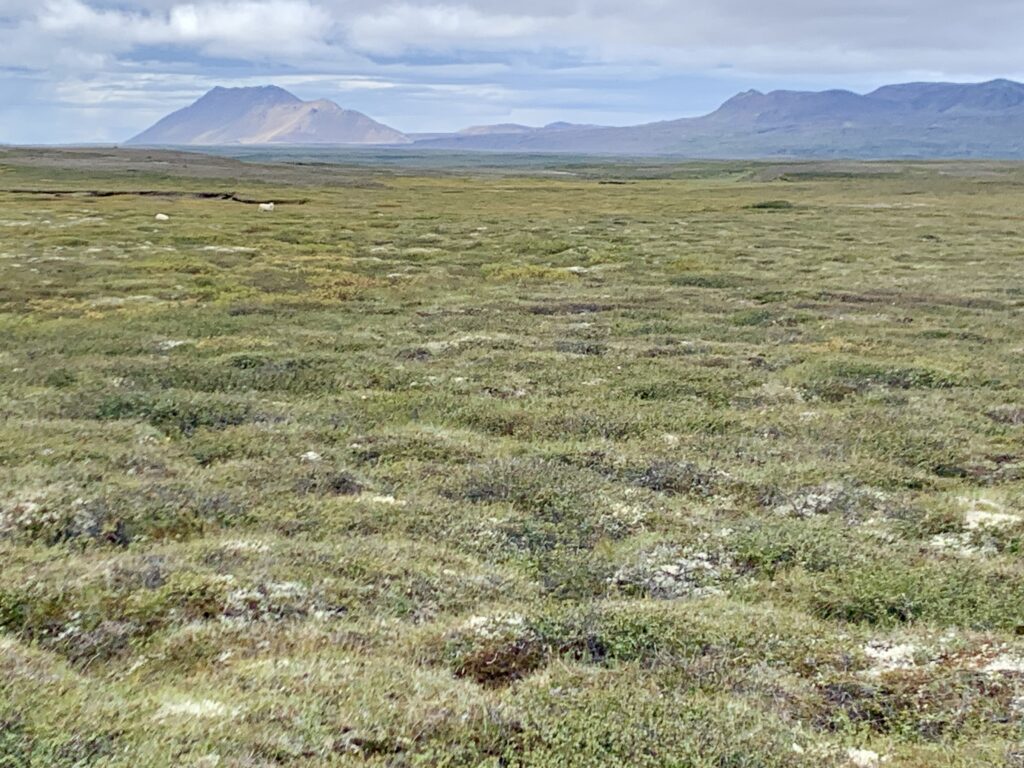
The storm clears overnight and we awake to clear skies and sun. Our spirits are high and we pass the morning walking dirt paths eastward towards Vatnajökull national park. The old farmer’s roads are the most efficient walking here as they create a navigable route through a landscape full of deep fissures and mounds of lava rock that are covered in a dense layer of dwarf birth, crowberry, lichen, and moss.
The only life to break the volcanic stillness are the domesticated sheep. They roam the land and bring me joy. We unintentionally startle them from their burrows beneath overhung shrubbery, surprising both them and us. Baaaaaing, they scurry up the road and then we repeat the whole thing thirty minutes later when we come across them again. And again and again.
As we walk, I’m pleased to find that there’s a wider diversity of shrubs and wildflowers than I anticipated. Some are new to me and others are familiar friends. It’s humid this morning and when the breeze subsides, the midges are upon us in droves; dive-bombing our eyes, buzzing in our ears, and trying to fly down our throats. Losing patience, we don our headnets and continue on, hoping for a light wind.
By early afternoon, we’re at the park, ready for a break. After topping off with water from the surprisingly nice WC, we sit at a picnic table(!) for a relaxing lunch in the sun. We’ve put in 20 miles, but the day is still young and we’re excited for what’s next. We press on, knowing that camping is only allowed in designated sites within the park, and our next chance will be in 12 miles.
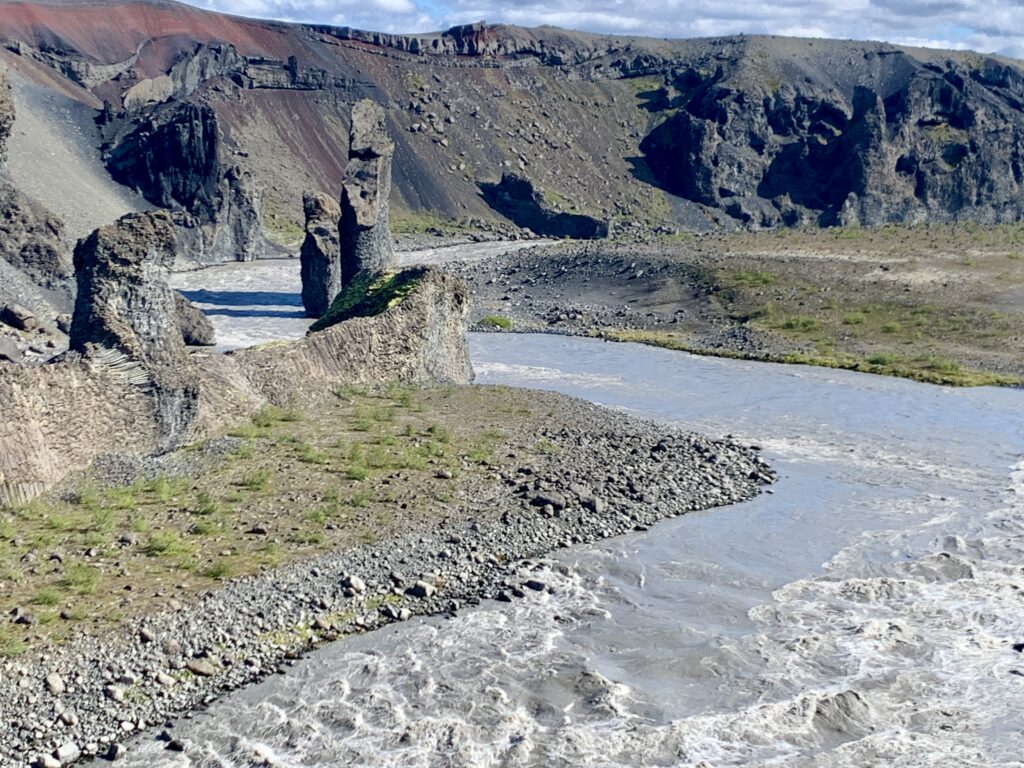
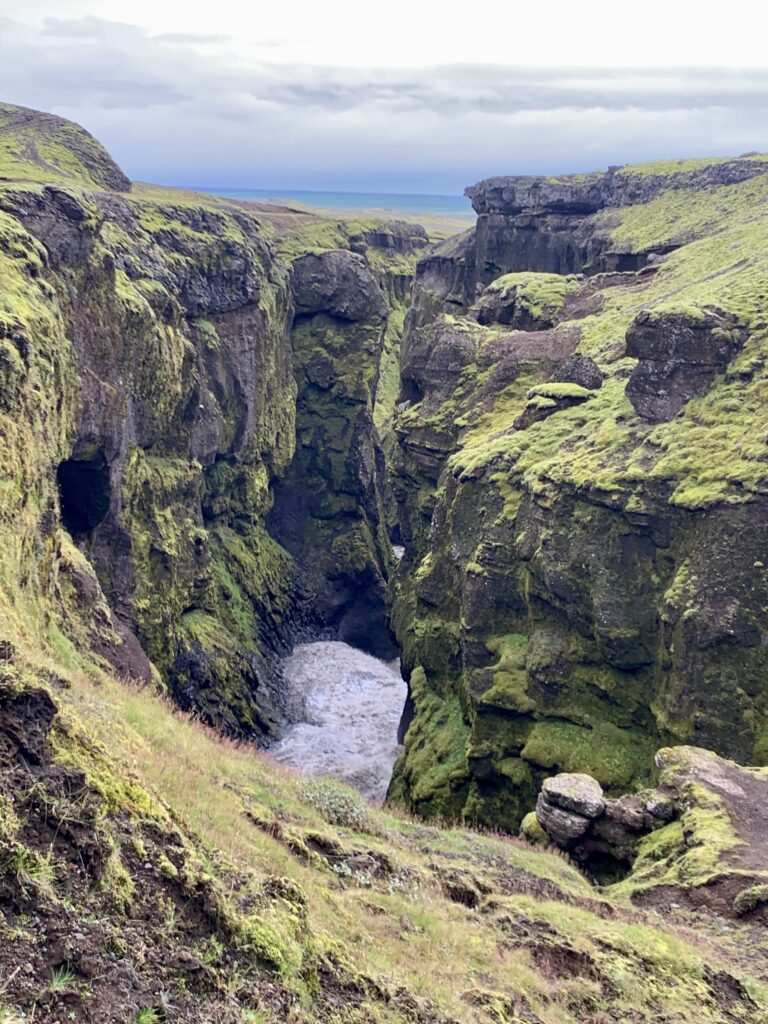
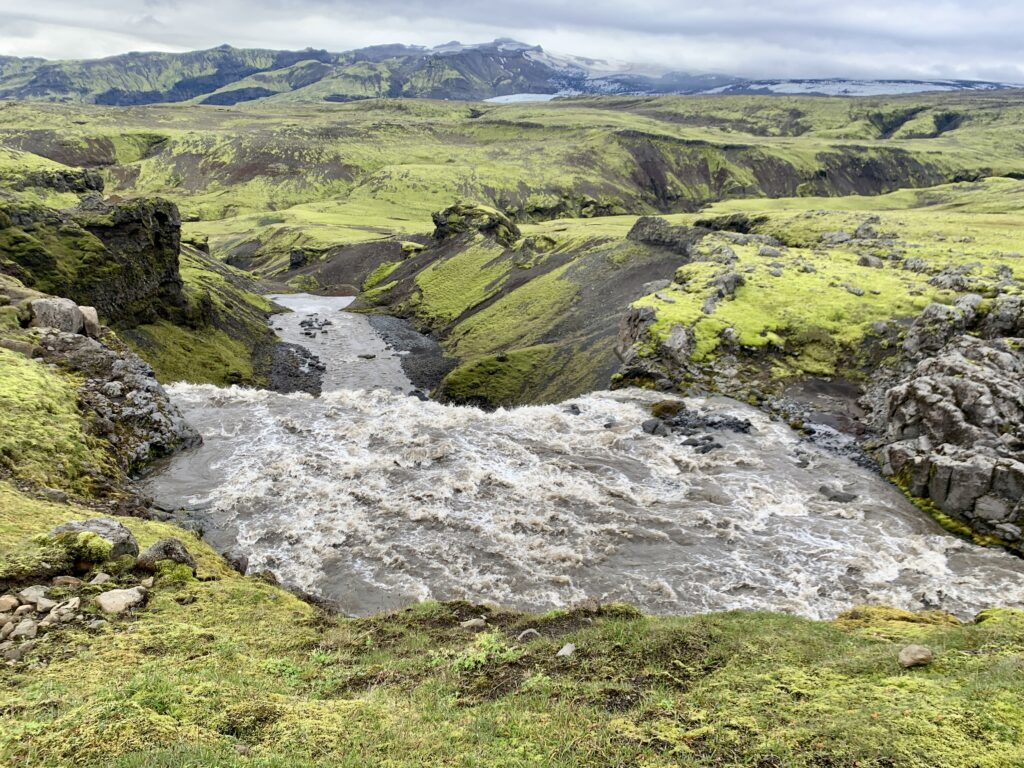
The sound of a roaring river beckons us to the edge of a gaping canyon. A hundred feet below, we see a wide, rushing, milky torrent making its way to the sea. Jökulsá is the second longest river in Iceland. Its source is the Vatnajökull glacier, which we will spend the next seven days walking towards. The canyon, we learn, was carved 8,000 years ago from a lava blockage in the water course which caused catastrophic flooding. Its walls consist of ornate columnar volcanic rock, indicating that the lava cooled slowly.
Enlivened by the change in scenery, we dip in and out of treed patches, admiring the river below and the plethora of little waterfalls gushing from the canyon walls. As the miles stretch on, our bodies feel the impact of the miles on our feet coupled with the weight of our packs. Breaks become more frequent and our pace slows. After what feels like a long afternoon, shadows already long and air cool, we close in on Dettifoss. We’re pleased to find camp in a circle of large, wind-protected boulders. We’re even more pleased that the park has cached water here for hikers, saving us a trip to find it. Bodies aching, we’re grateful to be done for the day.
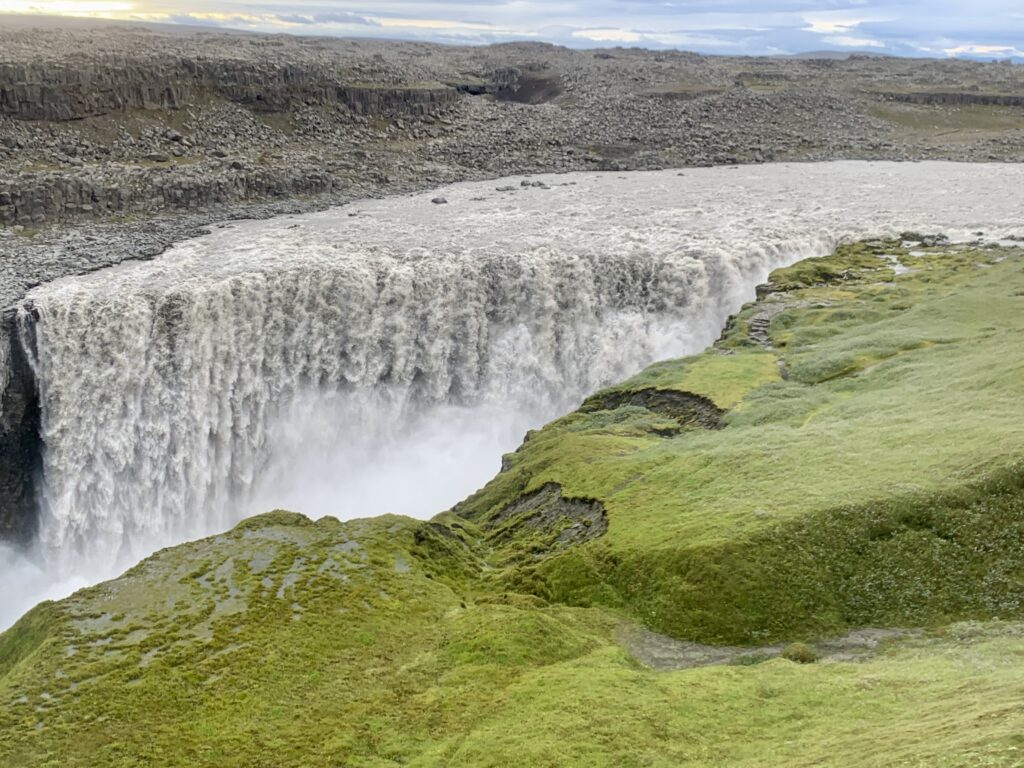
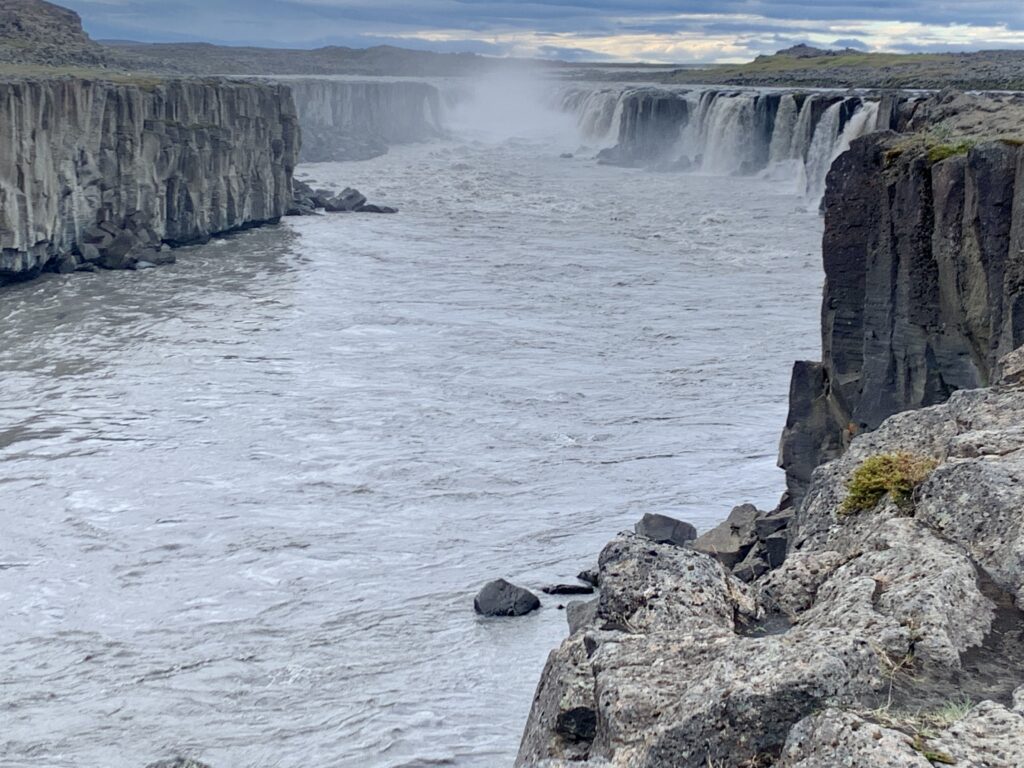
I wake up refreshed and with childlike excitement for the day ahead. “Today we see Dettifoss,” I whisper to Troy. Dettifoss is one of the most powerful waterfalls in Europe and a landmark I’d been looking forward to since I started planning. The sky is grey today and there’s a cool breeze, but it doesn’t feel like there’s precip coming. I sling my pack on and notice it finally feels just a tiny bit lighter; a good feeling. After an obligatory visit to the heated park bathrooms (very nice!), we follow a short path to the canyon’s edge.
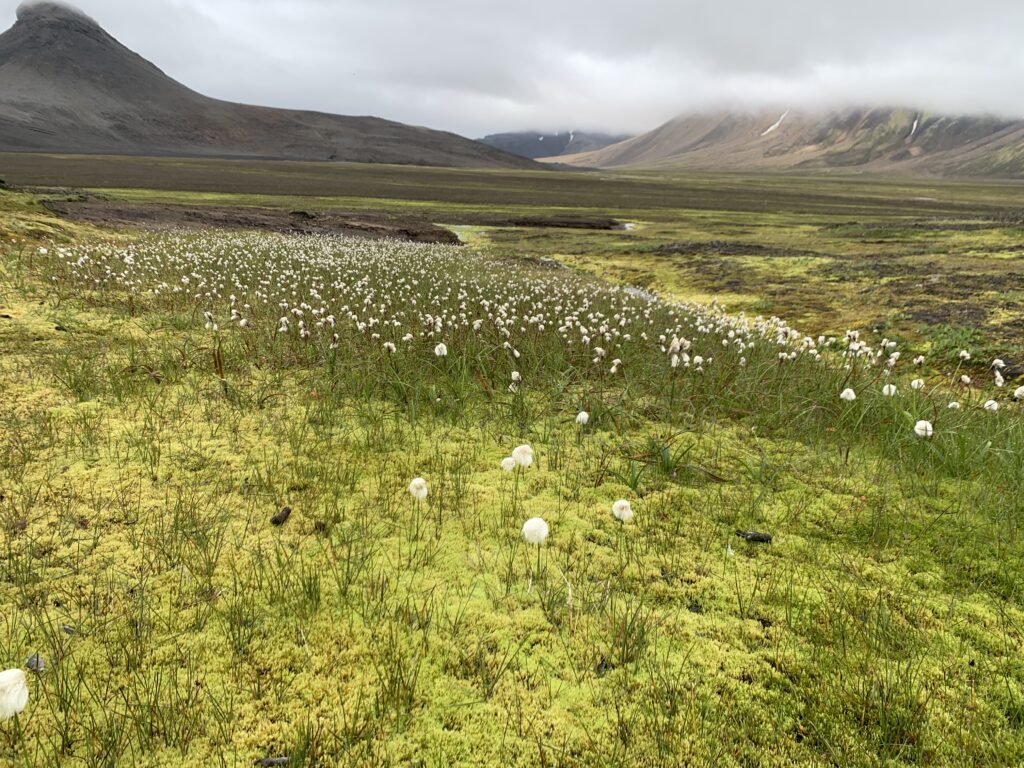
Being early, we have the rare treat of experiencing this famous feature with no one else around. Thousands of gallons of water plummet over the cliff, vanishing into the churning, self-created spray and roar below. Along the banks, thick carpets of vibrant moss peppered with tiny white flowers blanket the ground. Exposed soil indicates where whole slabs of peat have slid into the abyss.
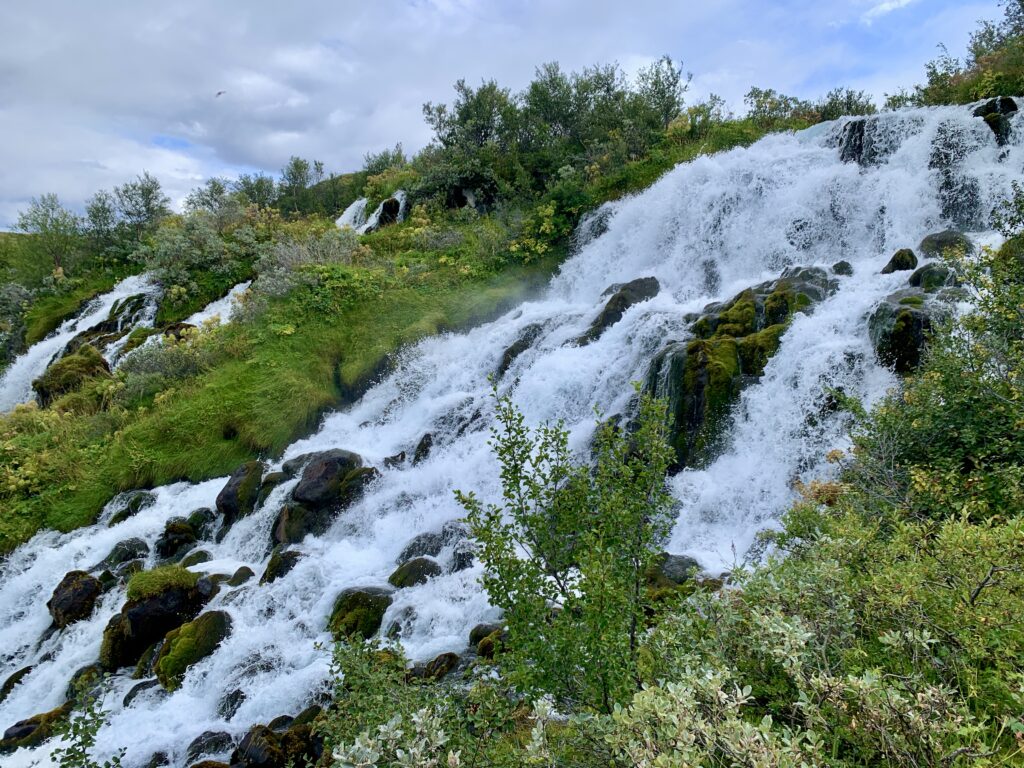
Droplets from the spray cloud gather on our coats and the thunder of the water is so loud that we have to raise our voices to speak. So we don’t speak much and instead admire the powerful scene in silence. Like the jumping flames of a fire, it’s mesmerizing and I could watch for hours, but we’ve got places to go. Before heading off into the moonscape toward distant peaks, we walk upriver to Sellfoss, a smaller, though still extremely impressive, waterfall.
Heading west, the gravely ground provides fast, firm travel. We drop over a rise into a rolling heather-willow-dwarf birch valley. Hints of crimson ground cover and yellow willow leaves draw my attention. It’s early August and fall is already here. I spot four fuzzy mounds — more sheep! I’m amazed by how the sheep can live here in the harsh conditions, with seemingly little water.
We’re aiming towards a mapped hut, hoping it will provide a cozy spot for lunch. What we find is a dilapidated, mouse-infested shack. We sit behind the building for a break from the wind. Clouds build over the afternoon as we make our way towards Krafla, one of Iceland’s most active volcanoes. Sprinkles begin and soon it’s a full on downpour. I’m warm enough, as long as we keep moving.
Sheets of rain over the moonscape feel ethereal, other-worldly. Pushing forward into the drizzle, engaged by the navigation and scenery, I look up to find that we’ve entered a valley bordered by ochre cliffs. The rain has ceased and it smells of sulfur. Reindeer and snow lichen cover the ground, reminding me of the Brooks Range. Silently, a Golden Plover takes flight from behind a rock. We crest a small pass, collect water from a stream, and make camp on the leeward side of a knoll.
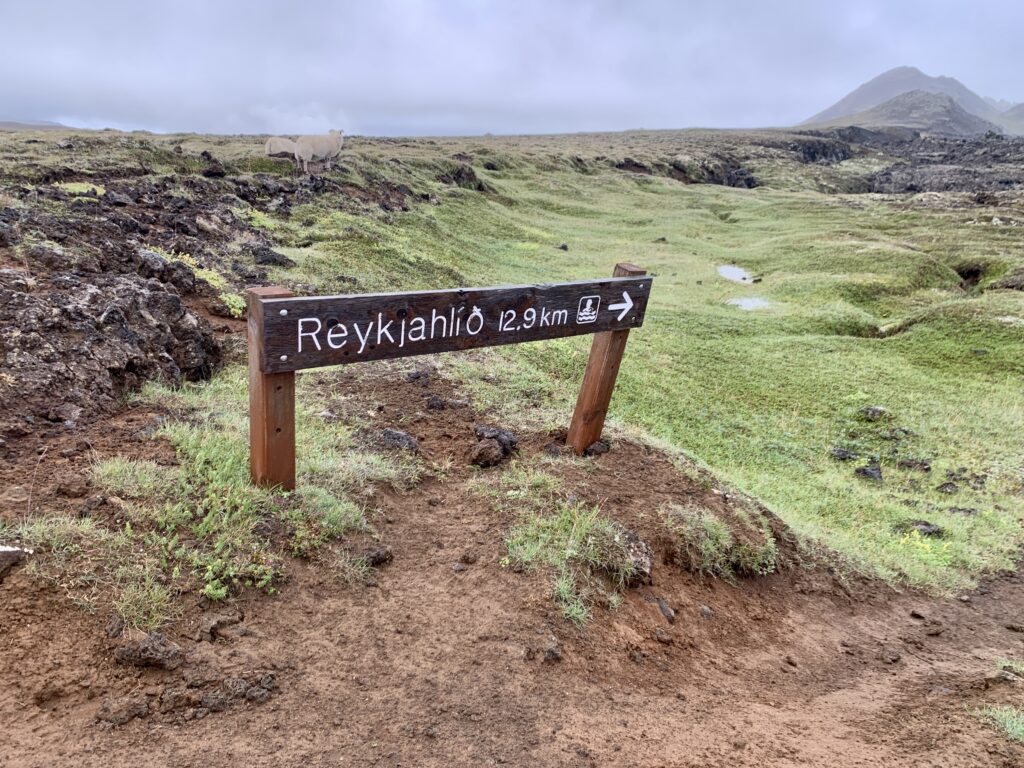
Wind howls and rain pelts the tent throughout the night. When it’s time to get up, it’s cold, blustery, and misty. I very much do not want to get out of my quilt and start walking in the windy drizzle. But, we need to keep moving and also, today is the day we get to Reykjahlíð, a small village where we can get a good meal and top off our food supply. We don rain suits and get going.
Iceland’s geothermal activity is driven by a hotspot that sits atop the Mid-Atlantic Ridge, which roughly splits the country in two along a north-south axis. The Ridge forms the divergent boundary between the North American and Eurasian Plates and along it are many of Iceland’s most active volcanoes.
This morning, we’re hiking over the shoulder of one of these volcanoes, Krafla, which last erupted in 1984. Viti, Krafla’s crater, is about 1,000 feet in diameter and 150 feet deep, and contains a striking blue-green lake. At the crater’s edge, we stand in the rain gazing down into the aquamarine pool. Beyond the crater rises billowing steam from the Krafla Geothermal Station, which drives two large turbines.
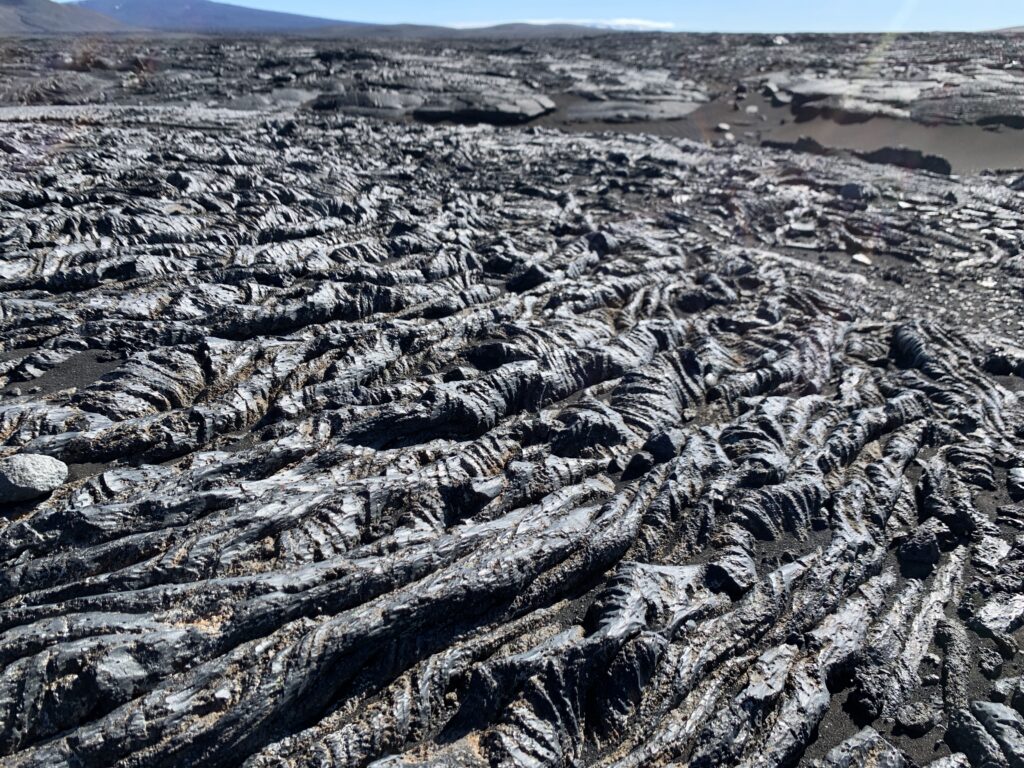
Departing Viti, we enter an extensive lava field that will take us the remainder of the way to town. Thankfully there’s a path as it’d be nearly impossible to navigate our way through the mangled landscape otherwise. Even with the path, it’s tough walking across sharp, rolling ridges of pumice. Fumaroles spout steam from russet hillsides. I’m making connections between what I saw on satellite imagery months ago with what it’s like to actually walk here.
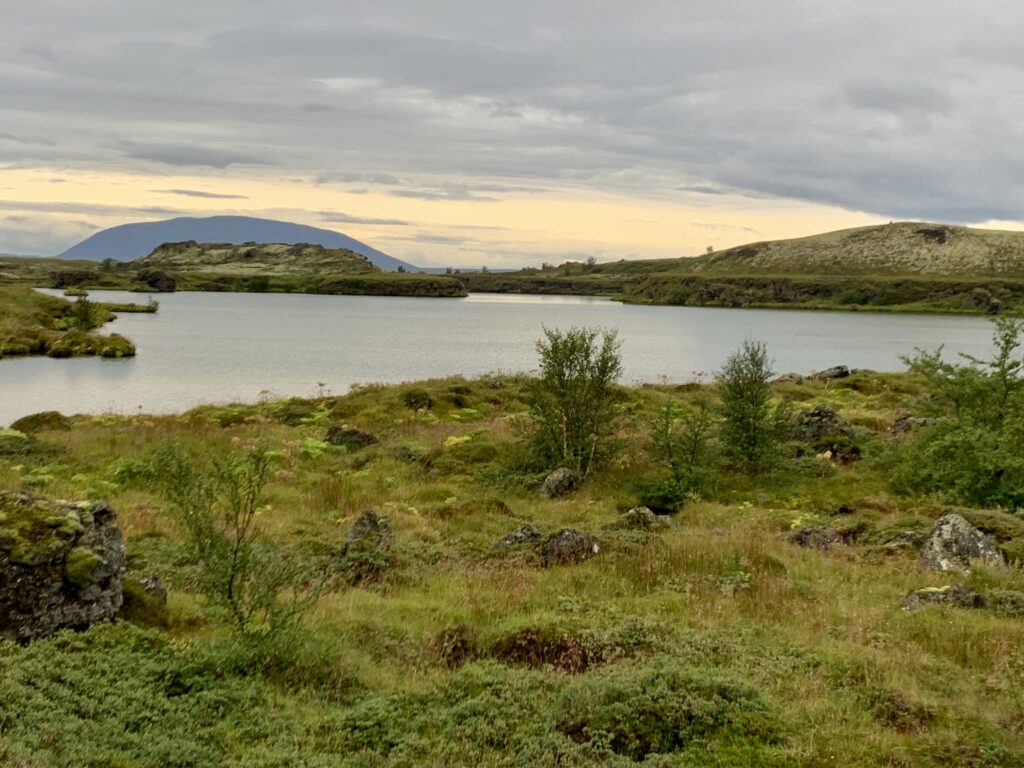
By mid-morning we’re in Reykjahlíð, setting up camp with front row views of the massive Lake Mývatn. We enjoy the amenities including a hot shower, covered cooking tent, indoor bathrooms, WiFi, and outlets. The small village has everything we need, including a couple of restaurants and a small grocery to top off our supplies. Chores complete, we focus on resting. Our next stop is Landmannalaugar in eight days.
I drift off thinking how good it feels to finally be getting into the rhythm of the hike. There’s a liberating simplicity in knowing that our daily life for the next ten days is walking, eating, and observing. Just be present to the experience and the surrounding landscape. I hope that we stay healthy and that the Icelandic weather is kind to us, or at least not too punishing.
Reykjahlíð to Landmannalaugar
I’m grateful for a refreshing stay and ready to move on. In the morning mist, we trace the eastern edge of Myvatn heading southbound. Mist becomes a light drizzle. At least it’s relatively warm and not windy. The landscape is lagoon-like with little lakes, grassy pumice islands, and ducks sitting peacefully atop still water.
With the straightforward navigation of this section, there’s plenty of time to let one’s mind wander. I think about how much trail and road walking we have on this route and question my decision to come here, knowing my love for the engaging nature of an off-trail route. But, there’s something that this type of walking offers that off-trail hiking does not: space for your mind to relax and go where it needs to go, thoughts untangling with each footstep forward.
I think about how this trip is a 40th birthday present to myself. I think about how I’m grateful that my body can still put down high mileage days. I think about the length of a life, about the passage of time, about my dad’s death and my mom’s health.
After nine miles of misty, midgy shoreline walking, we break off to the south, entering pastoral sheep land. Grass fades to broken rocks and soon we’re back on the moonscape walking towards Sellandafjall, a large mountain on the horizon. With no trees to provide scale, it’s hard to gauge distance here. We walk towards it for hours. We break, we lunch, we talk, and we walk in our own thoughts.
I remember on the Oregon Desert Trail walking towards a lone tree on the horizon for much of the day, miles upon miles of the same sage-specked landscape flowing by. Then suddenly you’re at the tree, emerging from a time warp, unsure of how many hours have passed. And it almost doesn’t seem real; this thing you’ve been walking towards all day. Then the process unfolds in reverse as the tree slowly fades into the distance behind you. It’s refreshing to step out of the time-space continuum of normal life, to slow time down, to just walk and exist; to think of everything, or nothing at all.
An unexpected oasis of green grass and gushing creek appear at the base of Sellandafjall, in the middle of this barren rockscape. A mama sheep and two lambs dart out from their wind-protected den in the hedges. The mama, udder bloated with milk, is limping. Tromping through the heath, we give them a wide berth.
Walking around the base of the mountain takes several hours. Storm cells come and go; rain gear on, off, on, off. Hours later, ducking into a small divot in the land, we pitch next to a burbling stream, using rocks to stabilize our shelter against the wind. It feels desolate and remote here, like we’re on a different planet. I feel my whole body exhale. This is what I was seeking; the emptiness. I fall asleep thinking about the sheep with the injured leg.
At 4:30, I crawl out of the tent to relieve myself and the entire expansive sky is streaks of pink, blue, and mauve. A blazing golden sun crests the eastern horizon. I watch it until I’m too chilled to stay out any longer.
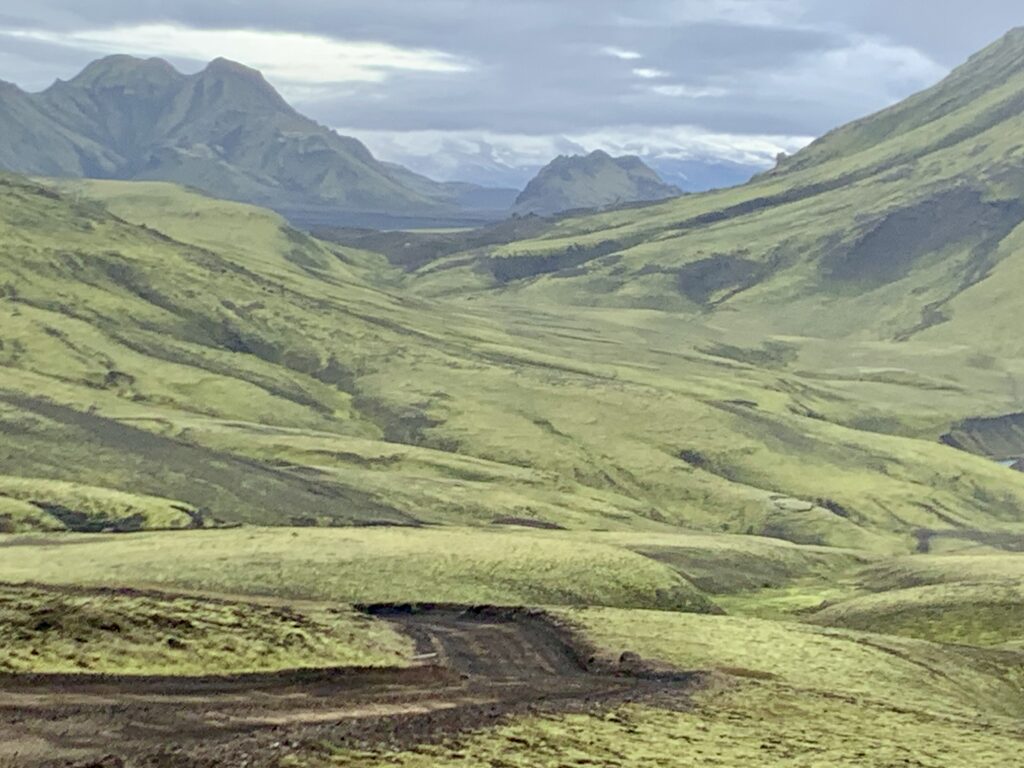
Endless gravel roads carry us towards the Dyngjufjalladalur valley as moody skies loom above. The moonscape turns briefly to green sheep pasture near an unnamed river that marks our turn. Continuing deeper into the Highlands, any remaining greenness soon fades to lava rock and desolation. We won’t see the sheep again until we’re at the southern coast.
Mid-morning, Botni hut provides a pleasant break from the wind. It’s howling today. I make tea and wish we could stay the night, but we have 14 more miles to our intended destination. A sign posted to the door states that our next water source may be dry. We don’t know how old the sign is, so we grab a little extra, but with already heavy packs, we roll the dice and hope the upcoming creek is flowing.
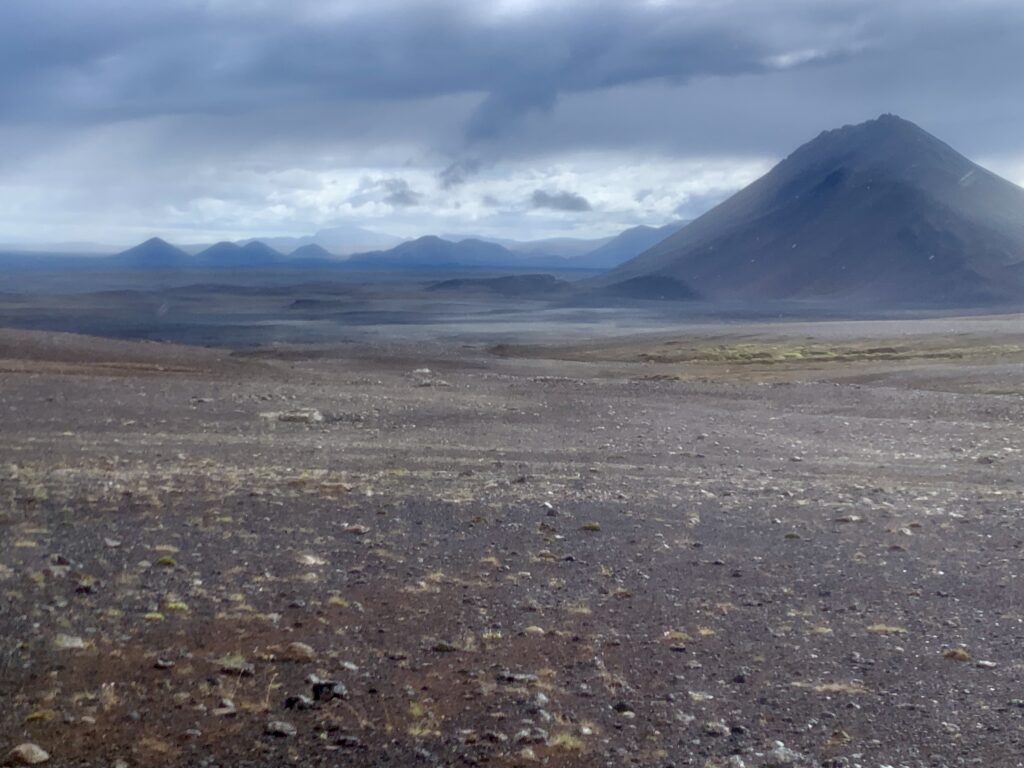
Exiting the hut, the wind has picked up and the mountains we’re hiking towards become veiled behind what at first looks like sheets of precipitation, but which turns out to be a cloud of sand. Entering the valley, the landscape funnels the wind, which is now gusting at 35-40 miles per hour.
I lean into the wind—a solid, invisible wall—forcing my body forward, toward the valley head. It takes the full weight of my body just to maintain balance. Next to me, I see Troy’s silhouette fighting the same impossible force, bracing against the whipping dust. The sky is gone, replaced by a churning, opaque fog of beige dust. Every inch of me is covered, yet the sand finds a way in. Beneath my buff, grit scours my teeth, and my eyes, burning behind sunglasses, water incessantly. All I hear is the constant rattle of thousands of grains of dust blasting the hood of my jacket. Two questions swirl in my head: What am I doing here? Why did I feel drawn to come here?
After a distance that felt much longer than it actually was, we’re at the Dyngjufell hut. We hadn’t planned to stay here, but it’s hard to justify hiking on in these conditions. Inside the vestibule, I force the door closed against the wind, stunned. It’s such a relief to be out of the sandstorm. On top of that, the water source, a small ephemeral snowmelt-fed stream, is flowing.
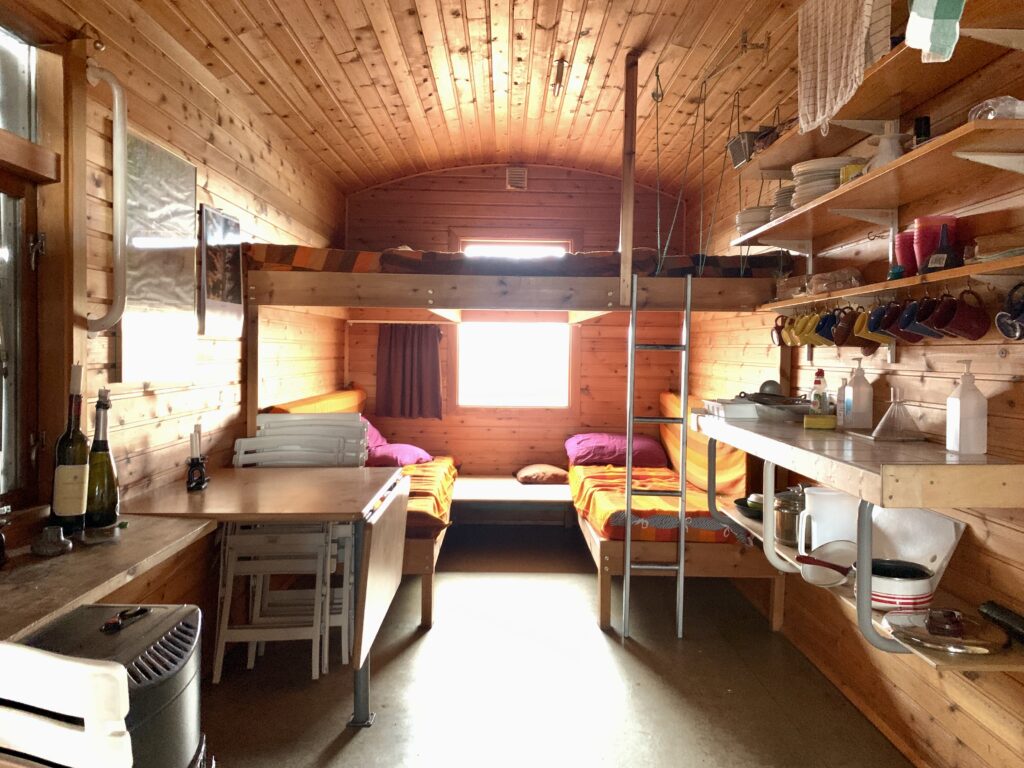
The hut is managed by Akureyri Touring Association of Iceland. The huts are not as common here as they are farther south, but several can be found scattered throughout the interior. Beds can be reserved in advance, and remaining spots are first come, first serve. Fortunately, no one else was here. At $50 per person per night, it’s not inexpensive, but when you need it, they provide refuge in a very barren, harsh, and remote volcanic landscape.
The interior is clean and simple, providing all that the weary traveler could ask for. A kerosene stove for heating, chairs, a folding table, bunk-style beds, a propane stove for cooking, kitchen ware, and I count, 25 brightly colored mugs. We talk briefly about the prospect of hiking on a bit, but the suggestion feels foolish when we, quite fortuitously, have this incredible place to sleep tonight.
Grateful to be inside as the gusts sway the structure and sand hammers the window, I can’t imagine trying to pitch a tent in this. An inreach forecast suggests that the wind will continue for the next two days, but that this is the worst of it. I stare out the window, content to be exactly where I am, with no internet access or chores to do or anything to distract. Just here. Now.
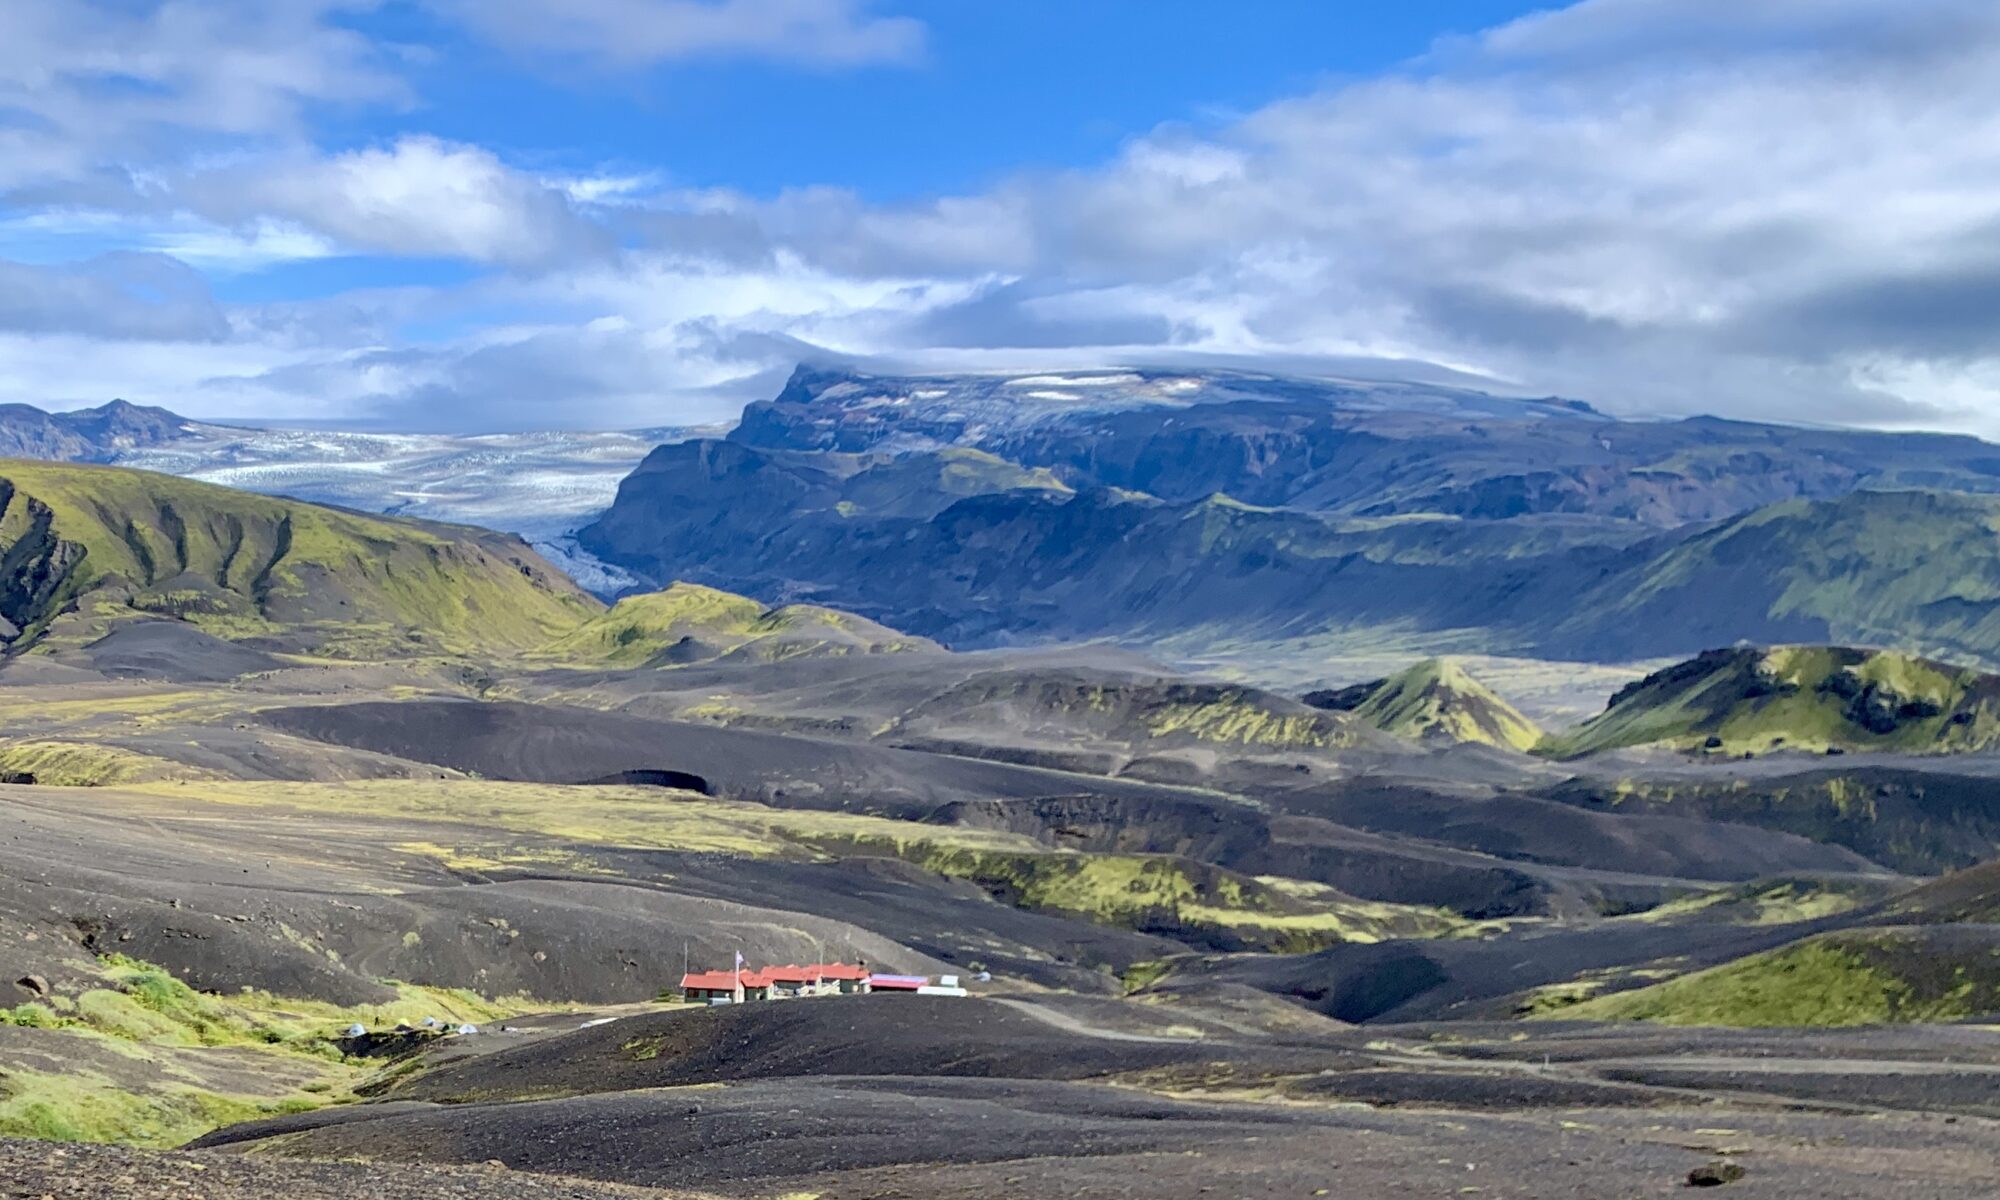
By dawn, the wind has relented to a steady 20 miles per hour, the sun is shining through and I see the surrounding mountains which were concealed behind dust yesterday. Just as our packs have gotten noticeably lighter, we load up with four liters of water for an all-day dry stretch. Just like every day on the Sangres Traverse. It’s particularly silty here. We didn’t bring alum but we’ll let it settle and decant off the top.
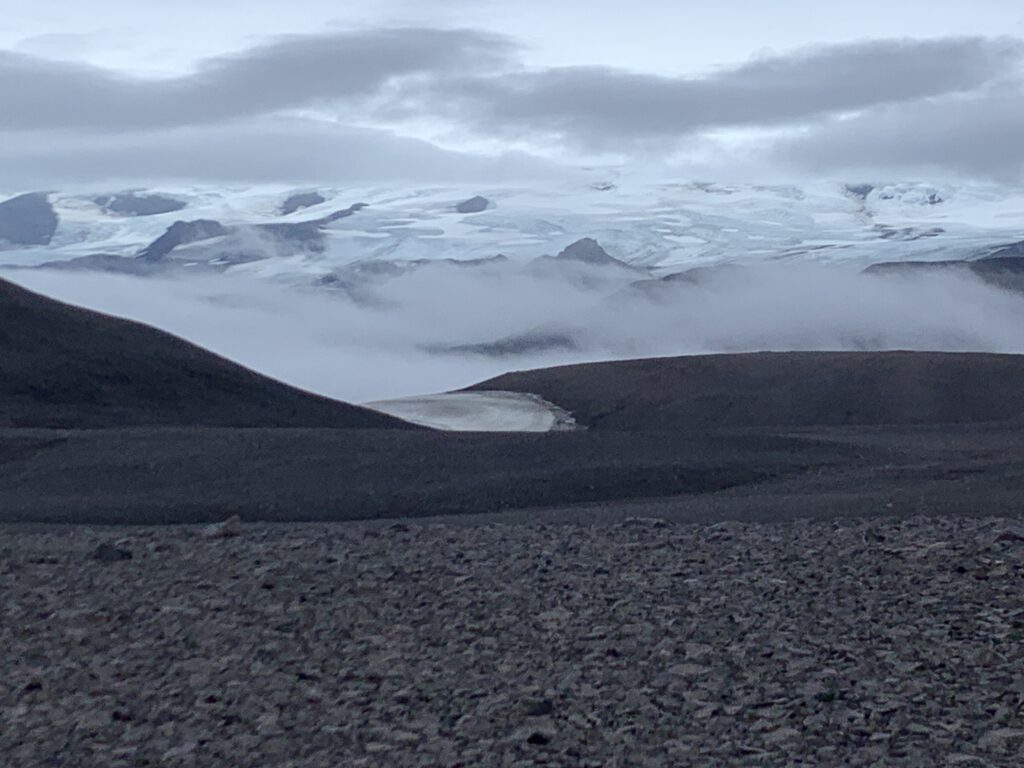
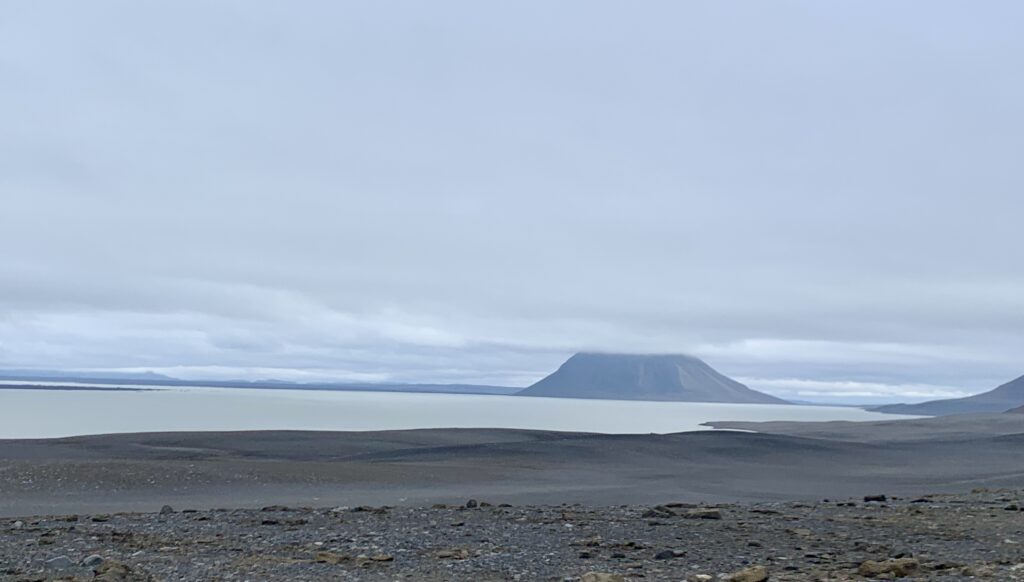
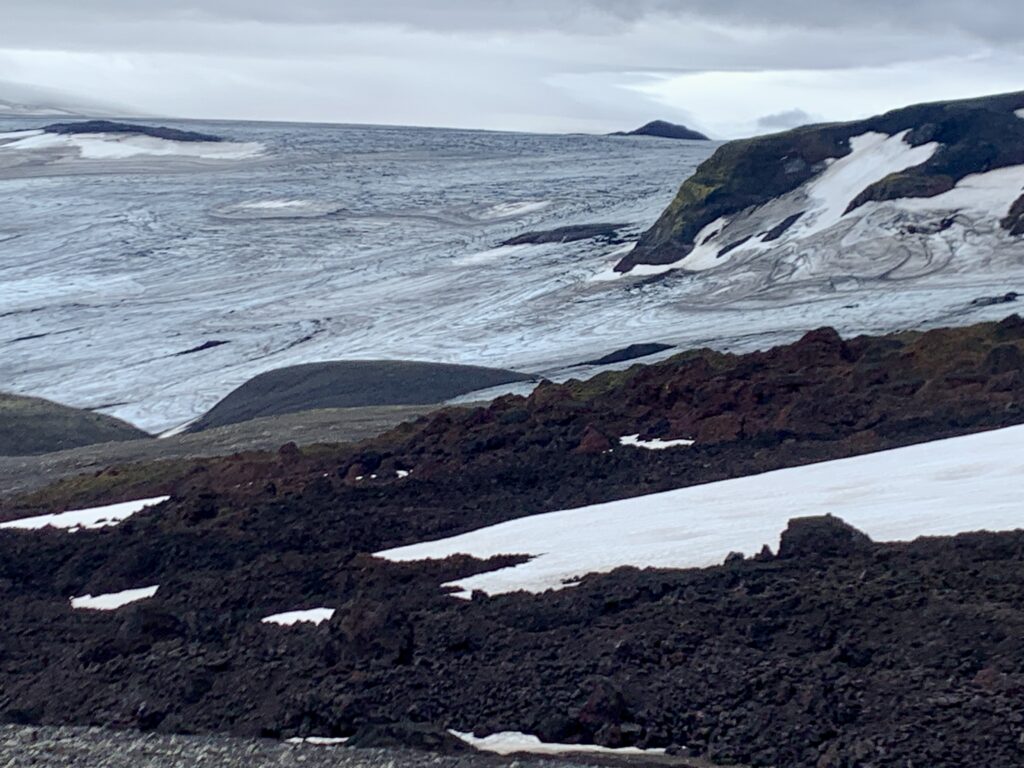
We continue our slow ascent towards the center of the island. Cresting the valley head, I see a massive cloud covering the entire horizon. I stare, trying to make connections in my brain, and realize I’m looking at the Vatnajökull ice cap. Covering eight percent of Iceland, it’s the largest ice cap in Europe, and the source of the river we first encountered on day two. Spindrift creates a snowy mirage above the surface and, as we cut west away from the ice sheet, I wonder what it would be like to walk along its edge, and regret that we didn’t plan our route that way.
With the exception of a few protected spots, the terrain is wide open and the wind is relentless today. The incessant noise is exhausting. Fortunately, the sky is clear and it’s sunny and warm. Vatnajökull remains a steady presence on the horizon, capturing our attention as the hours pass.
Still gusting when we reach our planned camp, the wind is coming from every direction, and despite our best efforts, there’s nowhere less blustery to set up. We select a large boulder and build a two foot tall rock wall around the sides of our tent. Even with our tent battened down as securely as possible, the DCF flaps incessantly. We crawl in, exhausted from fighting the wind all day, hoping our body weight will help stabilize the tent (it doesn’t). We unpack and soon there’s a fine black dust covering our quilts, food bags, and everything else. I clumsily prop up my trash compactor bag and empty backpack to cover the mesh. It’s marginally effective.
With earplugs and an eye mask, I manage to get at least some sleep despite the wap wap wapping of the shelter walls. Everytime I wake up, the wind is still at it. I bury my head back under my quilt. After much tossing and turning, I peak my eye out from under my eye mask and see light. Emerging from my cocoon, I assess the scene. Our bodies and all of our items have several millimeters of black sand atop them. The wind is still battering the tent. Ugh.
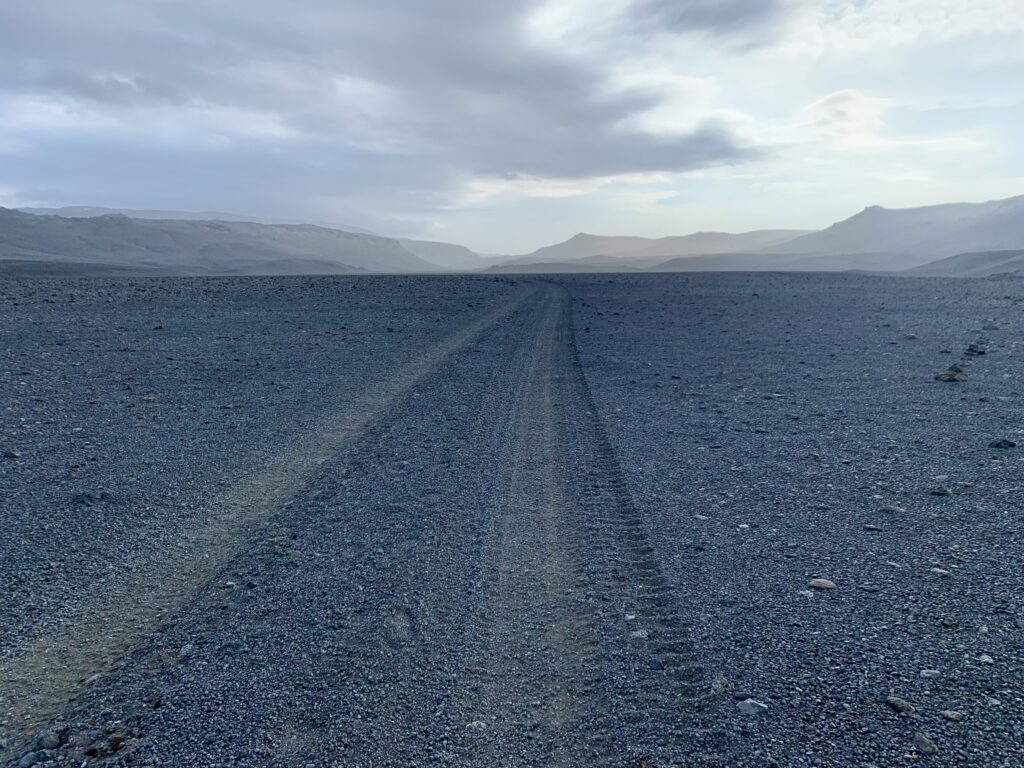
Feeling tired and defeated, we pack up, wrangling our tent into a ball, grit spraying in our eyes and mouth. Today is just a day of walking. For most efficient travel, we follow F roads, rough, unmaintained 4×4 tracks that create passage across the rugged interior. The wind continues. I have no poetic thoughts. I mentally count the miles to our next snack break, to water, to lunch. My mind needs more stimulation. I challenge myself to find the highlights: we’re getting closer to Vatnajökull, I see some River Beauties by a stream, we pass an unexpected waterfall, and my body feels strong. As I drift off to sleep, I’m buoyed by tomorrow’s forecast: dense fog, but no wind or precip!
Awake before my alarm, I notice how silent it is. It’s a silence I’m not used to. No birdsong, burbling creek, or wind. A total absence of sound. A low fog covers the valley. We’re walking in a dreamscape, slowly ascending. Cresting the watershed divide for northern and southern Iceland, the ceiling lifts enough to give us incredible views of Vatnajökull. We’re close enough now to see the many nuntaks, outlet glaciers, and textures of the ice.
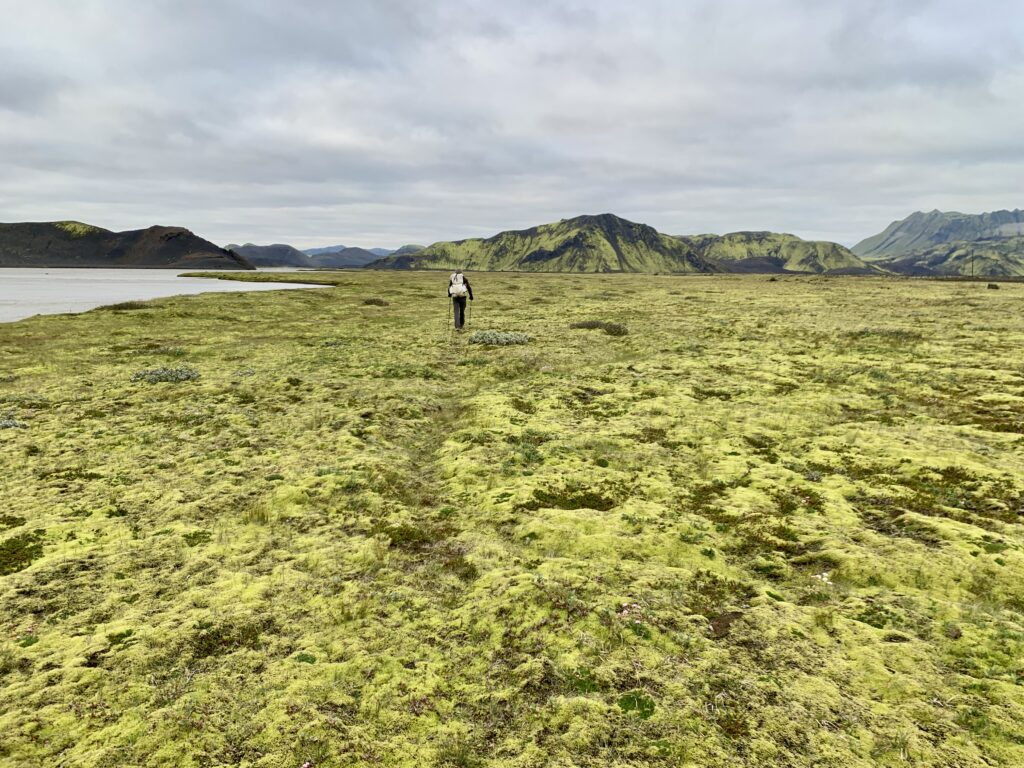
Dropping into a wide valley carpeted in lime green moss and criss-crossed by slow flowing river braids, I take in the rhyolite mountains with clouds draped over their peaks. It’s spectacular. Again, I notice the silence. With no megafauna, and very little human or air traffic, it feels liminal, like a forgotten wing of a museum that’s been closed to the public for decades.
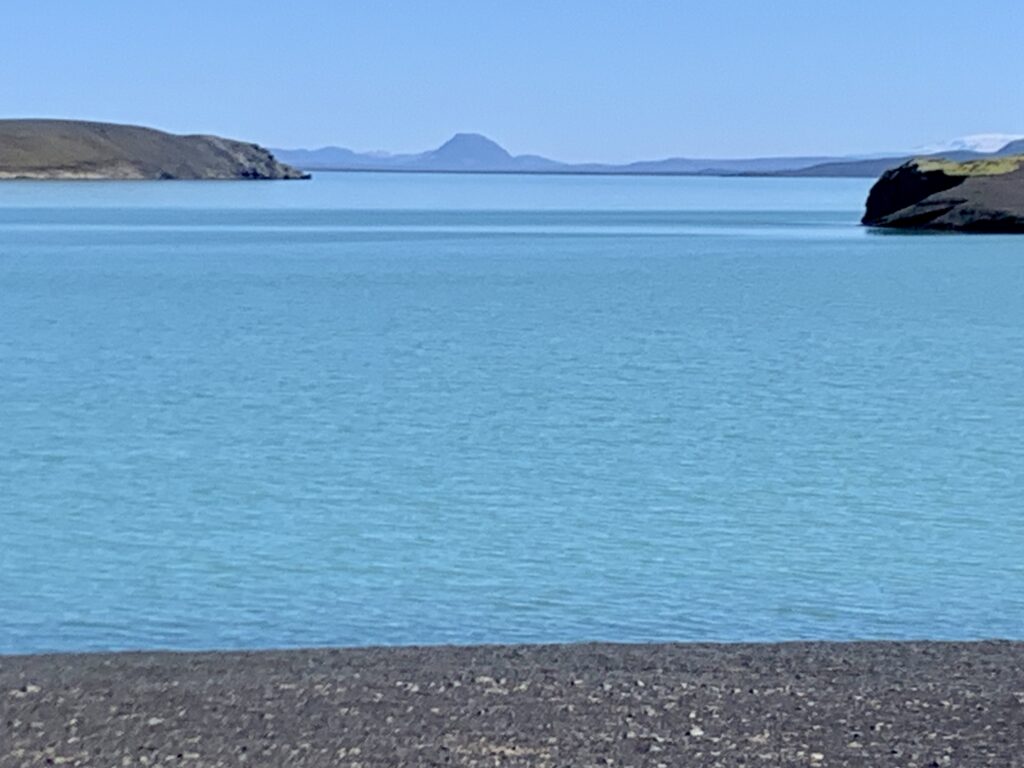
Crossing a steaming river, we skirt the valley where the footing is firmest, following yellow-capped posts. It begins to drizzle again as we crest a small pass from one valley to the next. The last hours of the day are spent walking the shores of the massive Hágöngulón reservoir. Today was my favorite day so far.
I awake the following morning to a dense fog, which finally burns off by mid-morning shortly after we intersect one of the main F-roads. I’m not psyched to be walking a road (even if it’s dirt) and I question whether I should be spending this time doing something else, like an alpine high route. It’s interesting, this recurring theme of questioning my decision to come here. But I don’t regret coming. It’s been a good experience for Troy and I. And the beautiful parts are outstandingly beautiful. And mostly, it’s the silence and the emptiness that I’ve really loved. I realize that’s what I was hoping to find here, and I did.
For the first time on the trip, the weather is nice enough when we set up camp that I can rinse myself in a nearby creek. It’s breath-takingly brisk and I savor the warmth of the weak autumn sun as I dry off afterwards.
The following day, miles pass quickly on the F-road and we’re rewarded with incredible 360 views of glaciers, mountains, and lakes. Traffic, unfortunately, picks up the farther south we go. We have to keep walking longer than we want to find a decent camp, but we finally come across a great little nook by the Tungnaá, an intimidating river that flows from the western edge of Vatnajökull.
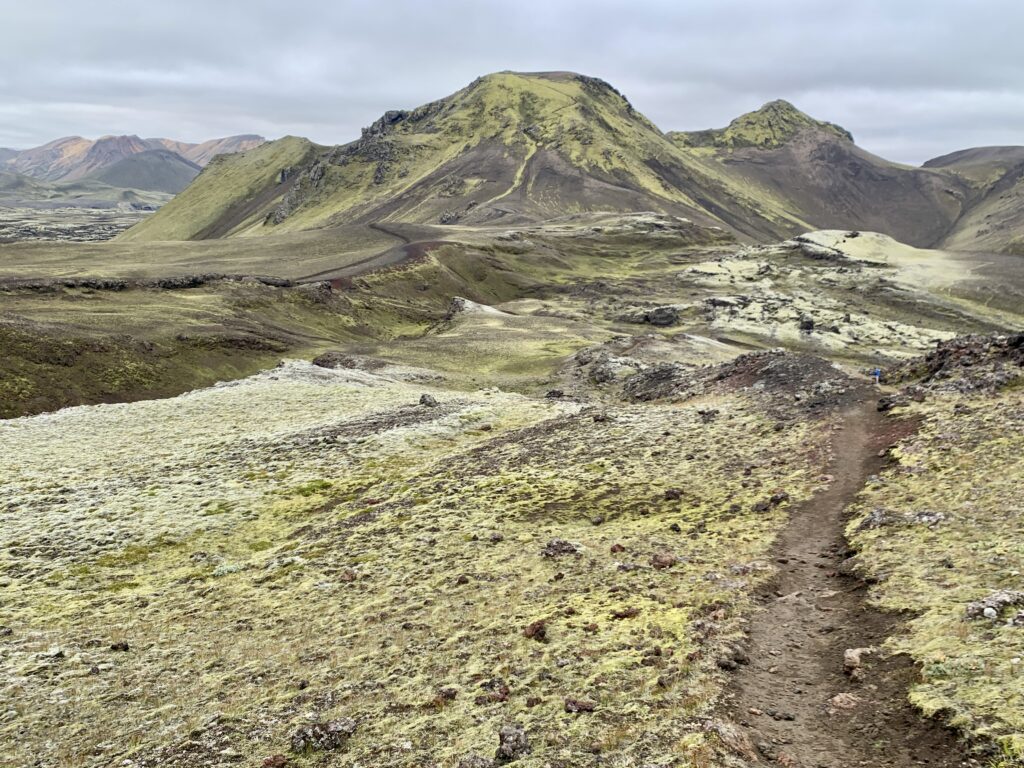
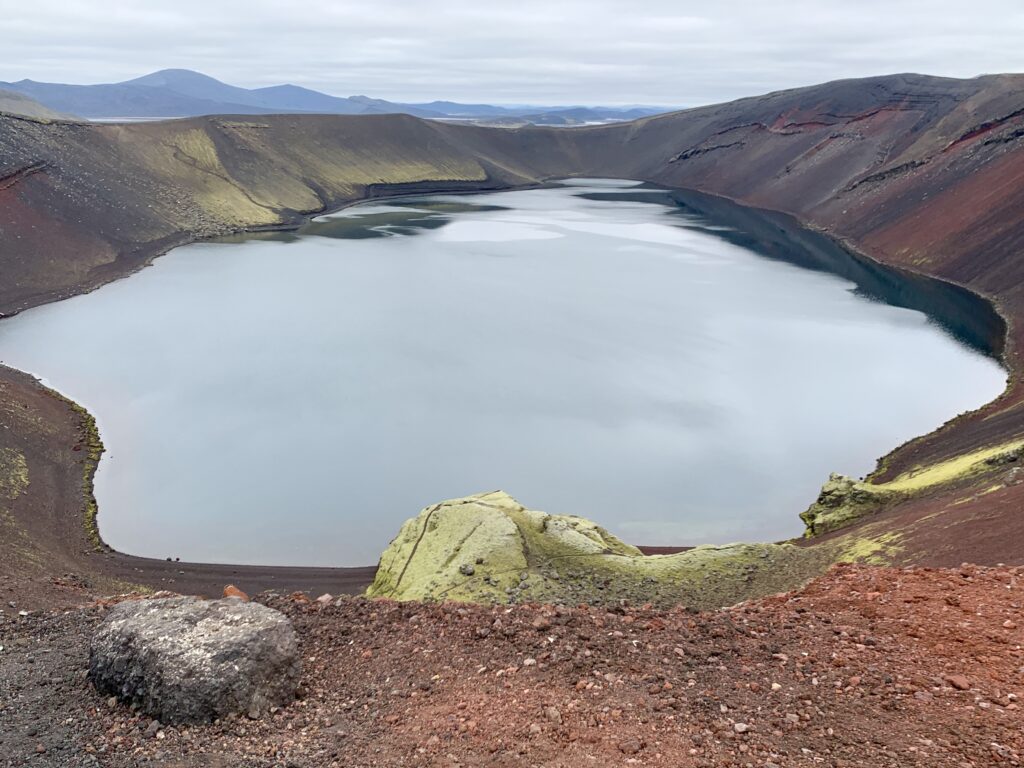
In the morning, we walk the final miles to Landmannalagur, aka the Promised Land. We’re walking through a lush, mossy green dreamscape and spirits are high. Thousands of viridescent veins weave through bands of obsidian rock on the mountainsides. We skirt the edge of a lake-filled crater with rhyolite cliffs. Finally, we’re walking in the mountains, not just near them!
Landmannalaugar to Skógar
Landmannalaugar, though a bit jarring due to the hoards of people, does not disappoint. We soon find ourselves at an adorable converted school bus that houses a small snack and camp supply store. There are no price tags. I’m pleasantly surprised by the variety of items they stock, from a plethora of camp food to bath towels and personal care items. I look for hydrocortisone cream to soothe the itchy blisters that developed on my knuckles a few days ago. Alas, there is none. I shrug and figure I’ll deal with it in a few days when we’re done.
Nearby signs inform me that Landmannalaugar translates to the People’s Pools and has been a rest stop for Icelanders for centuries. Historically, it was used as a place for sheep herders to rest after rounding up sheep in the Highlands. Currently, it serves as a tourist stop on the Ring Road and launching off point for Lagavegur trail hikers.
Unable to resist hot food that we don’t have to prepare on our camp stoves, Troy orders a grilled sandwich and I get a bowl of chicken soup. We add a bag of Lay’s, avocado dip, and two hot coffees. Basking in the heat of the kitchen bus, we eat with the intensity of starved dogs. It’s wonderful to feel full.
Next up is a soak in the natural hot springs. Steaming water pours from the cliff face into wide streams lined with tall grass. Stepping in, the water is so hot that I can’t stand it for more than ten seconds. I yank my foot back and try again farther downstream where the water has had time to cool. That’s better. I ease in and submerge my body. It feels glorious to get the grime off and allow the heat to soothe my muscles. Blessed with an uncharacteristically warm and sunny Icelandic afternoon, we crawl out and dry our bodies in the sun.
Warmed and relaxed, we return to the bus for more treats, savoring the amenities and opportunity for R&R before the push of the final two days. It’s hard to believe we’re finally here. The last two weeks have simultaneously gone both slow and fast. Long days, fast weeks. We’re eager for this next section, the famous Lagavegur and Fimmvodehauls trails. Be present, I remind myself, enjoy this last bit.
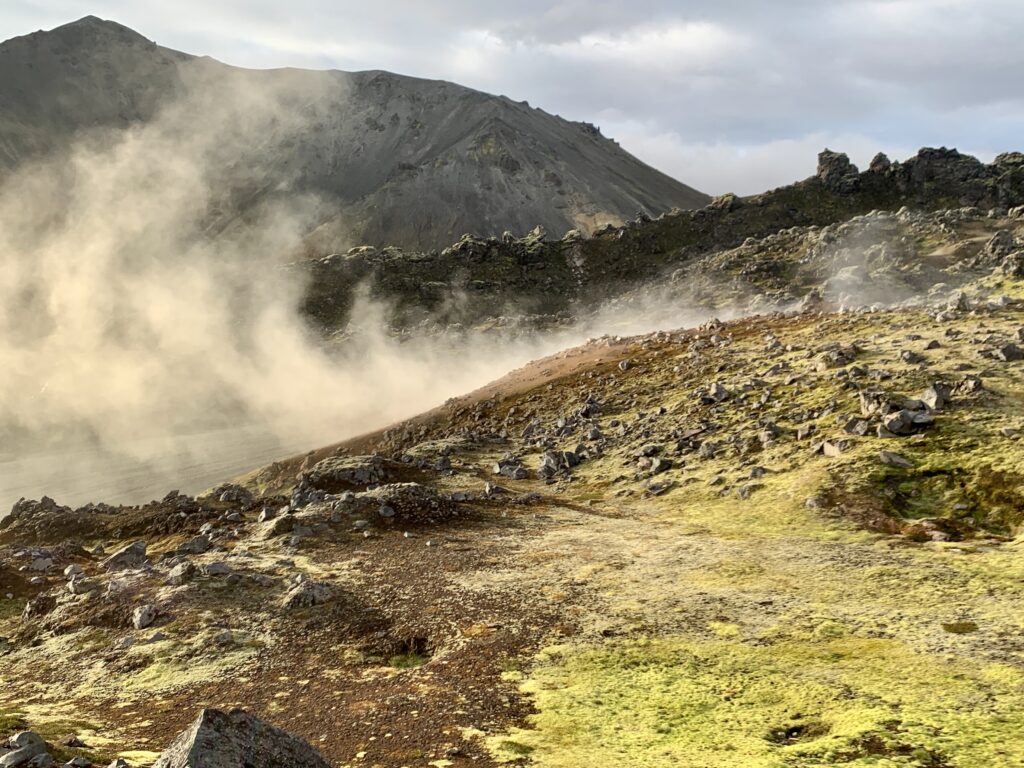
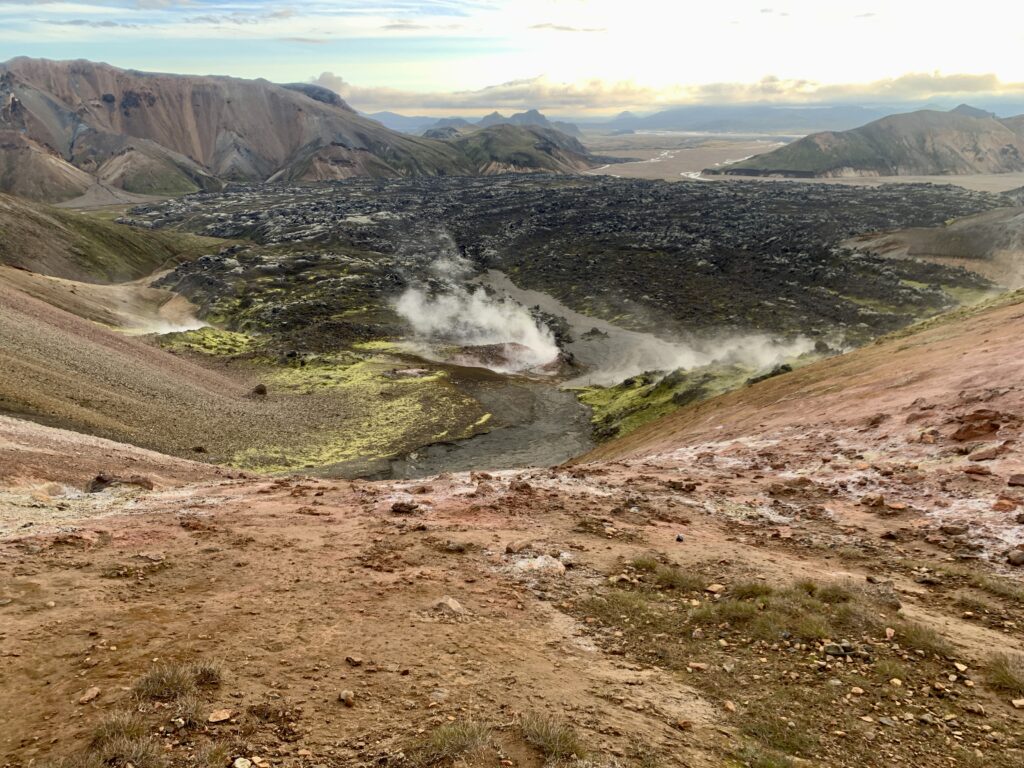
I sleep poorly in the crowded campground so we’re up and on trail early. Fortunately, no one else here gets up early so we have this otherwise popular trail to ourselves for the first several hours of the day. Climbing out of Landmannalaugar into the surrounding mountains, the hot springs shimmer in the morning light, billows of steam rising into the air. Geothermal features abound: fumaroles, boiling mudpots, open vents spitting steam, and multicolored mineral-coated rocks. I snap one photo after another, trying to take it all in.
The higher we climb, the more the wind picks up and soon we’re walking inside of a cloud. It’s very blustery and very cold. Well-placed cairns carry us to the Hrafntinnusker Hut, where we find temporary escape from the wind huddled behind the wall of the structure. We eat a quick snack, down some water, and carry on.
Despite wearing every layer I am carrying, I am deeply chilled; the coldest I’ve been on the entire trip. Still pushing through the fog, a light drizzle begins. I am walking as fast as I can, trying to generate body heat. I’m again taken aback by how quickly the weather can change from the pleasant heat of the morning to the frigid wind and rain we’re now walking through. Nonetheless, I think, the surrounding landscape beneath the cloud layer is still beautiful.
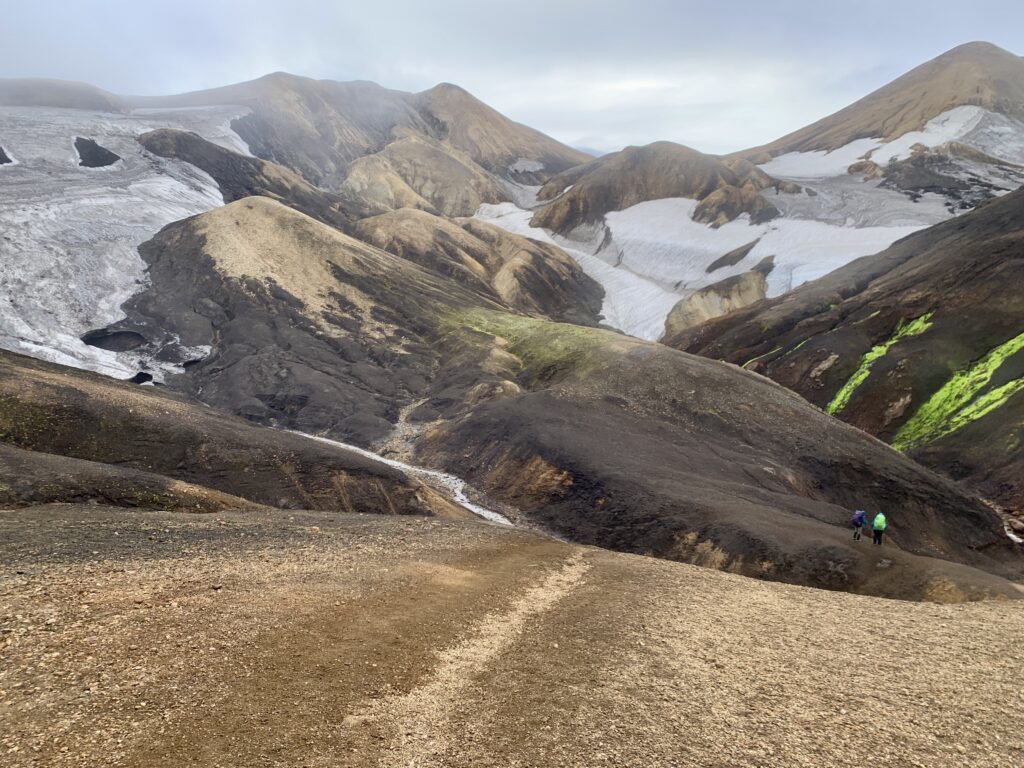
Dropping elevation, the fog thins as we walk below the Kaldaklofsjokull glacier and look south over the valley containing the Alftavatn lake and hut. We descend through beige, salmon, and rust colored peaks streaked with black obsidian, fluorescent moss, and crystalline ice. By the time we reach the hut, we’ve warmed enough to shed layers. Tucked out of the wind, we lunch on dates, peanut butter, and coffee.
Onward into the green wonderland, time passes imperceptibly amidst the engaging terrain. After miles upon miles of rolling roads over the past week, my body relishes the dynamic movement, the climbs and descents, the endless single-track carrying me from one beautiful valley to the next. For as well-traveled as it is, I am surprised by how rugged parts of the trail are: steep embankments, washed out drainages, ice crossings, and eroded slopes. In the afternoon, we ford the Blafjallakvisi, which is just over knee deep, but not flowing too quickly.
Our camp, near the Emstrur Hut, is perched in a lush little ravine, roughly two miles from the toe of a glacier that pours into the valley. Cozy in our tent, with blue skies overhead, we make tea and enjoy the satisfaction of a solid day. We finish tomorrow!
Sluggish with the cumulative fatigue of the past days and weeks, we roll out of camp with the knowingness that this is the last time we need to do this for the foreseeable future. The sky is clear and for the first time in a while, I am hiking in just my sun hoody as we cross the narrow gorge of the Fremri-Emstrua on a precarious bridge.
I feel the sharp rise in heat and humidity the lower we drop and the closer we get to Þórsmörk, the terminus of the Laugavegur. Before reaching the small village, we ford the Þröngá. It consists of several knee-deep braids, and is faster flowing than the other rivers we’ve encountered. Safely on the far bank, we enter a national forest composed of birch trees. I haven’t seen trees since we left the northern coast, and it feels wonderful to walk beneath the canopy. I notice gold and crimson tinting the leave’s edges. Fall comes early to the (sub) arctic.
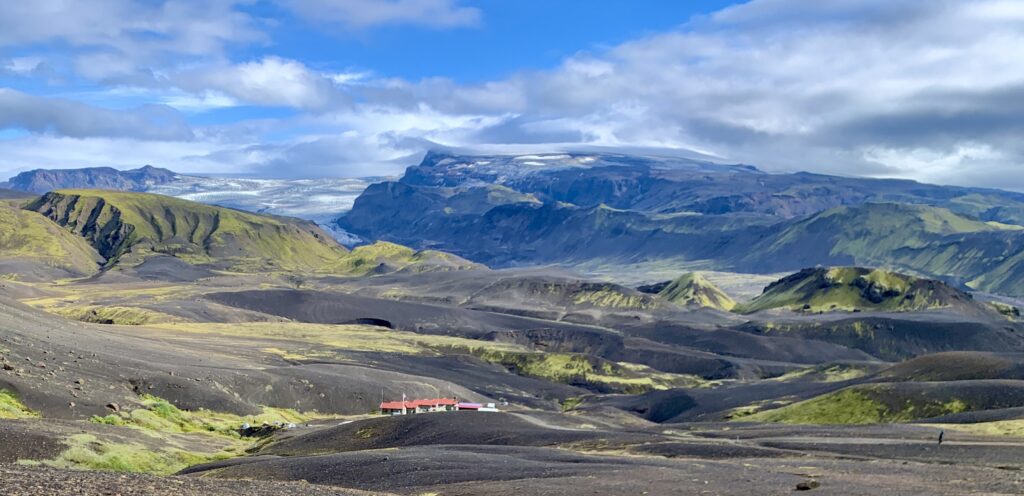
Þórsmörk consists of a few bunkhouses, a campground, a WC, and a small store. As a popular tourist stop and terminus of the Lagavegur, there are many people coming and going. With another sixteen miles and 3200’ of elevation gain ahead of us on the Fimmvörðuháls trail, we have a quick coffee and protein bar and push on. The Fimmvörðuháls climbs up out of Þórsmörk, passes between the Eyjafjallajökull and Mýrdalsjökull glaciers, and then descends to Skógafoss waterfall on the southern coast, where we’ll end our journey.
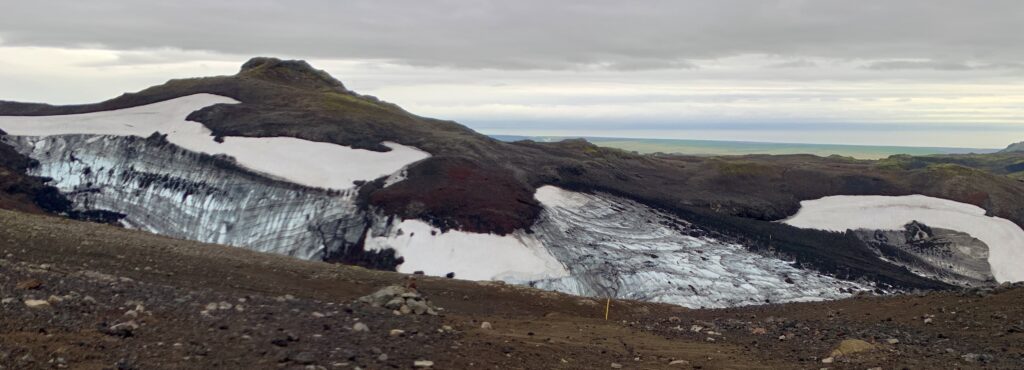
We walk the spine of a verdant ridge, water gushing from nearby waterfalls and through the valley below. Clouds thicken and as we climb higher, strong wind drives rain into our faces. The higher we go, the harder it blows. I worry about the next few hours of the hike as we’ll have to go farther up before we can go back down. Pressing on, we top out in a lava field between the two massive glaciers, famished from the climb and the cold. I remember to look up and I am awed by the textures and swirls in the ice, so close I can nearly touch it.
We eat a quick lunch in the sheltered lee of a giant caldera—a barren, black expanse that feels like the moon—before continuing on through a snow field and over a rise, where we catch our first glimpse of the southern coast and the gray ocean beyond. After two weeks focused only on the next step, seeing the horizon—the literal end—felt like a physical release of tension. Working our way through muddy rivulets across the toe of a glacier, we slip and slide on the ice. Adrenaline all but shot for the day, the final eight miles are slow as we descend towards the sea.
Intersecting the Skógá river, we hike along its bank, passing one waterfall after another through a whimsical valley. Crowds thicken as we close in on Skogar, our endpoint and a popular destination on the Ring Road. It’s obvious why all these people come here, of course – it’s extraordinary. It’s also a stark contrast to the paucity of people we’ve seen over the previous twelve days. I am glad we experienced Iceland the way we did; by crossing the country on foot and confronting its less-traveled interior. It felt like we earned a raw, honest taste of this magnificent, unforgiving island.
We treat ourselves to Kristalls from the camp store and set up our tent near the river, hoping to drown out the tourist noise. Tomorrow we catch the bus back to Reykjavik. Shortly after we tuck-in for the night, it begins to rain hard. It lasts all night and into the next day. I think about how lucky we were with the weather; how good it feels to not have to walk in this today.
As the bus pulled away from the coast the next morning, the rain was still falling. We were trading the vastness of the Highlands for the crowds of Reykjavik. Yet, I didn’t feel a need to rush back to the noise. The two-week crossing, with all its beautiful stillness and brutal wind, had served its purpose. I had found the vastness and simplicity I’d unknowingly sought. I was grounded by a deep appreciation for the quiet, difficult spaces in life—both on the map and within the mind. The journey is over, but the wide-open expanse of Iceland remains, and the stillness I found there comes home with me.
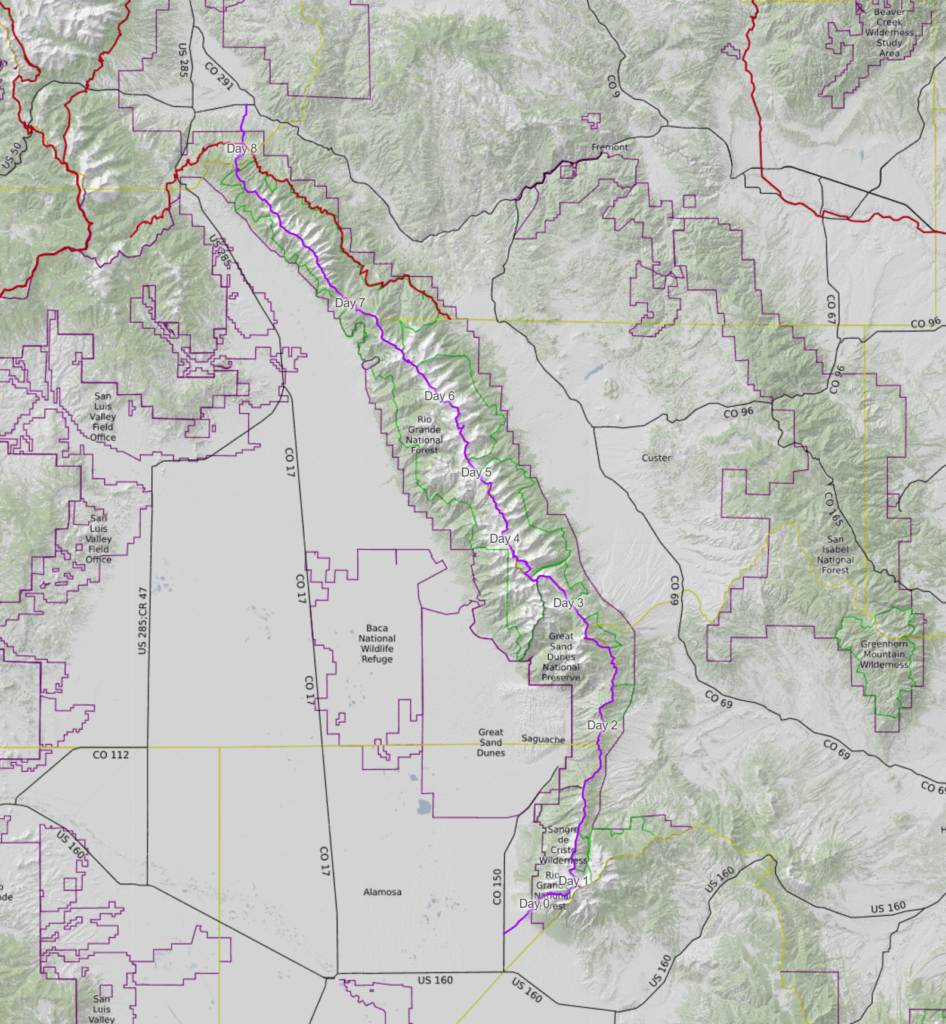
In August of 2023, I hiked the ridgeline of the Sangre de Cristo mountains from Blanca Peak to Methodist Mountain. This is referred to as the Sangre de Cristo Traverse.
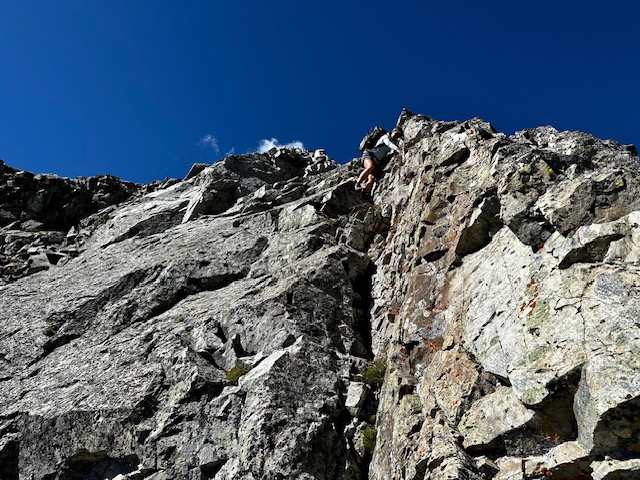
Though there are variations on the route, the primary Sangres Traverse runs along the central spine of the Northern Sangre de Cristo range, a subrange of the Rocky Mountains in Colorado. The main ridgeline traverses over 77 peaks, including five fourteeners and two thirteener centennials. It contains sections of extended class 3 hiking as well as class 4 and low fifth class scrambling. Depending on various factors, such as the weather or one’s comfort on technical terrain, alterations to the primary route can be made.
This post provides an overview of the route as well as highlights from each day and the trip as a whole. It’s intended to be informative rather than instructional. Linked below are my gear list and food planning spreadsheet. If you don’t like reading, scroll to the bottom for 21 of my favorite photos from the trip.
Sangre de Cristo Traverse Overview
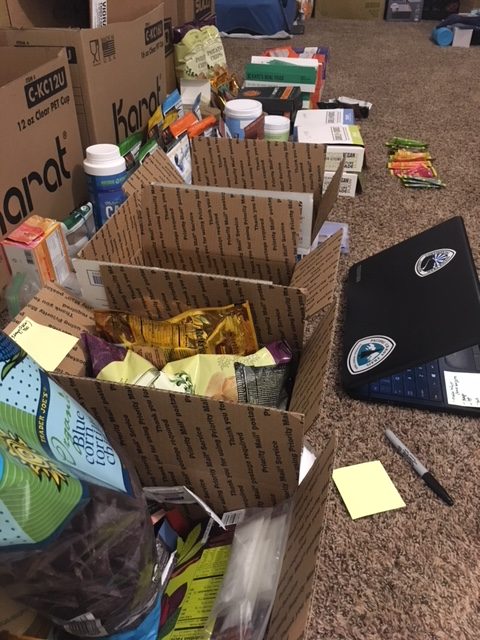
The route I completed covered 115 miles and 55,000 feet of vertical gain. These numbers include dropping off the primary ridge into basins for camp, water, and weather/technical detours. I was joined by Troy Klaassen and it took us 8 days to complete the route. We carried all of our food and gear from the start.
From Blanca Peak to Methodist Mountain, we followed less than 10 miles of established trail/road; instead hiking cross country and utilizing elk and sheep trails when we were lucky enough to find them. The majority of the travel occurred above treeline (~12,000’) where we were exposed to howling winds, intense sun, and rocky scrambles. Due to being on top of a ridge, there were no “on route” water sources and few opportunities to take cover if/when weather suddenly rolled in.
My goals going into this trip were to:
> Explore the Sangres on foot with the intention of developing a more intimate knowledge of and connection to the place I live
> Stretch and enhance my physical and mental capabilities (e.g. daily vertical accumulation, off-trail navigation and route finding, adaptability to rapidly changing circumstances, etc.)
> Connect a line on foot from the Highway 150/Lake Como Road intersection to Highway 50/CR 107 in Salida while staying true to the range’s central ridge as much as feasible
The entire trip was a highlight and as with any adventure, there were takeaways to be gleaned, but as I reflected on the trip in the weeks afterwards, there were a few themes that stood out.
The value of relationship to place. In researching and walking this route, I became infinitely more familiar with this range that I’ve lived by and recreated in for years. It felt special to connect many of my favorite local spots in one trip and to see from a new vantage point the peaks that I literally look at every day on my morning walk. That said, more than leaving me with a feeling of “been there, done that,” this trip revealed to me how much more there is to explore: so many subsidiary ridges, treed valleys, and alpine lakes.
The diversity of the terrain and the natural beauty. Following one ridgeline probably sounds boring to a lot of people, but I found it endlessly enjoyable. I was surprised by the diversity in terrain from the technical class 4-5 sections of the Blanca and Crestone massifs to the many steep class 3 thirteeners that pepper the ridge, to the rolling tundra found farther north. The unique positioning of this range with the massive San Luis Valley (SLV) to the west and the Wet Mountain Valley to the east, and the ability to stare down the ridgeline to our farthest objective was awesome. The remote alpine basins and hidden tarns, the colorful sunrises, and the dramatic clouds that flowed over the ridge never got old.
The importance of a good partner. These types of trips (off-trail, remote, demanding, multi-day) are physically and mentally taxing, to put it lightly. You need to be out there with someone you trust, whose risk tolerance is similar to yours, whose fitness is on par with yours, and with whom you can communicate openly. Ideally, you’ve already been on many shorter outings with that person, you’ve vetted each other, and you know it works. When you’re out with a trusted partner, that can make the trip all the much better. The opposite is also true. This is a tenet I was already well aware of from my Great Basin hike and Grand Canyon Traverse with Ryan “Dirtmonger” Sylva. This trip reinforced the value of a good partner to me and spurred self reflection in both what I seek in a hiking partner as well as the ways I can be a better one to others. Our team work wasn’t perfect, but I’m appreciative to Troy for the ways he showed up as a solid partner during this trip and in the debrief afterwards.
Around 1pm, we leave Troy’s truck at the dirt lot that marks the junction of Lake Como Road and Highway 150. It’s finally time to start this thing.
I’m a bundle of nerves and excitement.
I’ve been considering walking this range for years. It’s hard not to when you drive highway 17 through the San Luis Valley. The picturesque north-south ridgeline begs the question: could I traverse that whole thing on foot from end to end?
This range inhabits a special place in my heart and mind. I’ve lived on the north and south ends of the range, fallen in love on its flanks, had my heart broken here, buried my late cat under a Pinyon here, built lifelong friendships here, completed my 14ers here, and driven around these peaks more times than I can count. If there’s any place that’s felt like home in my adult life, it’s these mountains.
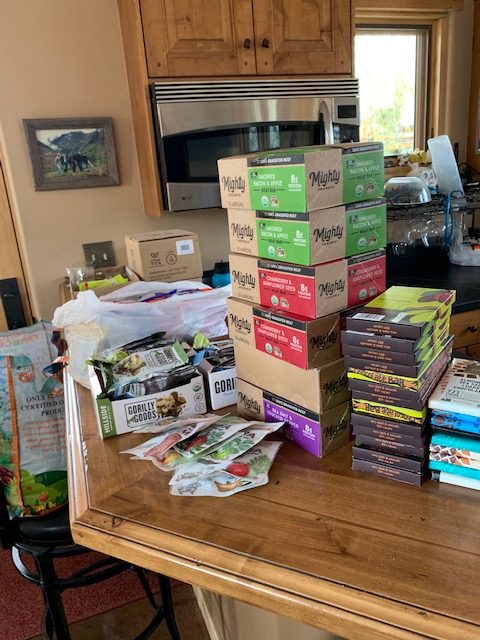
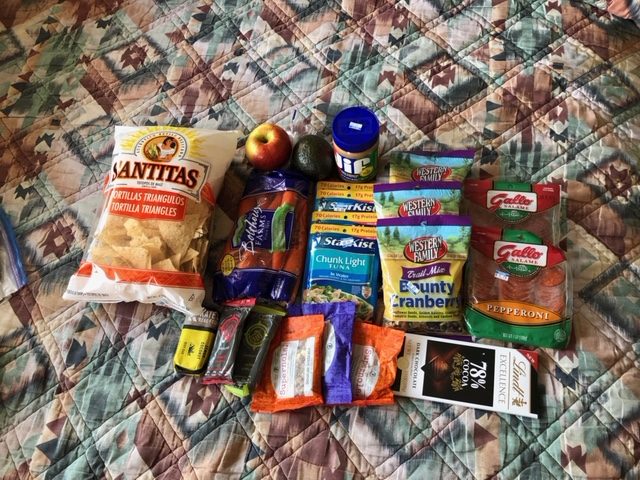
It’s 85 degrees on the hot, exposed, dusty 4wd road that we must walk up to access the main spine of the ridge. Our packs are heavy with 8 days of food and a few liters of water. We’re both feeling a little nauseous from the heat and exertion. I also drank too much coffee this morning which isn’t helping matters. We rest in the shade of Pinyons, slowly making our way up the 4400 vertical feet towards our camp near the base of Blanca.
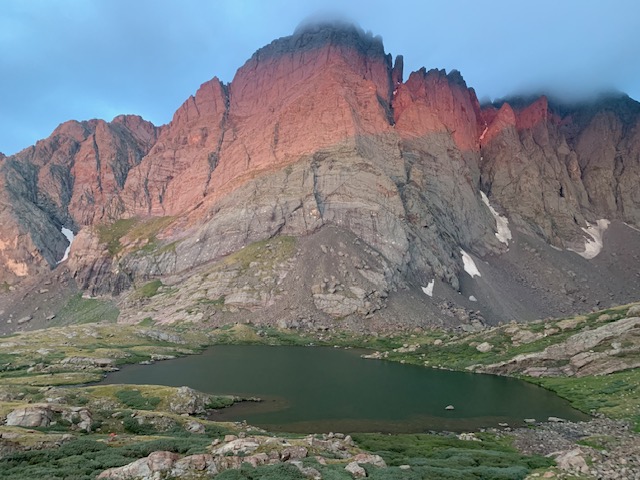
Golden aspen leaves on the trail tell me that the transition to fall has already begun in the high country. We hike past Lake Como and find a higher camp near Blue Lakes at 12,200’. The day’s heat subsides as we gather water, cook dinner, and discuss tomorrow’s plan. The basin’s three 14,000’ peaks (Little Bear, Blanca, and Ellingwood Point) loom above, tinged with alpenglow.
I go to sleep grateful to be out here after years of dreaming and months of planning. As with the start of any real adventure, I know challenging times are in store, but I don’t know exactly when they’ll arise and what form they’ll take.
Tomorrow the real work begins.
Sangre de Cristo Traverse Day 1
At 5:03 my alarm sounds and by 5:11, I’m drinking coffee in the dark, watching the stars fade as dawn lights up the edges of the sky.
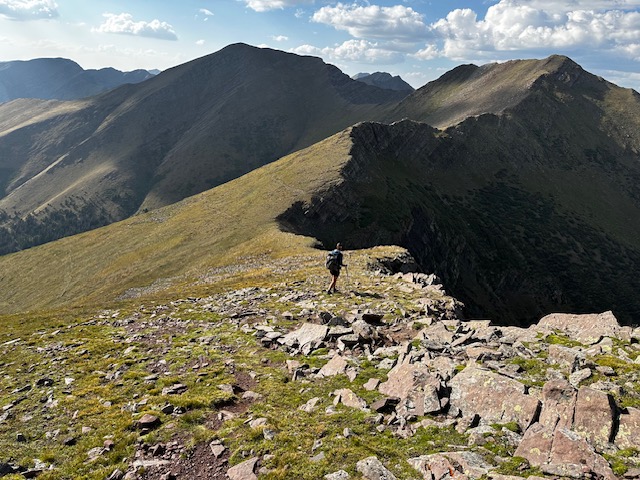
By 6, we’re slogging up towards the Blanca-Ellingwood ridgeline To the west, the shadow of the Sangres is taking form on the floor of the expansive SLV. At the top of Blanca, we high five, “one down, seventy plus to go” I say.
Being that it’s a Saturday, there are several other parties on the mountain, but after departing Ellingwood Point on the class 3 and 4 ridgeline over to California Peak, we don’t see another person until the end of the following day when we drop into the Great Sand Dunes Preserve for water. The weight of the full backpack makes the ridgeline scramble feel much more challenging than it did on a scouting mission 2 months ago.
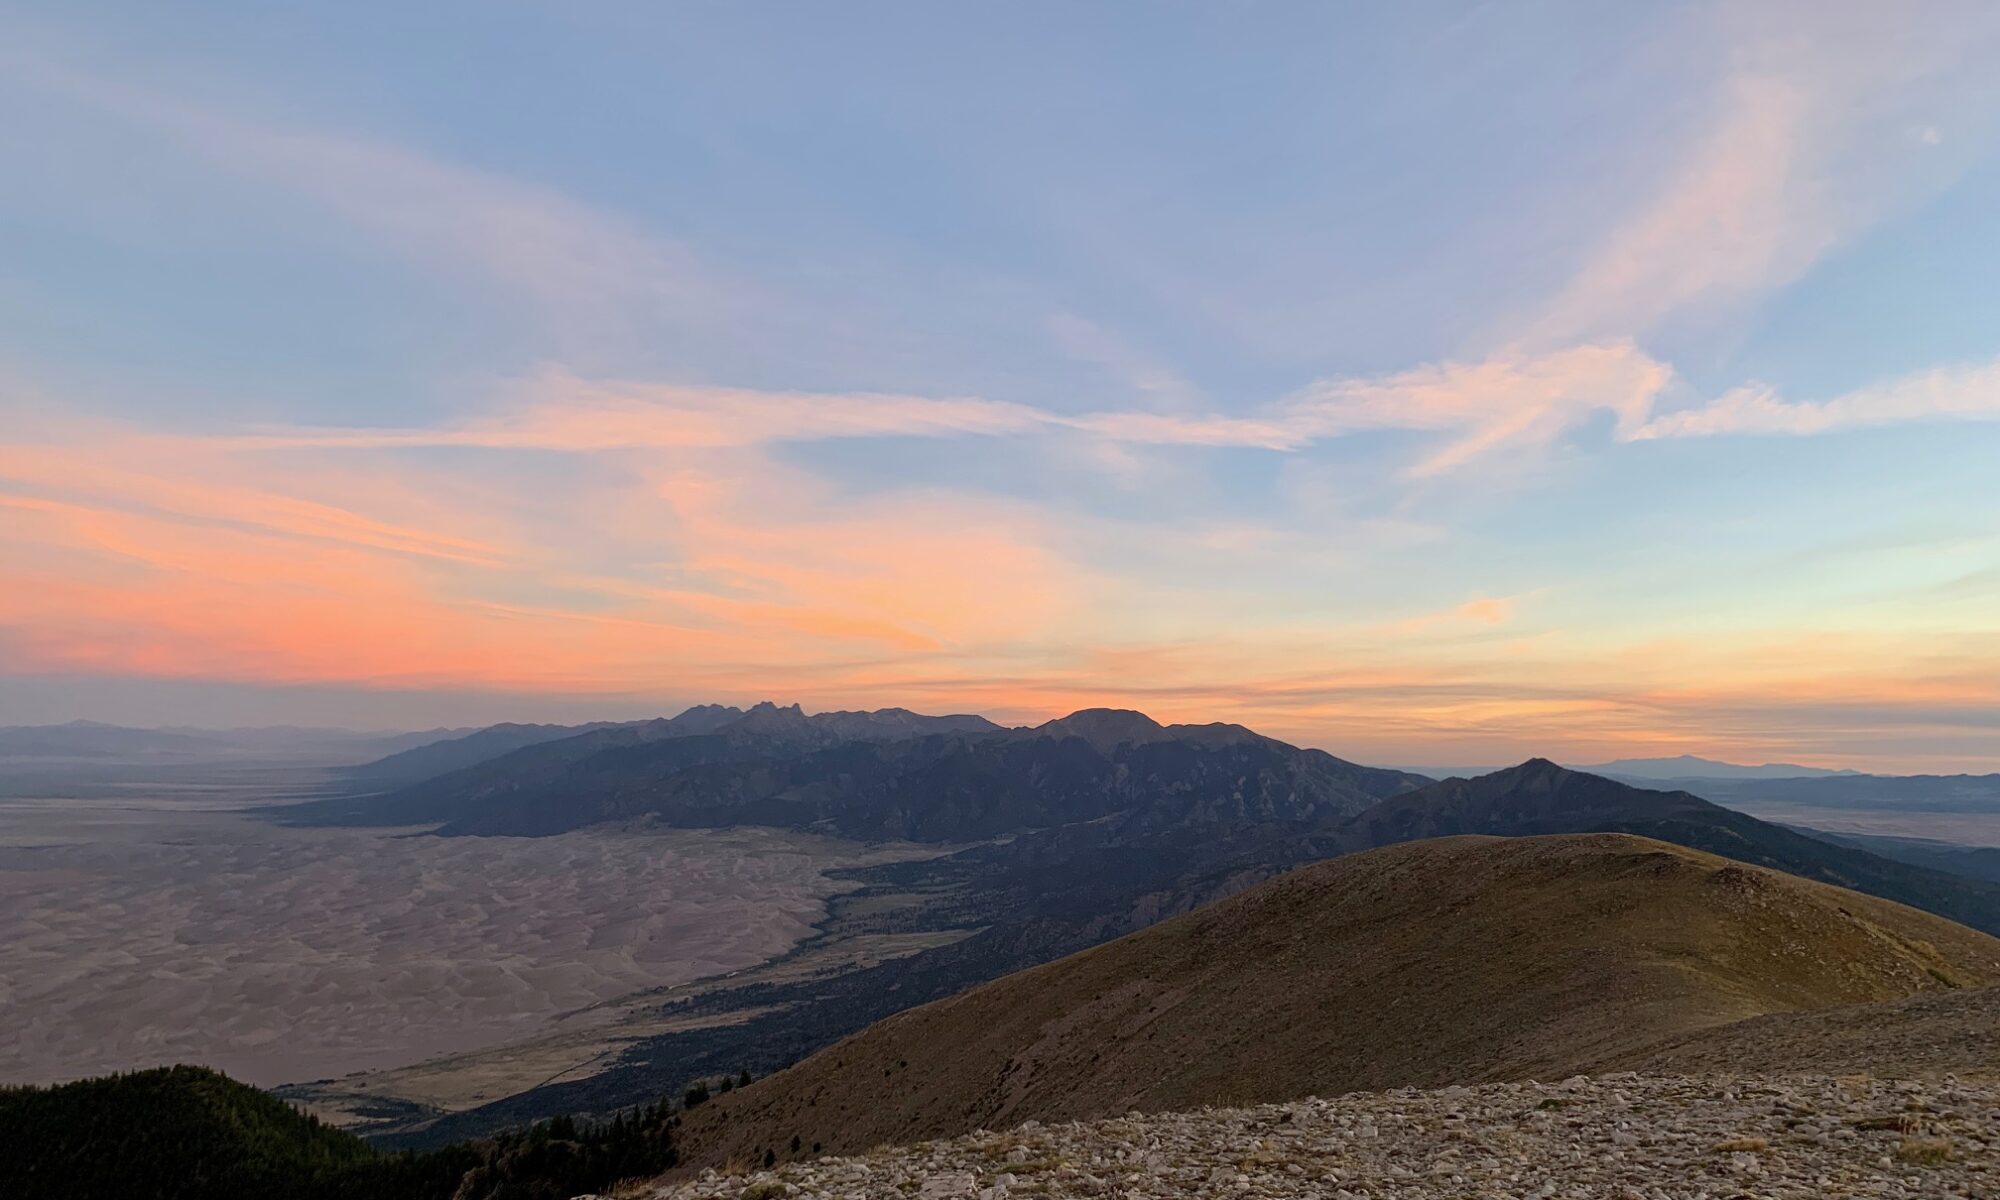
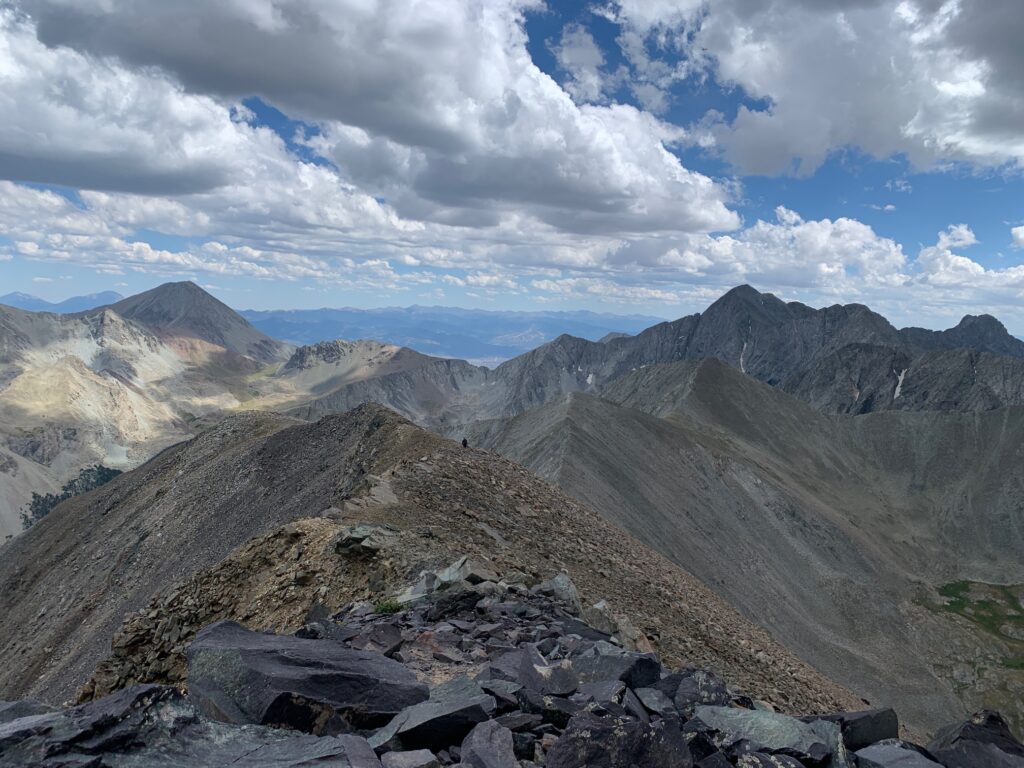
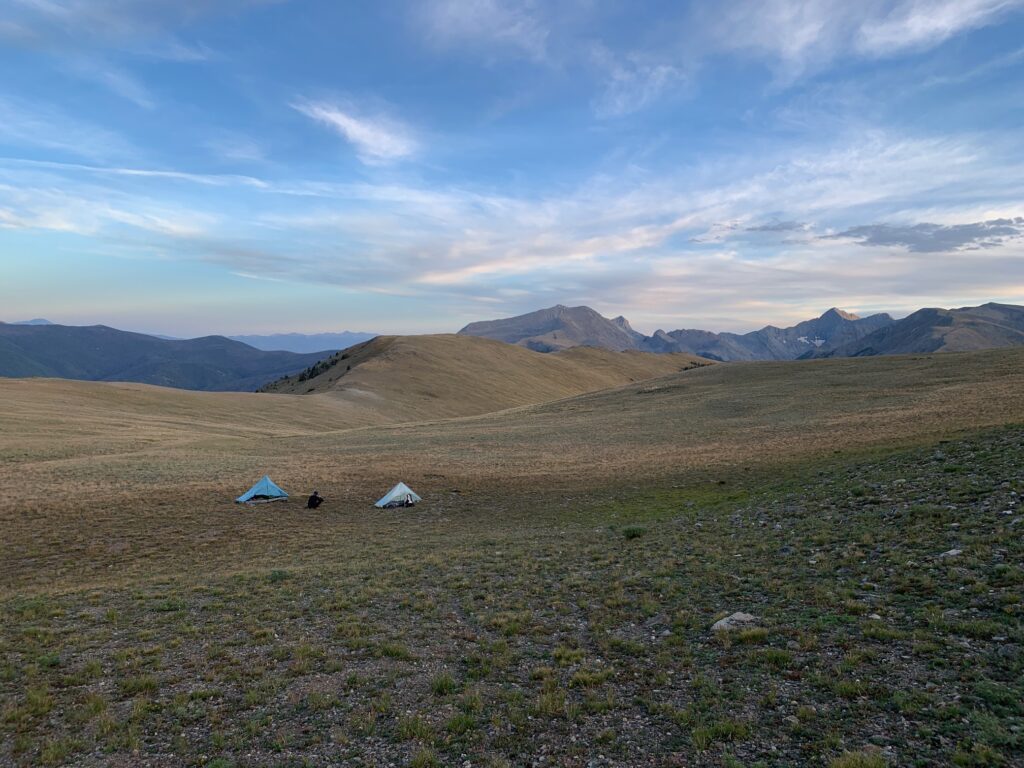
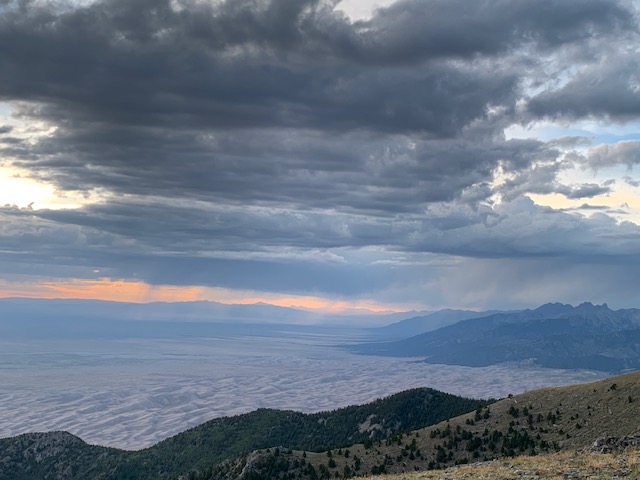
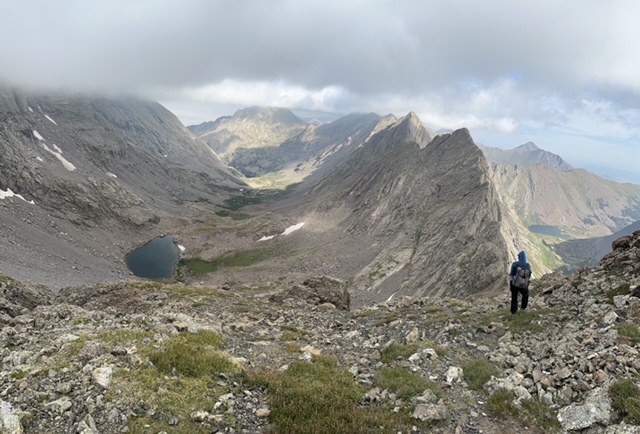
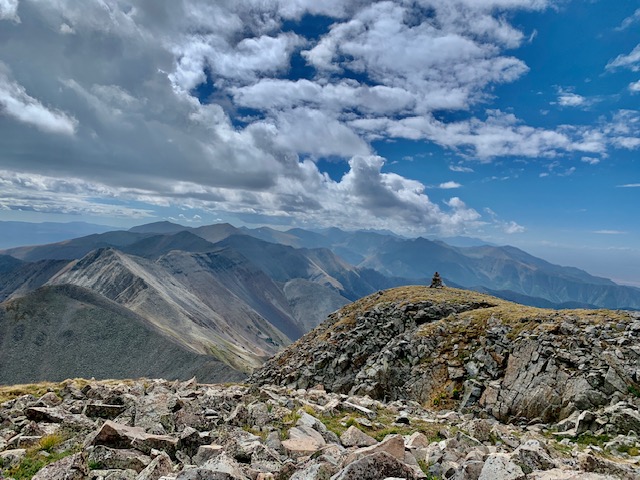
We drop north off California and the whole range – the entire following week’s work – is laid out in front of us. The crest drops away to the SLV in the west and the Wet Mountain Valley to the east. We walk rolling tundra for the remainder of the day and make camp in a protected area ~12,200’ behind a knoll south of Carbonate Mountain.
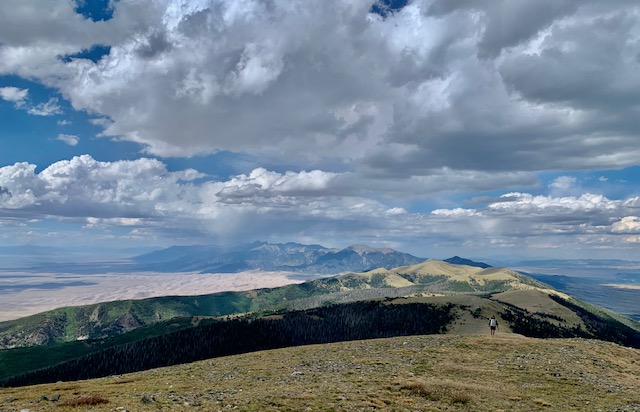
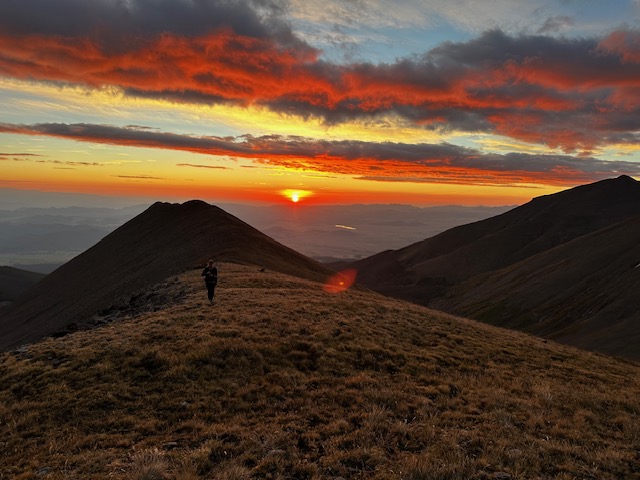
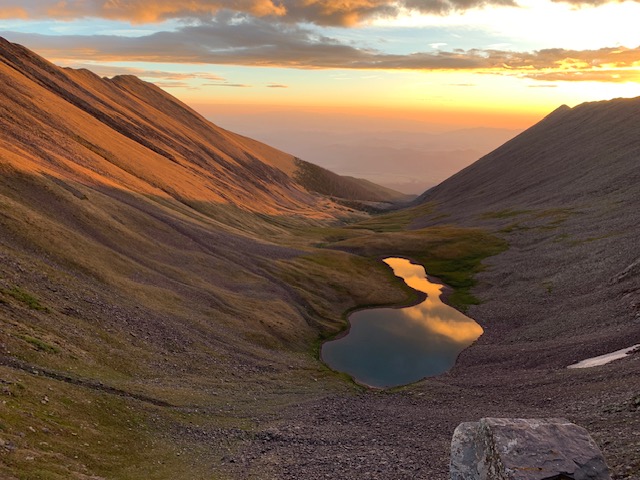
I walk up to the ridge to pee before getting into my tent and I’m astounded by the beauty of the scene that greets me on the other side of the ridge: rain showers over the Sand Dunes and valley to the north tinted pink, orange, and yellow by the sunset. I call Troy up and we enjoy the scene before a chilly wind sends us for our sleeping bags.
Sangre de Cristo Traverse Day 2
The morning is an easy, uneventful four miles down the ridgeline to Mosca Pass, the low point of the route at 9,700’. The spring right off the ridge that we were hoping for is dry and we walk the mile down into the Preserve for water. We go to a spot I’ve stopped at with guided trips in the past. As will become our practice, we fill up for the entire day and head back up to the ridge.
The next 10 miles of walking up and over Mount Zwischen is long, dry, and hot. It’s also littered with blowdowns. The view out over the Dunes from the summit is pretty spectacular though. The descent is steep through dense forest on tired feet.
The most joy I find all day is when I pick up bits of elk trail here and there and we can cruise until the path disappears as suddenly as it appeared. At Medano Pass, we descend 500’ into the Preserve to fill up on water behind an established camp from which dogs are barking at us. We hike the 4wd road out of the Preseve and north from the pass until we find a suitable camp underneath the shadow of Herard.
Sangre de Cristo Traverse Day 3
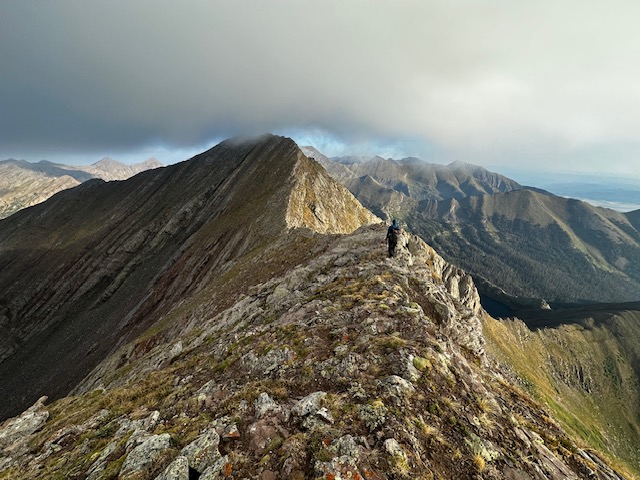
Shortly before 6am, we begin our daily migration back to the ridge. The higher we climb, the windier it gets. As we crest the ridge, the full force of the gales hit, carrying icy wind up from the shadowed valley to the west. We lean sideways into the 40-50 mph eastward winds as we push north over rolling tundra, summiting one small peak after another.
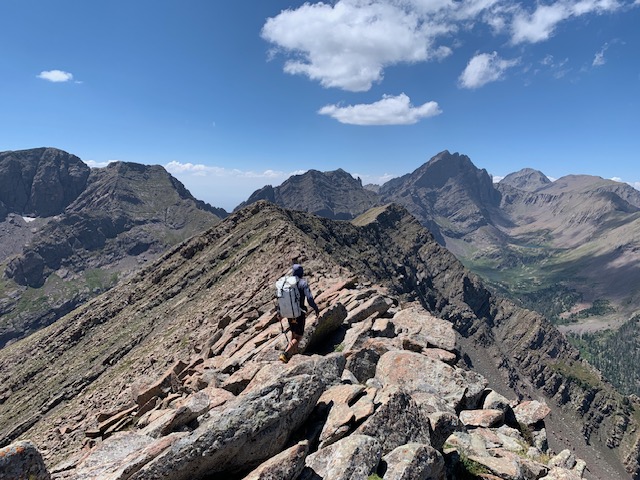
I need more layers, a snack, a break from the wind. I drop off the ridge to the east where it’s nearly windless and it’s 15 degrees warmer. I wipe the snot from the right lens of my sunglasses. We snack, layer up, regain composure and head back into it. We see weather over Blanca to the south as well as the Crestones to the north. Being almost exclusively above treeline, it’s incredible how far we can see around us – all the way back to where we started, and all the way to where we’ll sleep tonight.
By noon, we’re at Music Pass and we trace out the remainder of our route for the day: Marble Mountain, Milwaukee Peak, and the Crestones, beneath which we plan to camp. A steep 1300’ and we’ve regained the ridge. We skirt through the notch by Milwaukee, enjoying an oddly placed mile or so of nice trail that disappears as suddenly as it appeared.
With 8000’ of vertical on our legs already and daylight waning, we opt to take the Cresolita saddle rather than the ridge directly over Broken Hand Peak. I’m disappointed, but it’s the right call. As we descend into South Colony Lakes at dusk, the pikas’ chirping echoes around the basin. At the outlet of the lake, I achily bend over and wash the grime from my face and legs. We find a protected spot in the willows to settle in for the night.
Sangre de Cristo Traverse Day 4
Morning comes too soon and sleep was insufficient as I spent part of the night defending my food bag pillow from the mini bear that was scratching around at the edge of my shelter. That’s soon forgotten, however, as we begin our ascent and I’m entranced by the red glow reflected off the Needle. Soon we’ve regained the primary ridge via a fun class 3 connecting ridge from Humboldt.
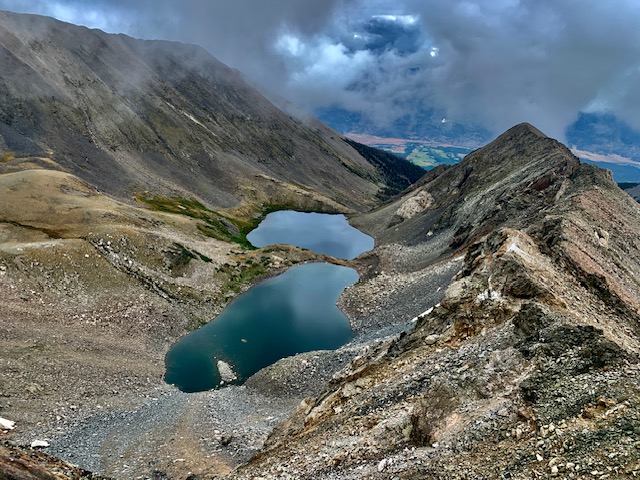
Clouds roll up and over a saddle from the west, blotting out the sun as we climb Obstruction. From the summit, through breaks in the clouds, we look down to Willow Lake, a longtime favorite haven, and across the bumpy ridgeline of 13ers that connects to Adams. In a flat below Adams is Mo Lake, a cat-shaped tarn I christened last August the weekend after I said goodbye to my 17-year old cat.
We descend a steep, loose gully skirting below the first two major obstacles of the ridge, which would’ve required hours of technical scrambling, and reascend at the saddle south of Peak 13517. A series of steep, scree-covered slabs and class 4 moves takes us along the remainder of the ridge to Adams. From there, we follow the chunky class 3 ridge to Fluted. The end of the technical difficulties! I’m both relieved (we might actually do this thing!) and sad. The technical parts, while slow, are an engaging puzzle to solve.
The remainder of the day is rolling block field until we pick up a mile or so of trail in a saddle near Comanche and drop down to Venable for camp. The basin is home to dozens of marmots which whistle at me as I pass through their domains on the way to the small lake. Three deer study me as I gather water. A gentle rain starts to fall and I scurry back to my tent. Cooking dinner from the safety and warmth of my tent, a rainbow appears over Westcliffe to the east. I fall asleep listening to Annie Dillard wax poetic about the glory of nature.
Sangre de Cristo Traverse Day 5
After a night mostly spent listening to the flapping of my tent in the wind, I open my eyes and notice it’s lighter than it should be at 5:03am. I’ve slept through my watch alarm and scramble to pack up as Troy is already almost ready to go.
The day is gloriously repetitive, consisting of going up and over several peaks >13,000’. Up 1000’, down 1000’, up 500’, down 500’, up 1300’, down 1300’. Eureka, Hermit, Rito Alto, Peak of the Clouds, Silver Peak, and on and on. The peaks were a nice break from the slower, technical terrain of the previous day, and more steep and engaging than the rolling tundra I expected. It felt wonderful to walk along the ridges I’ve seen so many times from the lakes below. Occasionally we stop on summit to snack and I just sit and stare contently at where we’ve been and where we’re going.
We make camp early at a small lake below Electric Peak. I take my time setting up my shelter and then walk the half mile to gather water. I’m nearly done when I notice movement in the otherwise still tarn. I think it’s insects at first, but the frequency picks up, and I realize it’s rain drops. Covering the water slowly at first, and then more quickly. I rinse my face and legs and scamper to my tent. I hop in just as the squall picks up. I bury myself in my quilt and eat spoonfuls of almond butter and drink lemon chamomile tea while I watch the rainfall outside. I’m warm, dry, and clean in my tent at a remote lake at 12,400’ in my favorite range. It’s hard to imagine any better feeling in this moment.
Sangre de Cristo Traverse Day 6
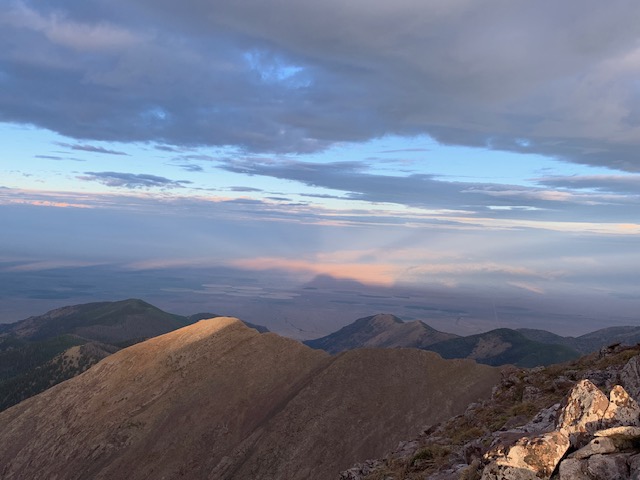
I awoke to a lone pika call at 4:30am, feeling rested and grateful for a full night’s sleep. We climb out of our basin camp and as we regain the ridgeline to Electric Peak, a red sun lights up the Wet Mountain Valley. The surrounding peaks emit a golden glow. The shadow of the range begins to take shape in the valley to the west. There’s the outline of Electric and our microscopic figures crawling up it.
At the summit, I look north and spot the Chalk Cliffs. HOME! We’re actually almost there. In a way, it feels kind of unbelievable.
There’s an icy wind, which I’ve come to expect each morning when we regain the ridge. I walk with my hands in my pockets and think about hiking this route again, solo, pushing myself as hard as I can. And then I wonder about that desire to run myself ragged, to walk until there’s nothing left, to find transcendence by searching for the limits of the physical.
Today’s terrain is a continuation of the previous day, and as I hike up another steep rocky ridge, I send a genuine prayer to the universe for endless talus covered 13ers. This feeling is like nothing else: heart pounding, breath rhythmic, in out in out, step step step step, thinking like the sheep, allowing my body to take the most obvious line, connecting bits of worn terrain. Some trampled tundra here, flattened scuffed rocks there, a slight opening in the grass.
At Cottonwood Peak, our main route drops below 13,000’ for the first time in 40 miles. The afternoon is hot and humid as we wind down through blowdown hell (though not as hellish as Zwischen) to Hayden Pass. A quarter mile from the pass my pole breaks. For 25 minutes, we search a small piece of ground for the missing spring. No luck, but I’m grateful for Troy’s help in the search as it’s already been a long day and we’re both ready to find water. We hike out to the pass and descend 500’ before we find a trickle big enough to fill our bottles, and then reascend to make camp.
I watch the cumulonimbus build behind the ridge to the south and darken the valley to the east as my dinner cooks. Flash. 1…2…3…BOOM! It’s close. Dinner is done and the show begins. I watch the storm mingle with sunset light as it passes overhead.
I love this outside life.
Sangre de Cristo Traverse Day 7
I wake up excited for our last full day. We follow old trail up Galena in the twilight. Clouds are rolling in over the pass and the entire sky is pink, orange, amber, and yellow as the sunrise light reflects off the clouds. The beauty is unbelievable.
All day, we hike up and down “bumps” on the ridge inside of a cloud. I feel like I’m in a dream, hiking the same 100′ of talus on repeat. Time is standing still. My watch says we’ve been hiking for 4 hours, but I can’t ascertain any progress.
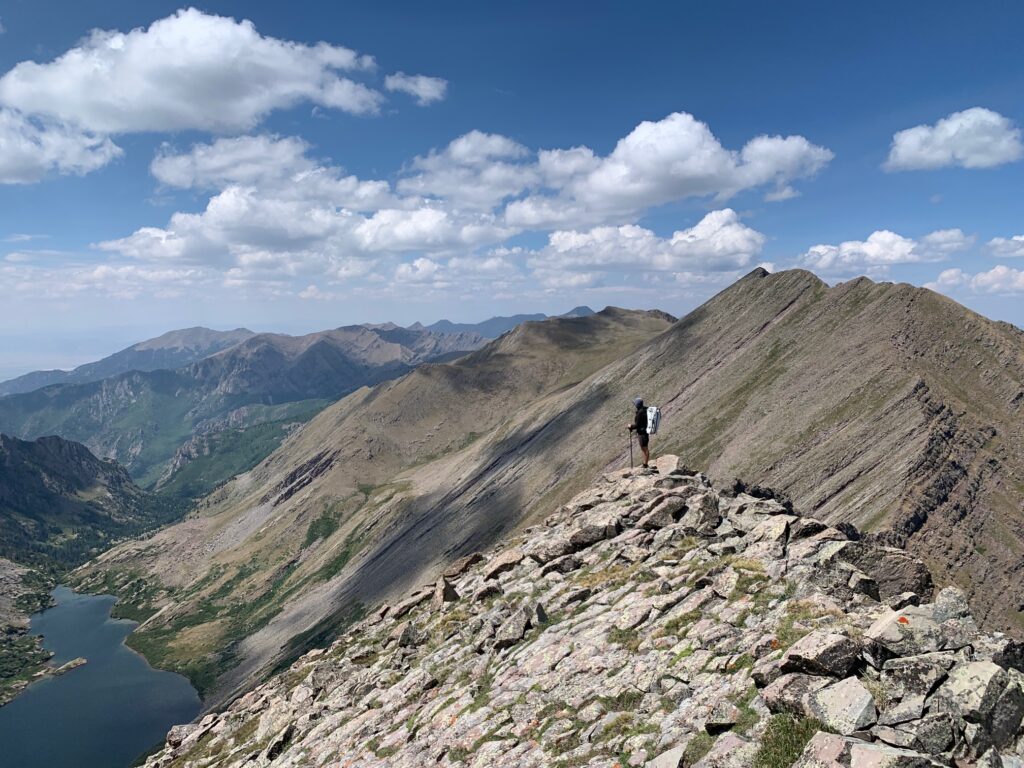
The clouds begin to break a little after noon and we’re above one of my very favorite alpine swimming spots. On a subsidiary ridge, I spot two sheep descending steep talus. It feels so meaningful to connect all these places I love and these peaks I literally look at every morning on my walk, addressing them by name, “good morning Simmons, Hunts, Twin Sisters…”
My body feels strong, even after 50,000’ of vertical gain in a week. Stronger perhaps than when I started. I feel gratitude for my body’s strength and resilience. I know it’s not a given.
I watch the sky vigilantly all day as storms build in every direction around us. Around noon we drop 700’ steeply off the ridge to get water. This is our original planned campsite, but it’s early and we think the weather will hold a bit longer. So we test our luck, fill up, and push on. And the weather (and our luck) does hold for another few hours; long enough for us to get up and over Hunts Peak. At the summit, we’re greeted with a cold wind and a loud clap of thunder. It’s raining in the valley directly to our east and up north over Salida. Time to get down!
I inhale a few spoonfuls of almond butter, nearly clogging my airway, and then we haul down the steep scree slope as the wind picks up and thunder continues to echo nearby. We bail into a basin on the east side of the ridge, where 500’ down we see some trees and a potential flat(ish) spot large enough to fit our tents. Hail starts to fall as we make our way down the slippery wet tundra and scree slope. We configure a couple of clever camp spots and as soon as we’re set up, it begins to rain in earnest.
I sit in my tent drinking warm emergenc, eating the last few ounce of almond butter, listening to the pikas, and watching the clouds swirl around the basin. Salida is 15 miles and 3k’ of vertical away.
Sangre de Cristo Traverse Day 8
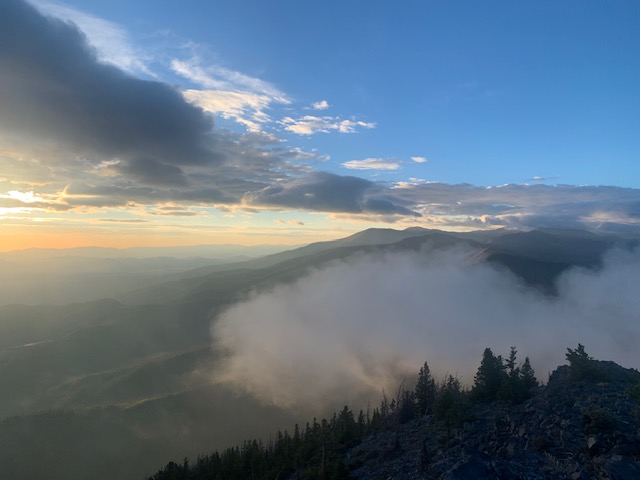
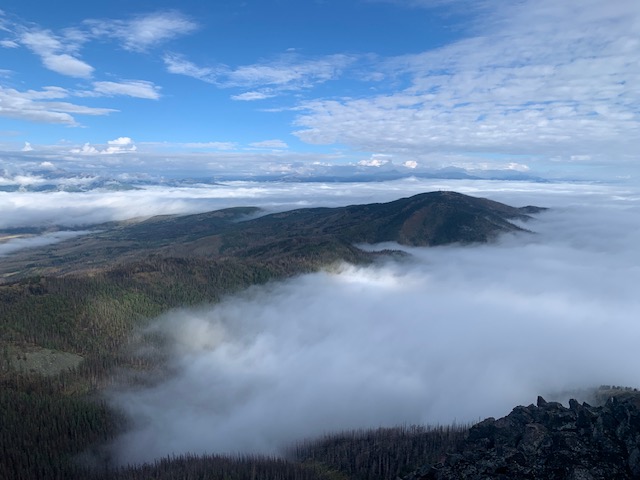
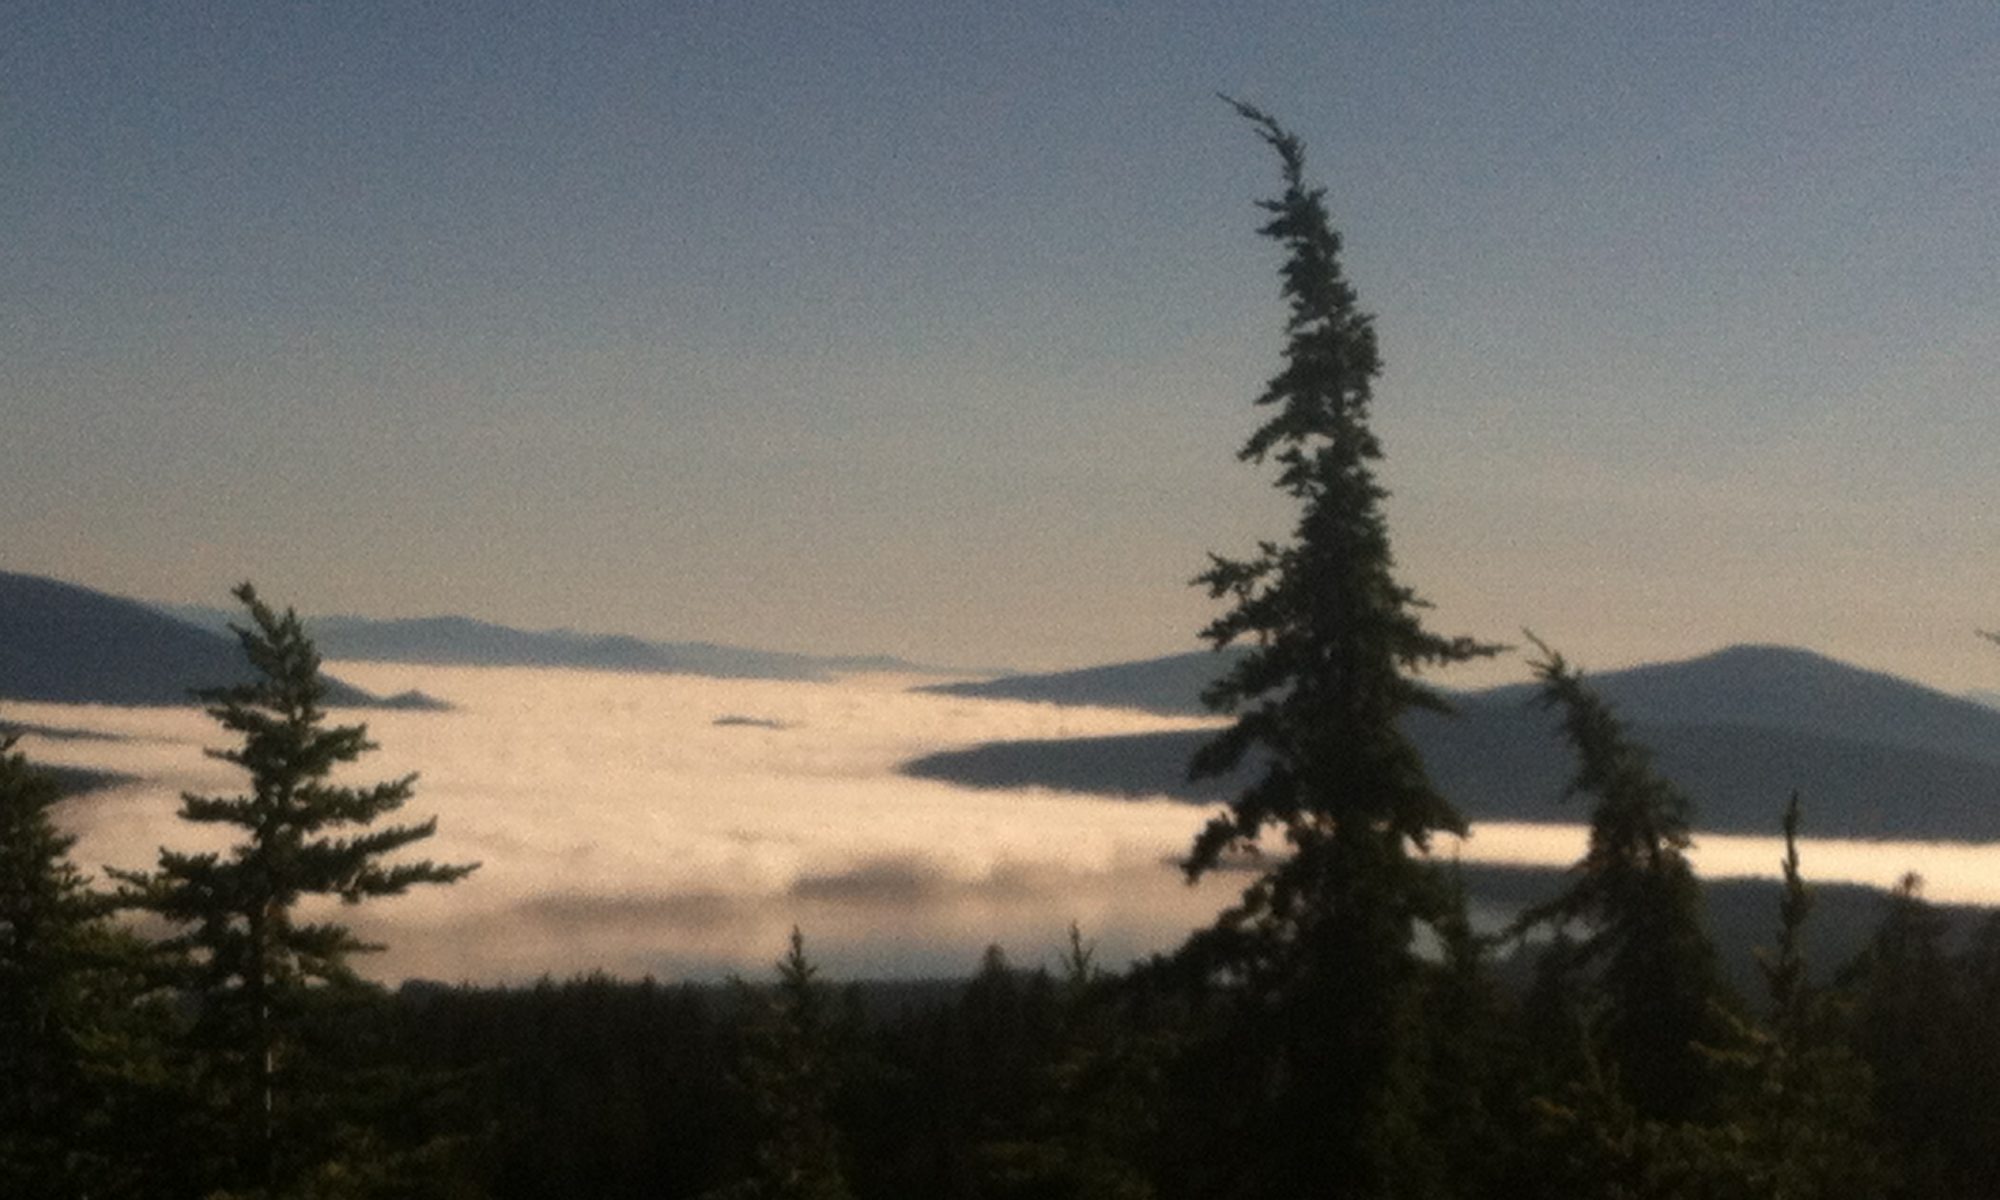
When I awake, the predawn air feels damp and chilly. The sun tries to light up the sky, but we remain inside of a dense cloud for much of the morning. We hike northward, only a few minor peaks and two named peaks before our descent into Salida. After a few hours, the sun begins to burn off the top layer of clouds, revealing the most incredible inversion in the valleys on both the east and west side. The ridgeline is an island of land in a sea of clouds.
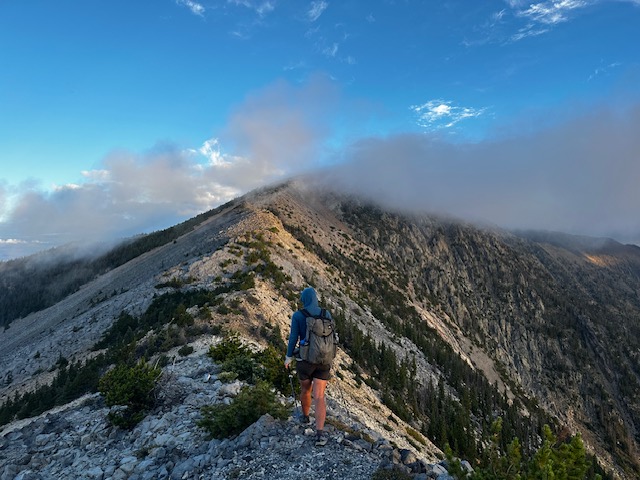
Through the dense fog, I walk north, feeling the magnetic pull of home so strongly I can’t slow down. I periodically stop and wait until I see Troy’s figure emerge from the fog and then I turn and keep walking. The terrain has mellowed into tundra and block field. We reconvene beneath Simmons Peak, remove some layers, and then ascend together. The clouds have burned off even more now. The sky is blue. Salida is 6200′ below under a blanket of clouds. Methodist, our final peak, is one connecting ridgeline away.
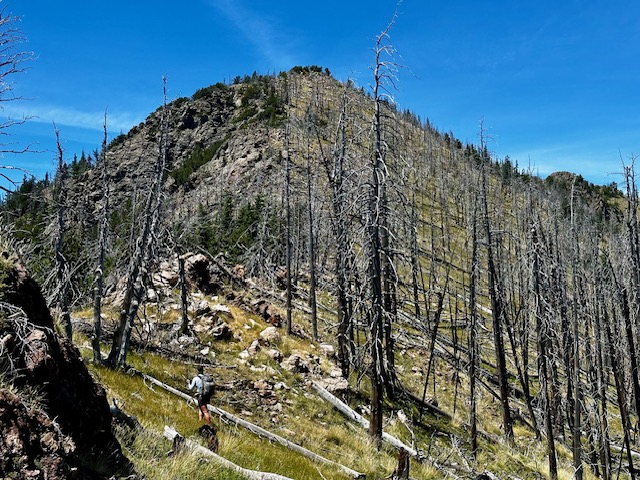
We gingerly crawl down the wet, slippery, lichen-covered rocks and into the blowdown forest that covers the remaining section of ridgeline. The Decker fire came through here in 2019. Amongst the burned out skeleton trees, fireweed and yarrow add splashes of color to the bare ground.
I’m laser focused as I weave in and out of downed trees and baby aspen groves finding elk trails to link together. I round the side of a knoll and spot five elk as they disappear off the other side of the ridge. Thank you for the trails! I stop to snack on raspberries along the way, but never for long. I’ve got places to go.
After what felt like much longer than it should’ve taken, I’m on the final push up up up the steep southwest ridge of Methodist. There was trail we could’ve taken at the last saddle to bypass this climb, but I forgot, and now I’m here and I’m climbing and panting and soaked from pushing through wet brush, and there’s nothing else I’d rather be doing in this moment than doing exactly this.
And suddenly, I’m standing on a road. It’s the service road that connects to the communications towers on the summit. And shortly thereafter, Troy is there too. We have 9 miles of road walking and 4600′ of descent to Highway 50. We tap poles and commend each other on a well executed trip.
I look at my watch, “we should be to the burger place by 1.”
“Sounds amazing,” he responds and we begin our descent off the ridge that has been our home for the last 8 days. We walk out of the sun, down through a layer of fog, and eventually Salida comes into view.
“I’ve walked out of the mountains into a lot of different towns, but never into the one I live in. It feels pretty great,” I say.
Photo Essay
I intended to pick out 5 or 6 of my favorite photos to share, but here we are with 21.
Are you focusing your health efforts on the activities that will make the biggest impact?
I see a lot of people spending way too much time on the things that aren’t moving the needle.
Things like:
Looking for the best protein powder.
Downloading new workout apps.
Researching supplements for weight loss.
Trying to decide if you should be intermittent fasting.
I get it. It’s easy to get caught up in the minutiae. You can do all of these things until the cows come home, but without the foundations in place, progress will be slow at best.
If you’re putting in effort and not seeing results, check in on the following:
Focus on 80% whole foods.
Whole foods are ideal to ensure that you get the micronutrients to keep your body functioning optimally. The water content and fiber of real food will keep you satisfied longer. By choosing whole foods over processed foods, you’ll avoid inflammatory compounds like food dyes, preservatives, trans fats, and more.
Pay attention to your protein and fiber intake.
Protein is the most satiating macro nutrient. It’s also essential for immunity, blood sugar balance, and muscle repair. The right amount for you depends on your weight, activity level, and goals.
Fiber is also satiating. Furthermore, it’s essential for a healthy microbiome, which affects everything from your cravings to mental clarity, immune health, body weight, and more.
Balance blood sugar.
No matter what diet you eat, balancing blood sugar is so important in reducing cravings, balancing hormones, having the energy for a full day outside, and so much more. I have several posts about this on my blog. Essentially, you want to include fat, protein, and fiber at each meal or snack.
Sleep 7-9 hours per night.
Sleep deprivation affects several hormones which impact appetite and hunger. Ever notice how you crave all the carbs when you’re sleep deprived? Not only can sleep disturbances affect your waistline and put you at higher risk for metabolic syndrome, lack of proper rest prevents you from putting in full effort during training sessions.
Manage your stress.
The stress hormone cortisol wreaks havoc on your health in so many ways. Regardless of what style of eating you follow and no matter how healthy you eat, if you’re not managing your stress, you’re not going to see the results you want. Your body holds onto weight, muscle gain is stalled, recovery is slower, and fatigue increases. Stress management can be as simple as a few deep breaths to shift from a sympathetic dominant state back into parasympathetic. Check in with yourself often.
Focus on Foundations for Faster Results
Nailing these foundations support you in feeling better in the day to day by reducing brain fog, anxiety, depression, and fatigue. On your adventures, it means the ability to hike longer days, recover faster, keep up with your adventure partners, and have a body that’s capable of doing what you love until your last breath.
I write about how important it is to personalize your approach and learn exactly what works for your unique body. I absolutely believe that and it’s why I work closely with clients to support them through that process. That said, a personalized approach goes hand in hand with focusing on the foundations.
You deserve a long lived, healthy, adventurous life. If you’re not feeling great, check on your foundations before searching for the latest “hack.”
“I want to be capable of doing what I love until my last day on Earth.”
I was recently having a conversation with a friend in the long distance hiking community about the concept of being a lifelong adventurer.
This is someone for whom adventure is an essential component of your identity. The adventure itself may take different forms throughout different times in your life, but the underlying spirit remains the same. For the lifelong adventurer, your excursions aren’t a “once in a lifetime” thing. They’re necessary for you to feel fully expressed and self-actualized.
You do your best to get out there summer after summer. Living out of your car. Going days without showering. Well, maybe not living out of your car anymore. Or maybe you are. Either way, no shame in that. You do what you need to do to live a life that is meaningful to you.
While the adventures may look slightly different than they did a decade or two ago, you have no intention of stopping until your last breath. And having the health to do what you love, whether that’s hiking, biking, climbing, or just feeling good running around the yard with your labradoodle, is essential.
This hiking friend was telling me about how after he turned 40, he started noticing that he didn’t have quite the stamina he used to have and that he felt more stiff in the mornings. He’d started taking some supplements we discussed (more on that in a moment) and he shared how it helped him continue to crank out 30-40 mile days and recover faster after back to back to back hard days in the mountains.
Similarly, I worked with a woman who pushed her body running ultras in her early 30s and was now struggling with low motivation and lack of energy during runs and hikes. We developed a protocol to support her adrenals so that she has the energy to keep getting after it for years to come.
It got me thinking about the best ways to care for the body, that precious vessel, so that it’s capable of accessing wild places for decades to come.
Here are 5 keys to keeping your body fit for adventure:
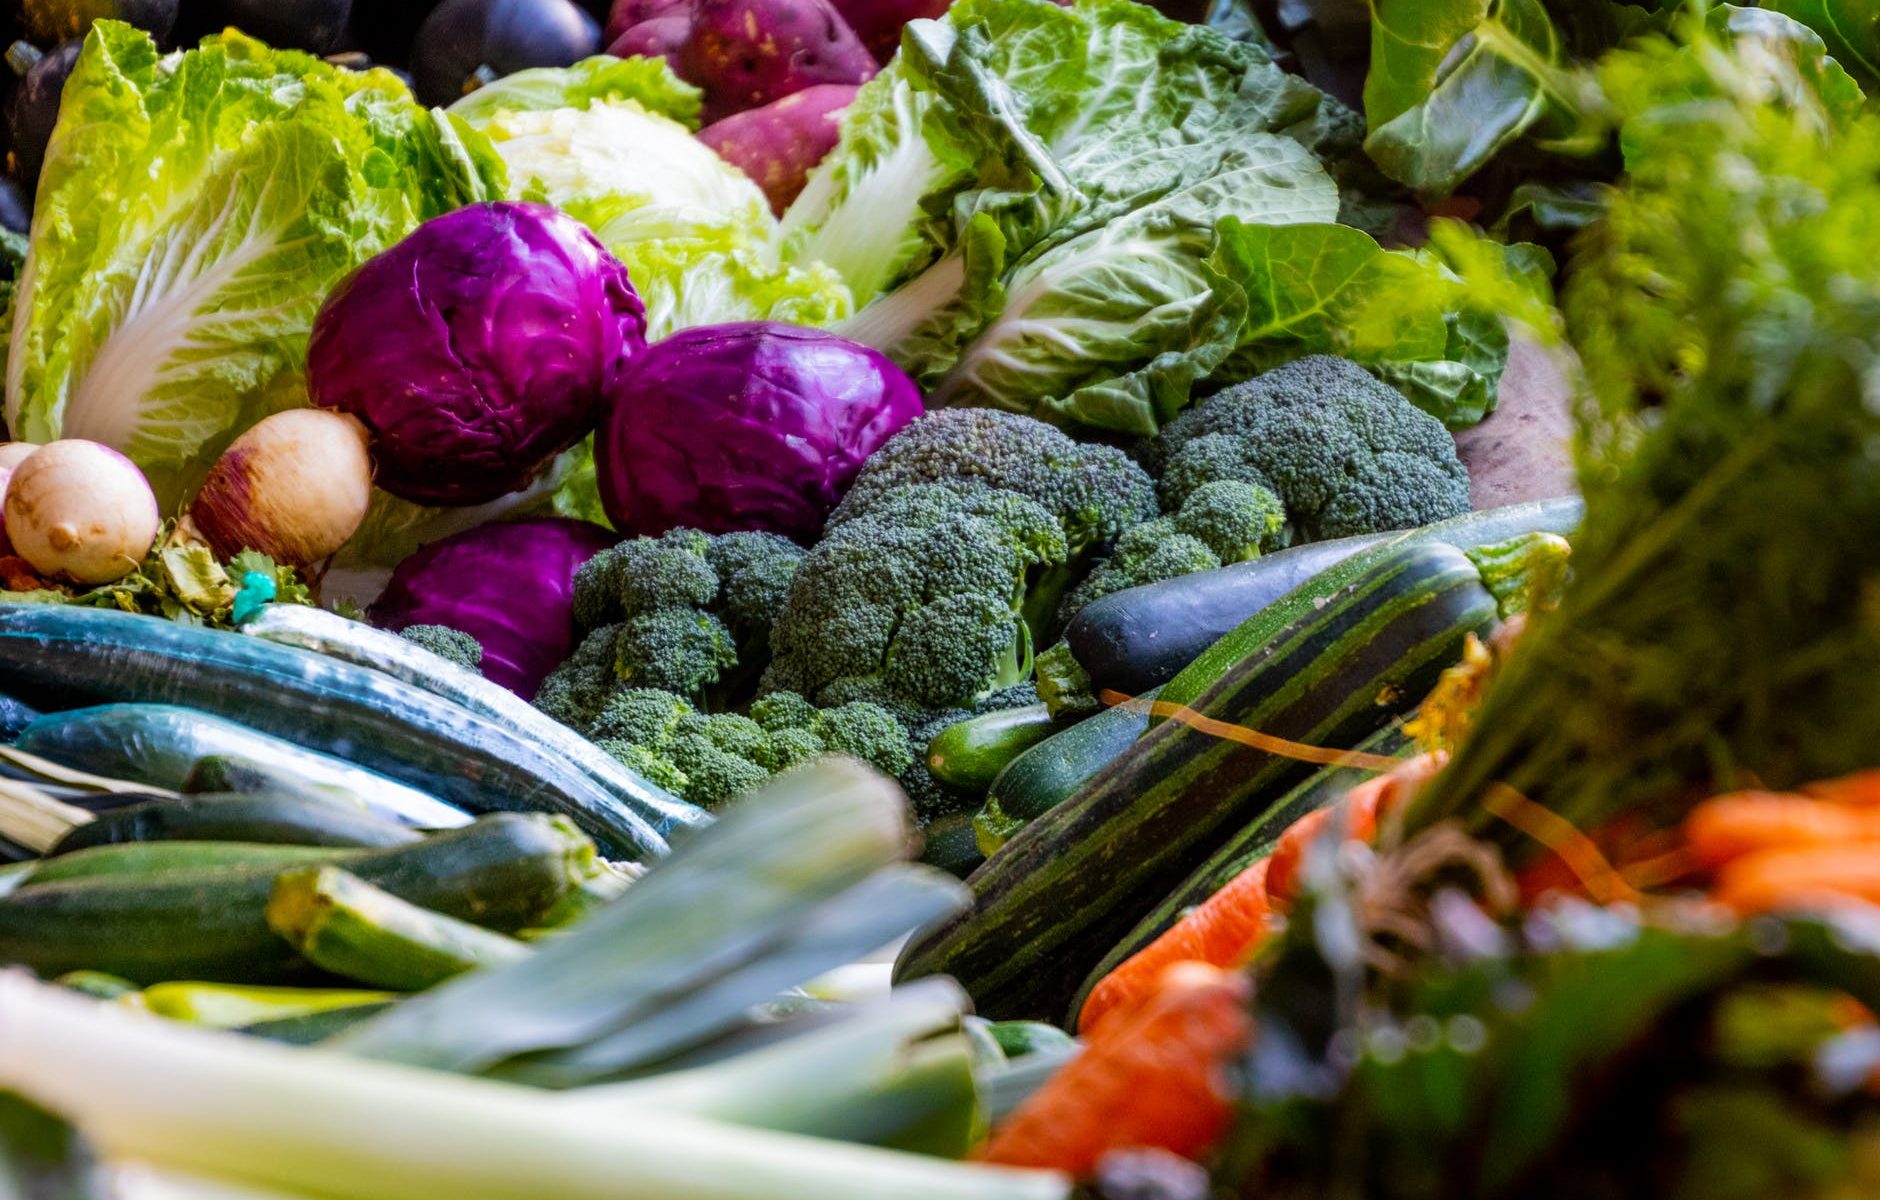
Eat for longevity.
I talk about this topic ad nauseam, so I’ll keep it brief. Focus on whole foods. Include loads of antioxidant rich foods (think fruits & veggies). Keep blood sugar balanced by including fat, protein, and fiber at each meal. Remember, you don’t need to be perfect. Just shoot for 80/20 and know that what you put in your body 3 times per day makes a HUGE difference in how you feel and what you’re capable of in pretty much every area of life.
Manage stress.
Chronically high stress creates chronically elevated cortisol, which wreaks havoc on the mind & body, including weight gain, memory impairment, heart disease, digestive issues, depression, anxiety, and more. Life is wild. One of the kindest things we can do for ourselves is to set aside 10-20 minutes per day for intentional stress relief. Whether that’s a walk in nature, meditation, journaling, or a snuggle with your cat, find what works for you and make space for it.
Supplement wisely.
Nutritionally speaking, we know that the body requires certain levels of nutrients to function optimally. We also know that due to the abundance of nutritionally poor foods available today, many of us do not get the daily requirements of several key nutrients. Furthermore, chronic illness, gut dysbiosis, exposure to toxins, stress, and heavy physical demands on the body all deplete nutrient stores more quickly.
As discussed above in regards to my friends, finding the right supplements to support your body can make a big difference. Getting blood work done is the best way to know where your current levels are and to determine what you may need. However, there are some supplements that can benefit nearly everyone.
I created a whole free guide about this which you can download here. It’s important to note that I’m not a doctor and you should educate yourself and make your own decisions. Side note: I wrote about the supplements I took on the CDT here.
Train in seasons & learn to listen to your body.
I used to run 7-10 miles every single day. That eventually burnt out my adrenals and led to overuse injuries. Looking back, my body was sending me countless signals that it was not happy with what I was doing.
Have different ‘seasons’ for how you train. In the summer you might go harder because the days are longer and the weather is conducive to getting out more. In the winters, you may slow down and give your body time to rest and rebuild. Tune in and honor your body so it will keep going for years to come.
Personalize your approach.
An important component to remaining active and healthy in the long run is learning about your unique body. What foods does your body do best with? What types of exercise? What types of living environments? What supplements? How much social time do you need?
When we’re not doing what’s best for our unique bodies in any of these areas, it can lead to inflammation, which has a cascade of negative effects on the body and is at the root of nearly every chronic disease. Take the time to learn what your body thrives on and honor that.
Aging doesn’t have to be a slow decline into a sedentary life where the highlight of your day is watching the Price is Right (not that there’s anything wrong with that, but the point is that if you want to live an adventurous life, you can!). With a bit of attention and self care, you can absolutely keep doing what you love for the rest of your life.
Three key changes this client made to return to his high school weight, increase energy, and live a life that’s “off the charts.”
I always find other peoples’ stories inspiring, so this week I want to offer a case study of one of my clients who’s been crushing his health goals in preparation for a challenging autumn hike in Colorado.
Joe is a well educated, high achieving executive in his late 40s with a history of success in many areas of life. He was already in a relatively good place in his health, but wanted to break through a weight loss plateau and reach the next level of what his body could achieve. He was tired of looking in the mirror and feeling disappointed. He was tired of restricting, dieting, and overexercising but not seeing the results. He had adventure plans and was ready to collapse the timeline and finally start feeling good.
Here are the changes we worked on together:
>>Dial in a unique nutrition plan.
There is no one size fits all diet. Finding a sustainable way of eating for you involves finding which foods support health for your body and which don’t. It also involves learning how different macronutrients affect your body.
Joe increased his protein intake to an appropriate level for his age and fitness level. He shifted away from processed foods and into eating more whole foods, which kept him full between meals and balanced his blood sugar and hormones. He got off the restrict and binge cycle and developed a healthier relationship with food and his body (more below on how he did that). He stopped focusing on the weight as much and learned to trust his body.
>>Incorporate lifestyle changes beyond diet.
We evaluated all areas of Joe’s life, including his fitness, sleep, and stress levels. He made changes which reduced how much cortisol he was producing, which was responsible for fatigue, weight gain, and anxiety. Joe began a regular meditation practice and stopped running hard every day. He prioritized sleep and made time to relax, often in nature.
>>Shift mindset + underlying patterns.
Long term results hinge on shifting not just diet and lifestyle habits, but on looking at how you make decisions for your health and why you choose to treat your body the way you do. Joe had a history of disordered eating behaviors. I’ve been there and I know how frustrating it is to know the decisions you want to make for yourself but to not follow through.
Once he was on a whole food nutrition plan that satiated him and supported his physiology, we could address the mindset and triggers that were keeping him from hitting his goals. Restriction, skipping meals, and stress are common scenarios that lead to binges. He learned other forms of emotional coping. He learned to slow down so that he could hear the feedback from his body. He learned to tune into what his body needed and to trust it.
All of this was incorporated in a way that fit Joe’s life and supported the creation of new habits.
In summary, cookie cutter strategies don’t work.
Joe was able to achieve the health he was after by customizing his diet for his unique needs, adjusting his macronutrient ratios, tuning into his body, reducing cortisol through lifestyle changes, and by removing the beliefs and triggers that were keeping him in a cycle of self sabotage.
Hopefully this inspires you to know that you can have the health, the body, and the adventurous life you desire at any stage and age of life. It takes strategy + mindset shifts, but it’s absolutely possible!
We’ll discuss your health aspirations and a potential plan for how to move you closer to those goals. We’ll see if we’re a good client-coach fit and you’ll come away with clarity on next steps, whether or not we decide to work together. Why wait another day to have a healthy body so you can have more energy to go on that dream trip?
You’re strolling down the ‘bar aisle’ at the grocery store. The one with all the ‘energy bars’ and the ‘protein bars’ and the ‘meal replacement bars’ and ‘snack bars’, and…
Perhaps, like me, this aisle overwhelms you a bit. But you need to stock your pantry for those mornings when you have to run out the door without breakfast, or maybe you need to refill your stash for your next backpacking trip. So you start scanning the shelves.
“Holy cow,” you think, “are there even more options than the last time I was here??”
New bar brands are hitting the shelves every day, and while this is great for adding variety when you inevitably get sick of your current favorite, it’s also overwhelming when you’re looking for one that’s going to power you up the mountains or through a long day of work.
How do you choose one that’s healthy? How do you find one that’s not just a candy bar in sheep’s clothing? (If you’re going for a candy bar, that’s your call – just don’t pay protein bar prices for what’s essentially a well-marketed candy bar – e.g. those “nutrition” bars with more sugar than a Snickers. #healthwashing.)
Why Protein + How Much?
First, what’s the big deal with protein? In short, it’s essential for every living being. You need it for proper immune function, and for muscle repair and recovery. It helps stabilize your blood sugar (and therefore, your energy levels) and keeps you full longer. It also carries electrolytes into and out of cells, and is a building block for muscles, skin, bones, and blood.
How much do you need? There are a lot of opinions on this question. Protein needs vary based on gender, activity level, and your goals (weight loss, muscle gain, maintenance). The Recommended Daily Allowance is 0.8 grams per kilogram (1kg = 2.2 lbs, so that’s 0.36 grams per pound) of bodyweight. Personally, I feel best when I eat in the range of 0.7-0.9 grams of protein per pound of body weight. It’s generally recommended that more active individuals eat more protein.
How do I choose one?
Here are 3 steps I use for bar selection + tips on when to use different bars based on your goals (recovery, muscle building, weight loss, etc.).
Look at Ingredients
At a very basic level, look for whole, real foods; things you can readily identify, such as almonds, dates, oats, prunes, hemp seeds, cocoa powder, and so on. The ingredients should be simple and as close to the form found in nature as possible.
Consider Your Goals
What are your needs? Are you looking for a snack bar to tide you over until dinner? Or for a meal replacement? Do you plan to eat it while you’re being active, like on a long run or a hike? It’s helpful to know how and when you intend to use the bar because it can influence what you’re looking at in step 3.
Scan the Nutrition Label
Look at the protein. To me, a protein bar should have, at minimum, 5 grams of protein. If you’re looking for a meal replacement bar or one to use when you’re exercising strenuously or during heavy lifting, look for 20+ grams of protein. If you’re on a specialty diet (e.g. vegan), look at the source of the protein and choose accordingly (e.g. avoid whey if vegan).
Look at the fiber. I generally prefer bars with 6+ grams of fiber. This keeps you full until your next meal, stabilizes blood sugar, and promotes a healthy gut microbiome. Fruit and nut-based bars generally have more fiber than others.
Consider calorie ranges. When searching for a snack bar in my day to day life, I’ll look for bars in the 200-calorie range. If it’s a meal replacement bar, 300-400 calories is a better choice, assuming I want it to keep me full until my next meal. If I’m backpacking, I look for the highest calorie per ounce bar I can get.
Evaluate the Protein to Carbohydrate Ratio
Okay, just a little simple math required on this one. If you’re interested in losing weight, a bar with a 1:1 or 2:1 protein to carbohydrate ratio would be a good choice. If you want to build muscle, or improve workout recovery, or get a burst of quick energy, anywhere between a 1:2 to a 1:4 protein to carbohydrate ratio is what I’d look for.
What to Avoid
There are a few things to avoid, if possible. One is sugar alcohols, like xylitol, sorbitol and maltitol, as these can cause bloating and cramps. I’d also steer clear of trans fats, high fructose corn syrup, and artificial colors.
Final pro tip, find a handful of brands that suit your criteria and stock up on multiple flavors, because you will inevitably get sick of them. Having a rotation at least slows that process. Knowing some go-to brands makes future shopping trips faster and less overwhelming. Having a criteria for selection, as outlined above, makes the process quicker if you’re in a new store and you can’t find your go-to brands.
I believe in meeting our nutritional needs through food first, but when you need an on-the-go meal or snack option, thoughtfully chosen protein bars can be a healthy choice. You just have to know what to look for 🙂
You can find some of my go-to options in the free Healthy Hiker Grocery Guide on this page!
This post is about the 5 things I’m doing to stay ready for outdoor adventure, once the coast is clear. If you like this, stay in touch over on my Facebook community, Holistic Health for the Avid Adventurer, where I do free trainings on topics like this one. You can also follow me on Instagram @katiegerber_wellness and DM me anytime to say hi! If you’re interested in strategic 1-1 support, schedule a free call and we’ll see if we’re a good fit. I would love to work with you now or in the future! ~ Katie
Are you pretty much always dreaming of where you’ll go and what you’ll do when you can get into the outdoors again?
There’s nothing quite like the freedom of hiking through the wilderness, with the sun on your skin, the breeze in your hair, and open trail ahead.
Hiking around my local reservoir today, I got caught in a thunderstorm. I felt the temperature drop, the winds pick up, the goosebumps on my skin, and then the first few drops of rain pelting my face. It was fantastic. I felt alive. I felt the sense of OK-ness that I get when I’m in nature.
And it reminded me that I may not know when my next big outdoor adventure will be, but I have no doubt that it will happen again at some point. And when it does, I want to be ready to get out with confidence and enthusiasm. What about you?
Here are 5 steps I’m taking to stay prepared for adventure.
Gear Inventory
This includes:
cleaning up gear that’s been shoved to the back of the closet after my last trip
repairing gear
giving away or selling anything I no longer need or will use
testing gear that I want more practice with before I take it into the field
repairing gear, giving away or selling anything you don’t need, and testing gear you want more practice with.
Research + Inspiration
I have a running document of hikes or trips that I would love to do at some point. A bucket list of sorts. When I’m thinking of planning a trip, like I am for this fall, I’ll look over this document, and I’ll highlight the ones that would be appropriate for the season and the length of time I have available. From there, I decide what my soul feels most called to, and then I dive into research. This keeps me motivated and inspired. Additionally, having a general plan in place allows me to be ready to execute on it and get out there if/when that’s possible.
Food Inventory
This involves:
cleaning out expired backpacking food
taking an inventory of what’s left (I like spreadsheets for this!)
bulk cooking and dehydrating meals (I’m not the kind of person who enjoys this, but it’s a great activity to be doing if you are!)
potentially planning a resupply strategy if I have a specific trail in mind
Taking time away from the trail and my normal adventure buddies doesn’t have to mean being completely disconnected. Making an effort to connect virtually with trail friends keeps us inspired and reminds us that we’re not alone in our longings to get back outdoors. To me, this is essential for not falling into a hole of despair due to canceled plans and future uncertainty. There are a myraid of options, including subscribing to the newsletters of your favorite trail orgs or joining one of the hundreds of outdoors-related Facebook groups. Webinar meetings are a great way to see like-minded humans ‘face to face’ and nearly every organization is offering this new style of connecting and learning.
Get My Body in Tip Top Shape
I know from experience that I feel SO MUCH better when I hit the trail with my body already tuned in to good nutrition and regular movement. I have more energy, I can hike more miles more easily, and I’m less prone to overuse injuries. It makes my adventure more fun and increases the likelihood that I’ll be successful.
Having the structure, support, and accountability of a coach can massively accelerate progress towards health goals. Furthermore, focusing on your adventure as your motivation for training and eating helps you stick to it when you face (inevitable) challenges.
What else keeps your spirits up and your motivation high between adventures? Let me know in the comments!
Outdoor physical activity and good organic coffee. These two ingredients have been cornerstones in my life for as long as I can recall. Unfortunately, when I’m out for a full day of play in the outdoors, good coffee usually isn’t readily available. If it is, the options tend to leave much to be desired. At least that was the case until recently. Enter Cusa coffee’s new instant cold brew.
I have thousands of backpacking miles under my belt fueled by Cusa’s instant premium teas, so I’m familiar with their quality standards. And while I genuinely enjoy the taste and health benefits of premium tea, there are times when only a good cup of coffee will do. However, the instant coffee market is limited, and the options I was familiar with left much to be desired in terms of flavor and quality.
Why Quality Coffee Matters
After years of working as a barista at many different coffee shops, and being fortunate enough to drink coffee that’s in the top 1% worldwide in terms of quality, my standards are high. Unfortunately, this means gas station coffee and cheap instant packets no longer cut it.
Furthermore, mold toxicity (via mycotoxins) is a real concern for coffee drinkers. You know that jittery, anxious feeling that you sometimes feel after you drink coffee? It may be an issue of quantity (too much), but often it’s due to the mold and chemical contamination. For these reasons, drinking a quality source is important to me. In that regard, Cusa’s new cold brew fits my needs.
Coffee Review
I had the opportunity to sample several of Cusa’s new instant coffee varieties, including the Dark Roast, Medium Roast, Vanilla Dark Roast, and Lemon Dark Roast. When evaluating an instant coffee, there are a few key factors I’m examining. These include taste, dissolvability in hot and cold water, quality (organic), and convenience (single serving packets).
With Cusa’s instant cold brew coffees, all are 100% organic, arabica coffee, satisfying my need for quality. They come in single serving packets that are intended to be mixed with 8-10 ounces of water, according to the instructions. I like my coffee pretty strong, so using ~6 ounces of water or multiple packets in a larger amount of water, depending on my caffeine needs, was the way to go.
I tested some of the varieties in cold water and some in hot water and each dissolved completely, either instantly or with a small bit of agitation (e.g. stirring or shaking in a jar/bottle). That part is crucial for my needs on trail since I want the ease of simply dumping a packet into my water bottle, shaking and caffeinating. Sometimes I carry a stove, but often I don’t, so cold water dissolvability is key for me.
I tested the Medium Roast in 6 ounces of cold almond milk. It dissolved well and the taste was strong and paired perfectly with the nut milk. The Dark Roast I tested in 8 ounces of hot water and found it to be full bodied with a balanced flavor. That one was probably my favorite. For the Vanilla Dark Roast, I used 8 ounces of hot water. The vanilla flavor was well balanced, but the brew was not full bodied enough for my taste, and I’ll reduce the volume of liquid next time. I prepared the Lemon Dark Roast in 8 ounces of cold water. The lemon is quite apparent and while I personally did not care for this flavor combination, I can see how one might find it quite refreshing on a hot afternoon.
I will always love the ritual of making a hot cup of french press or stove top espresso at home, but there are myriad ways Cusa’s coffee makes my on-the-go caffeine needs more convenient. I can stash a few packets in my day pack for a day in the mountains or on the river. I also keep a few packets in my glove box ICCE (in case of caffeine emergency). And Cusa’s tea and/or coffee packets are the ideal choice to send myself in resupply boxes for my multi-month thru-hikes. I also envision these being great for long travel days when I’m not interested in paying $6 for a cup of crappy airport coffee (which is always).
In addition to Cusa’s new caffeine free herbal line of teas (which are also excellent), I’m genuinely excited for the recent addition of premium cold brew coffee to the Cusa family.
In full disclosure, this product was sent to me free of charge. However, I have no ongoing relationship with Cusa. In addition to a few other organic instant coffees, it continues to be one of my favorites.
If you enjoyed this review and plan to order, please consider using this link, from which I can earn a small percentage of the sale with no additional expense to you.
A portion of this content was created as part of a collaborative effort by the executive board of the American Long Distance Hiking Association – West for a presentation at one of their spring Rucks.
What am I going to eat?!?
This is a big concern for hikers heading out on a long trail. What, when, and where you’re going to pick up your next food drop on a hike is something that you’ll want to consider, at least briefly, before hitting the trail.
This article will cover how to start planning your food resupply for the trail. We’ll review your options, including the pros and cons of each, and wrap up with some tips for execution.
Resupply Planning Overview
Begin by identifying where you absolutely must send a box. There will almost certainly be at least a couple of towns like this on each trail. These towns have extremely limited or non existent resupply options. You’ll need to look at what resupply options are available in a town and determine if that’s adequate for how you like to fuel your hike.
In that regard, it’s helpful to know ahead of time what type of food makes you feel best when you hike. I encourage you to experiment before you get on the trail! For instance, I (as you might imagine) like to eat pretty healthy, so five days of snickers, pop-tarts, and pastries wouldn’t cut it for me. Others might be ‘fine’ with this. The point is that it’s important to know thyself.
You don’t have to find resupply information from scratch! Nearly every trail has an associated trail organization that will provide some information on resupply options available in each town. Use that guide to determine where you will need to send a box. Additionally, you can find other hikers’ resupply strategies for a particular trail by reading trail journals. You can also consult survey results from each year’s previous class of hikers.
How to Send a Box When One is Needed
Once you determine where you need to send a resupply box, you have a couple of options on how to do that. You can 1) purchase your food ahead of time, box it up, and solicit a point person to send it out for you, or 2) you can purchase food on trail at a town that’s 100-200 miles ahead of the town where you’ll need the box sent. Plan for mail to take at least five days.
Food boxes can be sent General Delivery via the United States Post Office (USPS). Alternatively, they can be mailed to a store, motel, or restaurant in that town that accepts hiker food boxes to be sent to them. Either way, call ahead to inquire about the correct address and hours. Additionally, if it’s not a PO, ask whether the place accepts boxes and if there’s a fee associated. Also ask if it’s best to send USPS, FedEx, or UPS.
To find the Post Office that handles General Delivery in any area, call 1-800-ASK-USPS or check usps.com. Rates are found on the website and currently, they range from $13-19 for medium to large flat rate boxes.
How to address your USPS box for general delivery: JANE HIKER c/o GENERAL DELIVERY TOWN, STATE ZIP
It’s recommended to write “PLEASE HOLD FOR HIKER (name), ETA: (date)” somewhere on the box. Furthermore, it’s recommended that you use priority mailing via USPS because, if for some reason, you cannot pick up your box, you can “bounce” that food box to another post office up/down the trail or request it be returned to sender. On that note, always include a return address.
Options for Your Resupply Strategy
Now that we’ve covered how to handle your resupply when you absolutely need to send a box to a location, let’s look at your overall strategy.
Essentially, you have three options: 1) Prepare boxes in advance to send to each location you want a box. 2) Buy as you go, sending boxes ahead to each location you want a box. 3) A mix of the above strategies. Read on as to why you might choose one strategy or another.
Buy Ahead Resupply Box Approach
This option entails preparing and packaging food at home to send to towns on trail where you determined you need or want a box. You buy groceries in towns where you don’t send a box.
This approach requires that you purchase all of your food in advance, (possibly) repackage it, and box it up before you hit the trail. It also requires that you have a responsible point person to send your box out in a timely fashion. If boxes aren’t picked up at the PO within two weeks of arrival, they’re sent back to the return address. As a footnote, if you think you won’t make it to the PO for your box on time, try calling them, explaining the situation, and asking them to hold it a bit longer. Be kind and they’ll likely say yes.
For best success with this option, pack your box ahead of time, address it, and have it ready to go, but do not tape it shut. It may be necessary to have your point person add or subtract items that you discover you need or don’t need in the box. Additionally, you might consider numbering your boxes, so when instructing your point person to send a box you can email, phone, or text and say, “please send box #3 out by this date.” This ensures no thinking or second guessing on behalf of the point person. Make it easy for them!
PROS
You can guarantee your nutritional needs, wants, and desires. Organic and options for restricted diets can be limited. A good option for those who need prescription medications.
You can budget your food.
No need to spend time in town purchasing food for the next stretch. Less chores in town frees up more time for relaxing. Alternatively, you may choose to just pick up your box and leave town. In that sense, this option is great if you’re in a hurry.
You can send hard to find items like gas for your stove (IF YOU SEND VIA GROUND ONLY). Basically, if there’s a need you discover while on trail, you can ask your point person to send it.
You can add your maps for your food box to avoid mailing them separately.
CONS
You’re stuck eating what’s in your box. Of course, you could send it back and purchase in town if needed, or you could throw it in the hiker box. But typically, the cost of not eating what you’ve already purchased, packed, and mailed outweighs the cost, time, and energy of sending it back home and buying in town.
Requires more planning time before you hit the trail.
Post office hours vary and sometimes you may get into town after the PO is closed or on a Saturday whereby you will have to wait until Monday morning to get your food. PO’s can close down seasonally.
The box gets sent back because it wasn’t picked up in time.
The delivery gets mixed up by your point person or just fails to get to the PO.
Buy As You Go Resupply Approach
If you don’t have dietary restrictions and you want to ease the pre-planning time before you embark on your adventure, the buy as you go option is ideal.
Most towns have grocery stores, both large and small, where you can purchase food. Others, however, have only a gas station/convenience store, which is basically the “bottom of the barrel” when it comes to nutrition.
PROS
You can support local businesses.
You can purchase the food you are craving and change up your menu as you hike.
If you have food left over when getting into town, you don’t need to buy those items in town.
You’re not tethered to the open and close times of the PO.
If you have to leave the trail due to illness, injury, homesickness, etc… you don’t have a ton of un-eaten trail food boxed up at home. (If you do, you could donate and send it to hikers in need).
CONS
Prices can be slighter higher than average in a remote grocery store.
Organic, vegetarian, vegan, gluten-free, etc… foods and specialty items are typically not available in small towns.
Hikers ahead of you may wipe out staple items like tuna packets, ramen, coffee, etc. before you arrive.
Combined Approach
You could use a combination of both strategies. This entails sending some resupply boxes ahead of time, from home, and mailing some ahead while on trail. For some, this is the best of both worlds. To determine which towns need a box sent and how to do that, consult the first section of this post.
For the boxes you send from home, send those to places where you want to send prescriptions medications or where you want to send food items you can’t get in most towns. This may include dehydrated foods you’ve made ahead of time or specific brand name or specialty items. For sending boxes from on trail, the idea is to ensure freshness, satisfy new cravings, and adds variety to your trail diet.
General Resupply Tips
Create a resupply spreadsheet. Having a spreadsheet with your resupply locations, whether you’ll send or buy from that location, how much food will be needed for the next stretch, and any other pertinent information is helpful for staying organized and reducing stress once on trail. Be sure you can access this spreadsheet from your phone and leave a copy with your point person, if you have one. Here’s a sample from my Oregon Desert Trail hike. Feel free to use this as a template!
Collect tiny condiment packages throughout the year. These little packets of ketchup, mustard, honey, hot sauce, relish, salt/pepper, etc. are perfect for tossing into your resupply boxes you send from home. They can really spice up a trail meal 😉
Add flair to your resupply box. There will be hundreds of boxes JUST LIKE YOURS sent by hikers JUST LIKE YOU to these post offices. Adding a giant sticker of a walrus, unicorn, yeti, etc. to the side of the box helps identify your box from others. When you arrive to pick up your box, give them your name and say, “it’s the one with the giant pink squid on the side.”
Add extra ziplocks into your resupply box. You may decide to throw some of your food into the hiker box and/or purchase some food that needs to be re-packaged.
Consider tossing in travel size soap, shampoo, conditioner, laundry detergent, razor, etc. for resupply boxes to towns where you plan to take a zero day.
For a deep dive into performance nutrition and meal planning for backpackers, check out our online course on the topic.
Want to prepare your body for optimal endurance, energy, and recovery on your next hike? Watch our free Adventure Ready Masterclass on creating your unique nutrition plan!